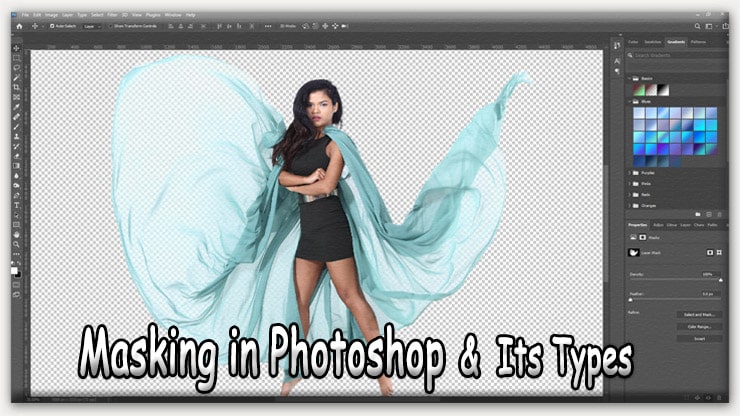
Masking in Photoshop is a process to hide or reveal parts of an image selectively. It allows you to make detailed edits without permanently changing the original image. Masking in Photoshop differs depending on the image’s appearance.
By the way, Whether you’re a Pro or a new Photoshopper, you should know the different masking procedures to improve your photo editing skills.
This article discusses different masking methods and how to do it well in Adobe Photoshop.
While editing photographs using Photoshop masking is a crucial technique. You can cover up or reveal the areas of an image you want to change. One of the most useful features of masking is its ability. It isolates specific areas of an image for editing without impacting the pixels.
A mask can cut off just that region before the correction is made. Only the parts of the image you want to edit are affected. It allows you to achieve a high degree of precision in your modifications.
Several photos can be easily combined using masks. You can make a more seamless composite. You can hide specific areas of an image using a mask. Then blend the remaining areas. This method shines when you need to merge photos.
Photoshop masking using a background eraser tool is a powerful method. It can improve the precision and accuracy of your modifications. Masks are useful for various picture editing tasks. You can even do portrait retouching, image blending, and color correction.
Let’s learn the types of masking in Photoshop.
Layer Mask in Photoshop
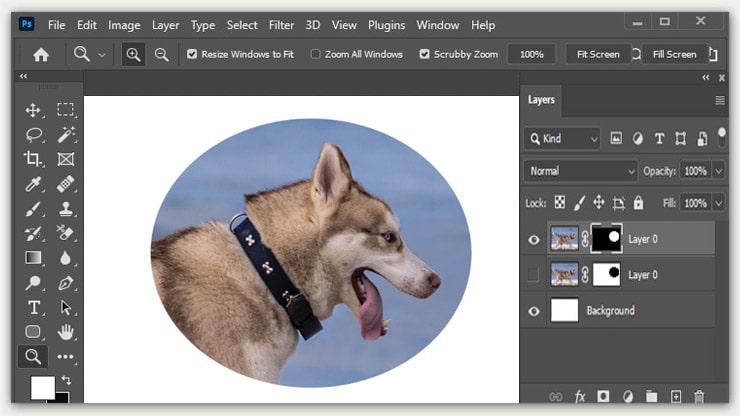
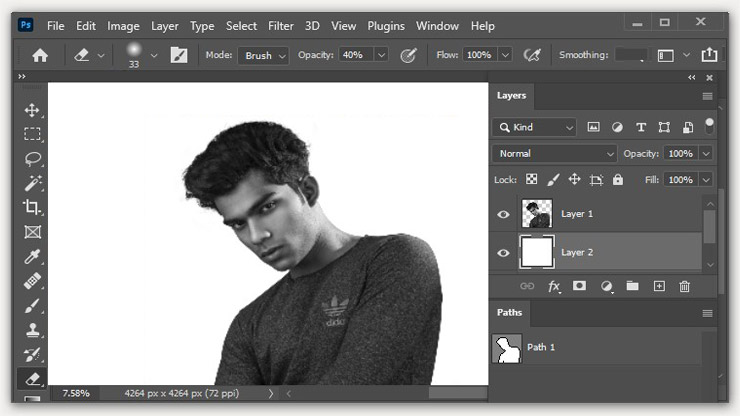
Use layer masks in Photoshop to expose or hide elements of a layer selectively. A white rectangle indicates this attribute. It appears next to the layer mask thumbnail. You may make a mask with the “Add layer mask” button in the Layers panel.
White areas of the layer mask will disclose the layer. Similarly, black areas will keep it hidden. You can selectively hide or show parts of a layer through this. You can undo the changes to the layer mask anytime. This editing method is considered non-destructive.
With this, you can blend two photos or apply a selective color effect. In Photoshop, using a layer mask is very useful. They permit targeted, highly customizable changes to specific layers.
Vector Masking
With the vector mask tool, you can give a layer a clean, defined outline. A shape’s “skeleton” path can change with the Pen or Shape tools. Pixels in the layers are available or invisible depending on the geometry of the masks.
The quality of a vector mask will not degrade. This is completely resizable. You can change the underlying layer without worrying about breaking the mask. Logos and symbols benefit greatly from using vector masks. The mask makes the images with sharp corners.
Clipping Masking
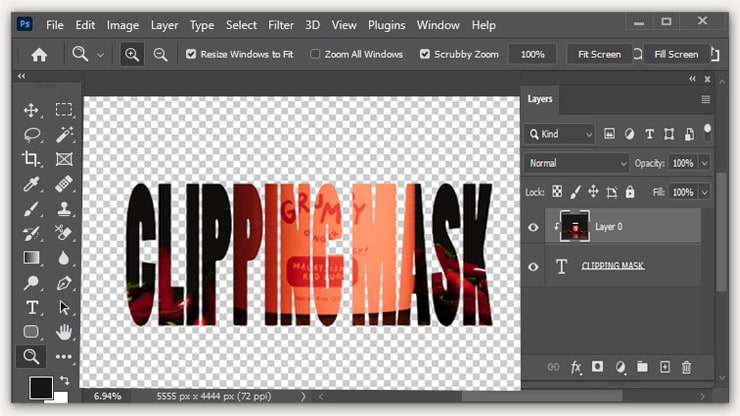
Photoshop’s clipping mask lets you selectively reveal parts of many layers. The masking layer only reveals the portion of the masked layer. It lies inside its defined form or border.
Clipping masks can show photos within texts. It can even create an image of a specific size and form. They are also non-destructive. Your original layers will be preserved and accessible when editing.
Put the layers on the masking layer and select the clipping mask option for the results. You can cut the mask to match the dimensions of the masking layer.
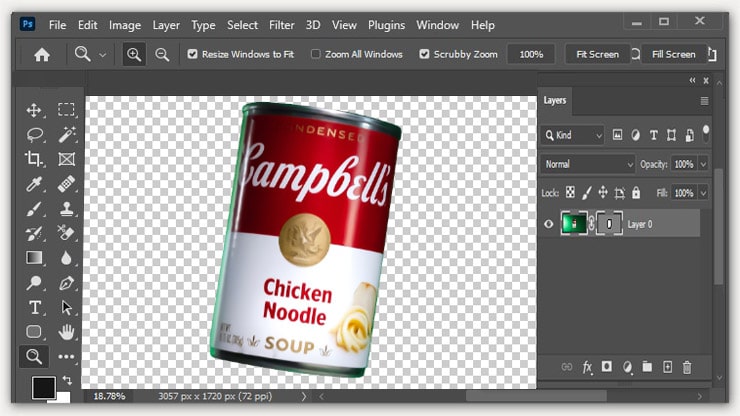
Alpha Channel Masking
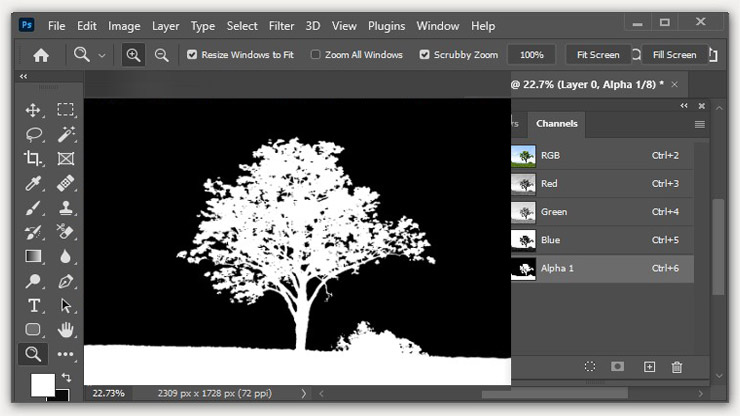
Photoshop’s alpha channel masking allows for extremely good selections and transparent effects. A picture’s alpha channel is a grayscale band that displays the image’s clarity. It might be anywhere from 0% to 100%.
Using an alpha channel as a mask requires first making a selection. The picture’s alpha channel can then conceal details or add transparent effects. You can use alpha channel masking to eliminate an image’s backdrop. You can even create a blurring effect around its edges.
Pick an area of an image with the Magic Wand, Lasso, or Quick Selection tool to apply alpha channel masking. You can utilize that selection to make an alpha channel to add masks. You can also do other transparent effects to your photo.
Transparency Masking
Photoshop’s transparency masking allows users to blur an image selectively. With a layer mask, you can specify which parts of a picture should be left unaltered.
You may employ the Brush, Gradient, or Selection tools to make the mask. Once the mask is made, you may tweak its opacity and smoothing to get natural-looking. To construct intricate picture composites, you can use this.
You can even erase unwanted backgrounds from photos. Moreover, you can selectively reveal or hide specific areas of an image to achieve more convincing results.
You can create a mask for a layer from the layer panel. Then you can easily adjust the mask’s transparency with the other Photoshop tools.
Collage Masking
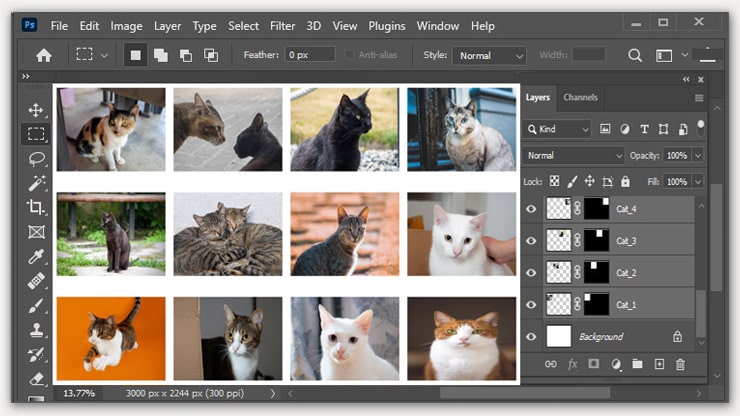
In Photoshop, “collage masking” is a method for combining many photos into one. With this, you may seamlessly combine many images into a single collage.
To begin, you’ll need to open each photo that will be part of the collage. The final step in making your collage. Use the Layer Mask to obscure or reveal specific areas of each layer. Masking techniques, like gradient, layer, and vector masks, can combine the photos smoothly.
Create digital artwork, photo albums, and even promotional materials with collage masking. The Layer Mask in Photoshop can combine many pictures into a single composition.
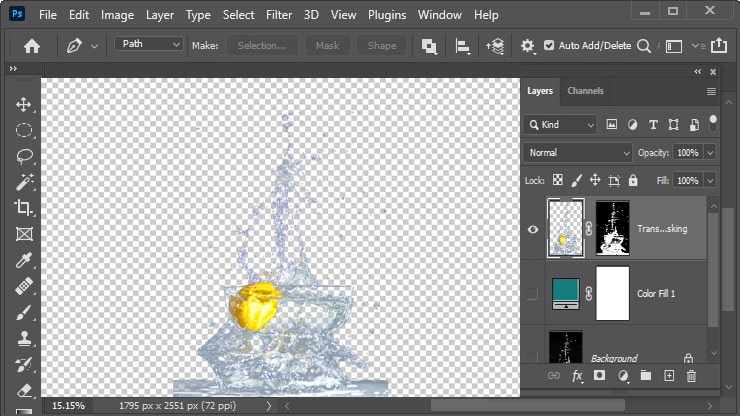
Translucent Image Masking

You can create a transparent background using “translucent image masking.” This method shines to make graphics and product shots with a high degree of versatility.
First, make a mask layer for your image to use this method. Then, with the brush tool, draw over the backdrop with a transparent color. This hue will gradually disclose the transparent layer beneath it.
Balancing the masking is possible by manipulating brush shape, intensity, and flow. You can use the eraser, selection, or refine edge tools to enhance the mask’s precision. Save the image as a transparent PNG file and place it on any background.
3D Masking
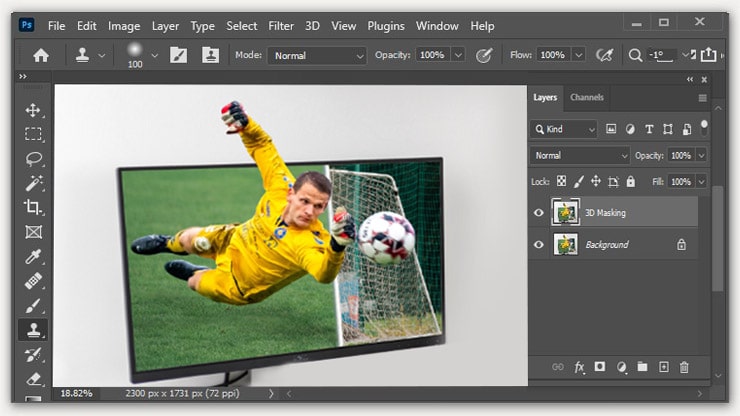
To modify a 3D object, you can utilize Photoshop’s 3D Masking. You may selectively reveal or hide features by manipulating the item’s opacity. You can use a grayscale texture map here.
First, you must create a texture map. Then select the relevant layer in the 3D interface. Finally, apply a mask on the texture map. This method shines after applying it to constructing sophisticated 3D models.
Granular control over which details are visible and which are hidden. It may give 3D objects genuine textures and elements like rust. Photoshop’s 3D masking feature is potent for making photorealistic 3D models.
Path Masking
With Photoshop’s Path Masking feature, you may cut out certain regions of an image. You can draw a vector path around it. Drawing a line around the target area and turning that path into a selection. Then applying that selection as a mask.
This method shines with intricate background images. Because here, the regular selection methods may fail. Using Path Masking, you may make more informed and exact choices. It will lead to a more polished and accurate end product.
It is frequently available in professional editing and graphics. Photoshop’s Path Masking feature effectively makes clean, accurate choices from various image types.
Smart Masking
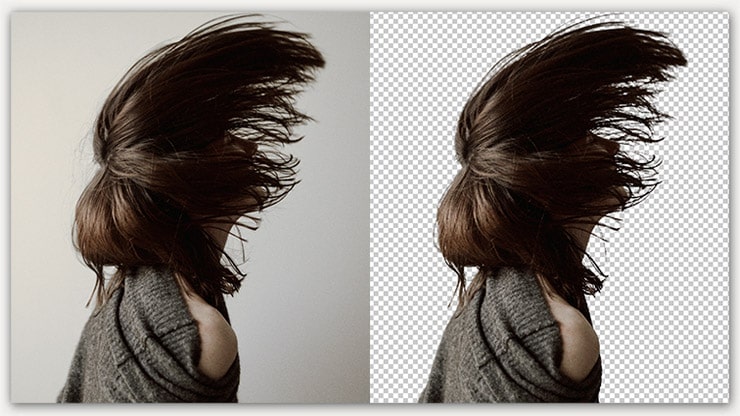
Photoshop’s Smart Masking feature makes making intricate selections and masks easy. The program’s AI features can generate a mask automatically in Photoshop. It is based on the subject’s color and contrast.
Traditional selection methods can help with the Smart Mask function. It will create even greater mask refinement and precision. Compared with conventional masking, the technique can save time. It is ideal for photos with complicated borders like hair or fur.
Smart Masking is an invaluable tool for picture editing. It facilitates the creation of complicated masks in a timely and precise manner.
How to Mask in Photoshop
Learning how to use masks in Photoshop can vastly improve your digital art and photo-editing experience. Understanding how a mask works are crucial: a mask essentially conceals or reveals specific parts of a layer, allowing you greater control over your image.
To add a layer mask, select the layer you want to work with in the Layers panel. Next, click on the “Add Layer Mask” icon at the bottom of the panel. A white thumbnail will appear next to the layer thumbnail, indicating that a mask is applied to the selected layer.
You can easily edit your image or artwork on the fly using quick masks. To access this feature, press the ‘Q’ key on your keyboard. With quick masks, you can easily paint over the areas you want to remove from your first layer and then fine-tune your selection later.
After you have painted over the desired area, press ‘Q’ again to exit the quick mask mode, and the area you painted will now appear as a selection.
To remove the selected area fully, click on the new layer mask icon once more to apply a new mask. With practice and experimentation, you’ll soon master the art of masking in Photoshop, opening a world of creative potential.
Tips for Effective Masking Images in Photoshop
In Photoshop, effectively masking images can be valuable for enhancing your creative projects. Mastering this technique allows you to combine two images seamlessly, remove unwanted elements from a photo, and make precise adjustments.
It is essential to have each image on its own layer. This enables you to edit non-destructively, avoiding permanently erasing or deleting any information.
The ability to mask in Photoshop is vital. Various tricks can improve your masking accuracy and efficiency:
- Use a Wacom tablet: More precise and flexible mask creation is possible with a Wacom tablet. It is far better than with a mouse.
- Use the Quick Selection tool: Creating masks is a breeze with the Quick Selection tool. It lets you generate selections based on color and pattern.
- Refine Edge: Use the Refine Edge tool to ensure your pick only stands out from the background.
- Feather your masks: With feathering, the boundary between your image’s masked and unmasked regions. The image will look less abrupt and more natural.
- Use Adjustment Layers: Image changes are possible non-destructively using Adjustment Layers. You can combine it with masks for more precise control.
- Work non-destructively: You can use masks and layers to make non-destructive edits to an image.
- Take advantage of channels: Channels are useful for making brightness or color-based masks.
Following these guidelines will help you make accurate masks. It will make them look great and blend in with your photographs like an expert.
The Importance of Image Masking in eCommerce
Now that we live in the digital era. E-commerce is essential to most people’s daily routines. Visually appealing products are more crucial than ever in this market. And picture masking is a vital part of getting there.
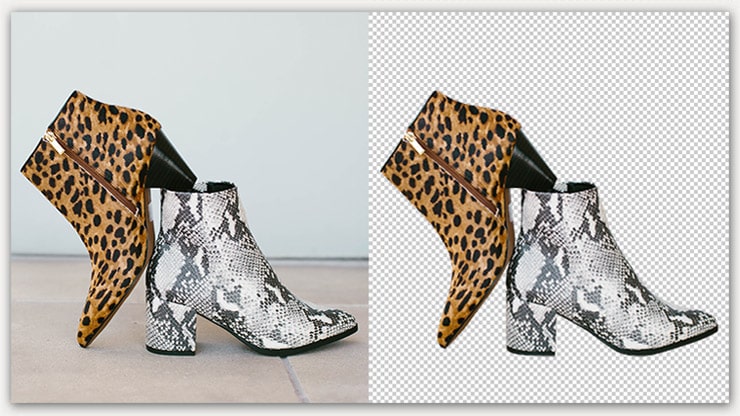
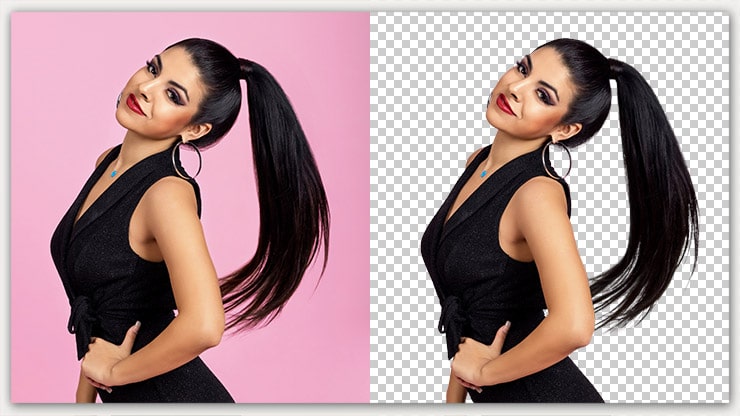
Image masking is for erasing an image’s backdrop. It keeps the foreground object intact. Using this method, product photos might have a higher quality. It will have a more commercial appearance. Retailers can clear the distractions from a photo and draw attention to the sold item.
Image masking’s ability allows for selective manipulation. Picture masking can save you time. It can modify the color of an item without having to redo the backdrop. Masking images allows online retailers to showcase their wares against various backgrounds.
It is great for establishing a unified visual brand. Businesses can present their products in various settings with a consistent visual aesthetic. Image masking can make clear backgrounds. Picture masking lets you crop out people or other distractions from a product photo.
As a result, this can tailor the product better to the individual. It also makes a more satisfying buying experience overall. Image masking’s importance in improving eCommerce product photos can’t be overstated.
It aids companies in giving their products a more stylish look. E-commerce companies can give customers a better browsing experience. They can even give more visually appealing products by image masking.
Conclusion
Masking in Photoshop is a fantastic method for enhancing an image’s quality. This method lets you change the background to improve an image’s clarity. All the forms above masking can be quite helpful with photos in Photoshop.
This tutorial will help you to know the masking process. In addition, you should deeply understand Photoshop’s layering system. You need to know how using white and black background colors can aid in masking.
Although the idea of picture masking is straightforward, mastering the craft requires much practice. Image masking allows for much artistic freedom. Godspeed!