You can make your image background transparent.
Adobe Photoshop CC 2024 is a free transparent background maker that creates transparent background of an image with its excellence. It is well-equipped with its tools and features for background removal.
You may think, how do I make my image background transparent in Photoshop CC 2024?
You can use Photoshop tools named Magic Wand, Pen tool, Rectangular and Elliptical Marquee, and Mask tool. The newest Photoshop CC 2024 Generative AI is also great for making transparent BG.
You can use the full potential by making the photo background transparent using the mentioned tools.

Let’s learn the process in more detail.
We will be using Photoshop CC 2024. If you don’t have the upgraded version, install it. Otherwise, following the below steps will take a lot of work.
Method 01:
Make an Image Background Transparent with Photoshop Generative AI
Generative AI makes the photo editing process incredibly simple. Here is what you need to do when making a transparent background with Generative Fill of Photoshop CC 2024.
Step 01: Select the Surrounding Area of the Subject
Use any selection tool to select a particular part of your image.
Step 02: Access Generative Fill
You will find the Generative Fill button in the Contextual taskbar. For this,
Windows Menu > Contextual Taskbar > Generative Fill
Step 03: Write the Prompt
Describe your prompt in English. Make sure to use writing prompts with descriptive nouns and adjectives. Avoid writing “create a transparent background” or make an image transparent.”
The result is:
Method 02:
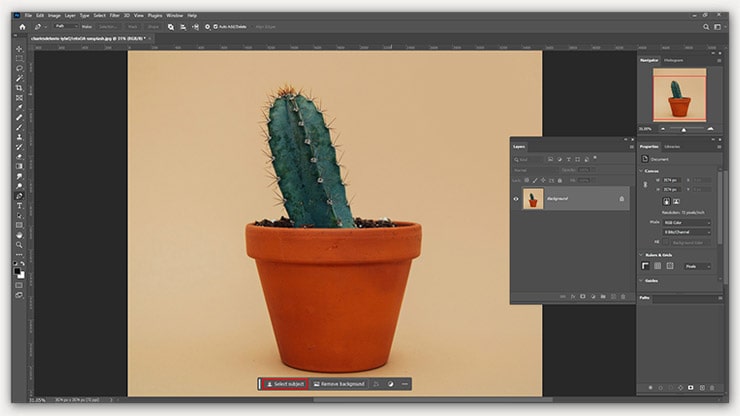
Make Transparent Background Image with the Select Subject Tool
The Select Subject tool is beneficial for making the Background transparent for simple images.
Step 01: Copy the Background Layer & Image
First, Copy the background layer. Next, Copy the image and Paste it. For this, Press Ctrl + A (Windows) or Command + A (Macbook). Then, Hide the Background by clicking the eye icon next to the background layer.
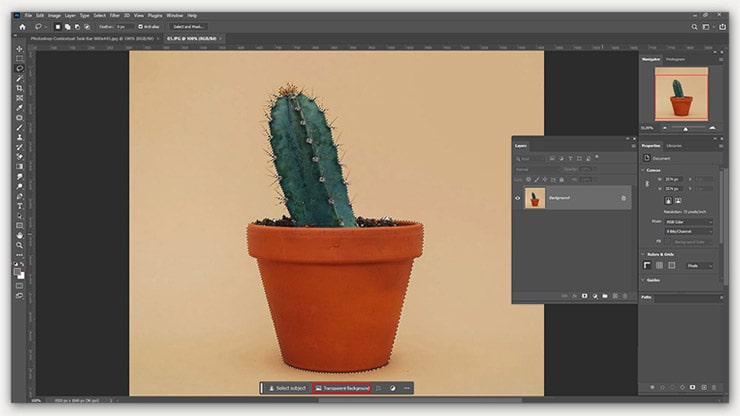
Step 02: Select Quick Actions
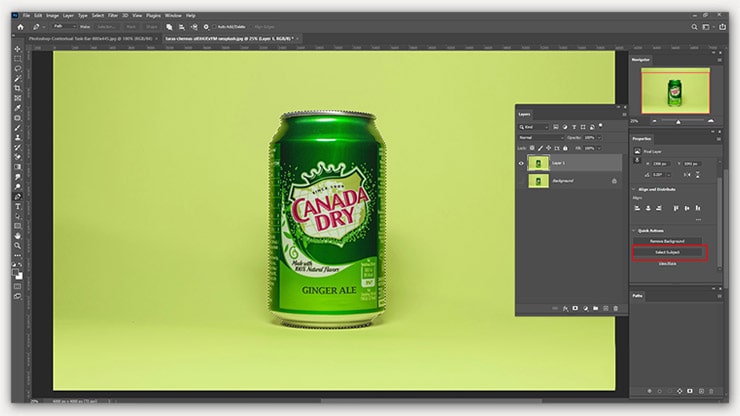
Remember to work on the new layer. This way, you can UNDO any unwanted changes whenever required.
Navigate to the Properties panel on the right and choose Quick Actions.
Step 03: Make it Transparent
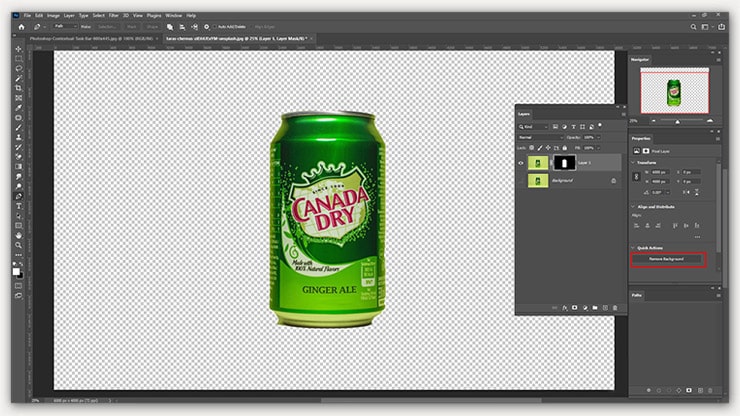
You will find the Remove Background option in the Quick Actions section. The program may take a few minutes to identify the subject and remove the Background.
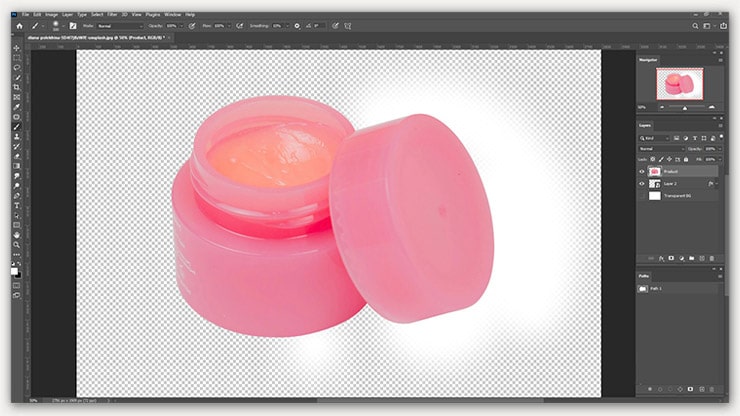
After completing the Command, you will see the subject on a checkered pattern or transparent image Background.
Important Note: As said, keep the Background layer hidden. Otherwise, the transparent Background or checkered pattern will not be visible.
Method 3:
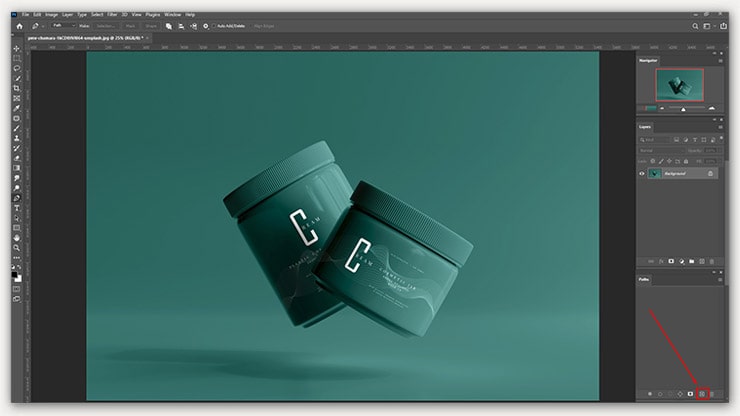
Make a Transparent Background with the Pen Tool
You can make a smooth selection using the Pen tool of Photoshop CC 2024. Here are the steps for making BG transparent with the Pen tool.
Step 01: Choose the Pen Tool

The pen tool is available in the Right panel of Photoshop. Moreover, select it by pressing the default shortcut {P}.
Step 02: Enable the Rubberband

Once selected, check if the Rubberband is turned on. If not, the path thread will remain invisible. Thus, making a smooth selection will take a lot of work.
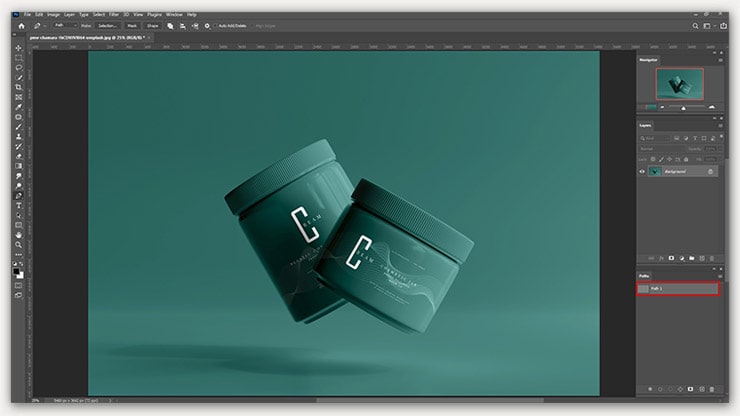
Step 03: Create a New Path
Create a path from the path palate.
Avoid losing the path by selecting the Path layer from the path palate.
Step 04: Enable the Navigator Panel
Does your Photoshop CC 2024 have an enabled Navigator panel?
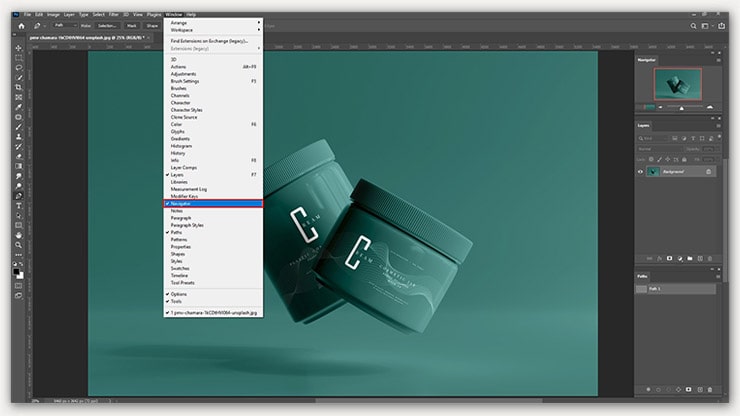
If not, turn the panel on. Hover your mouse to the top bar and click Windows > Navigator.
Step 05: Zoom in Up to 300%
300% zoom-in is necessary to make the selection perfect. Photoshop has 3 ways to zoom in on an image.
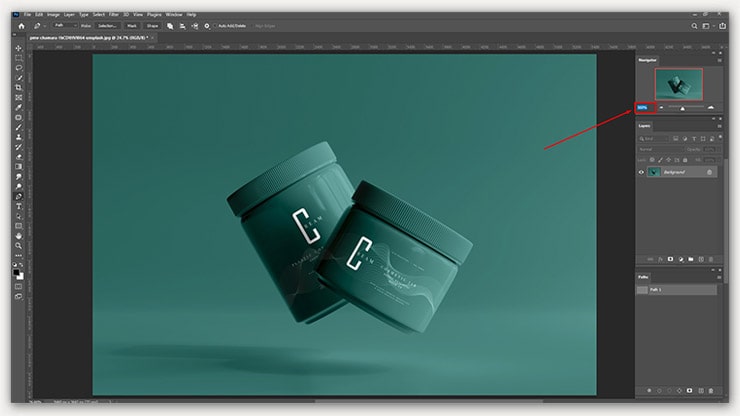
- Way 01: Navigator panel
- Way 02: Ctrl + Spacebar + Right Click on the Mouse
- Way 03: Ctrl and pressing {+} together.
Step 06: Make the Path
Now, start making the Path surrounding the subject.
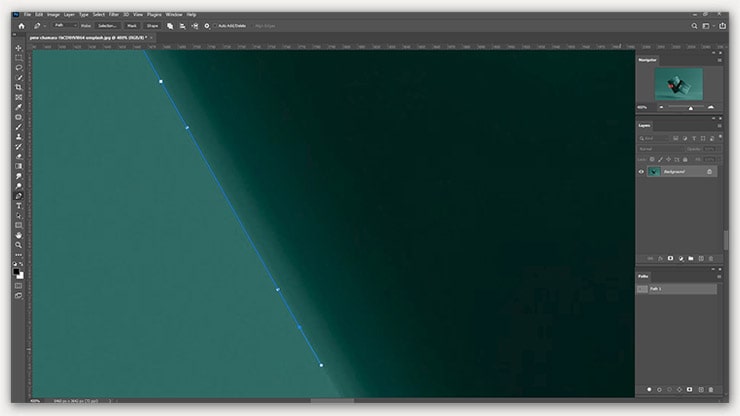
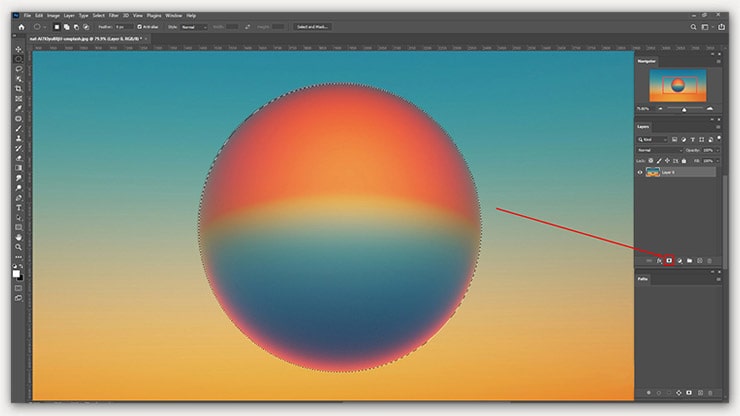
Clip the subject out where making a selection is required. Remember to make the selection 1 px inside of the subject. This will keep the BG out of selection.
Step 07: Close the Path
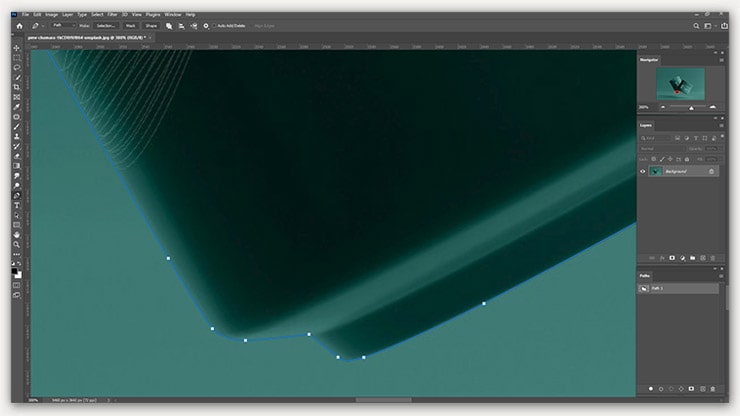
Once the Path is created, close it.
Step 08: Select the Path
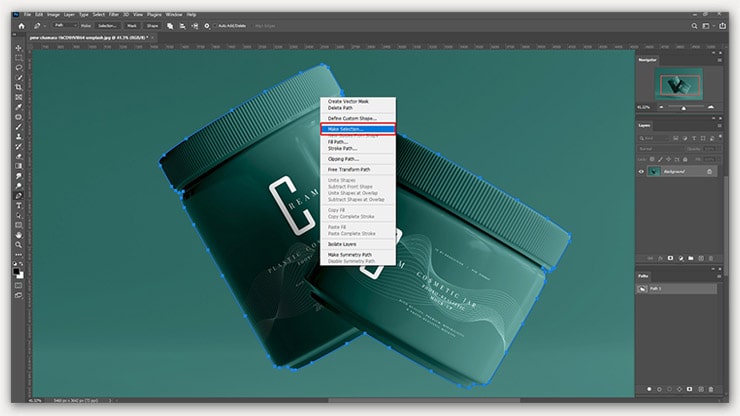
Then, provide a right-click to select the path. After that, you will see an option to “Make Selection.” Choose it. This way, the product or subject will be selected.
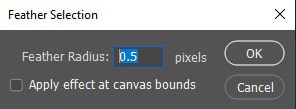
Step 09: Feather Adding
Your selection requires feathers. You can do this by pressing Shift + F6 or Select > Modify > Feather from the top menu bar.
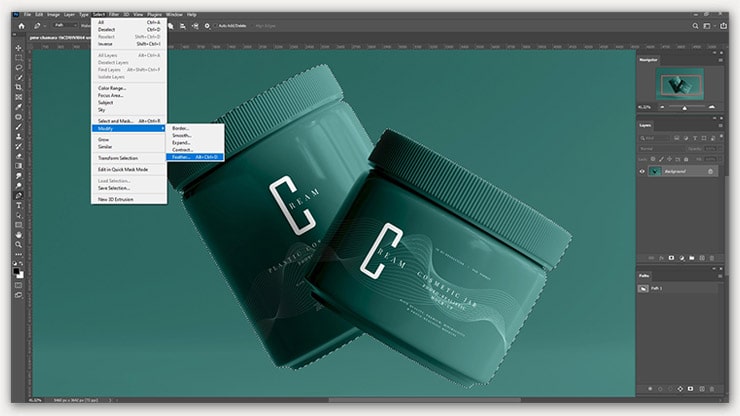
Get the smooth edge by selecting the radius 0.4 – 0.5.
Step 10: Add Layer Mask
Locate the Add Layer Mask option from the Layer palette and select it.
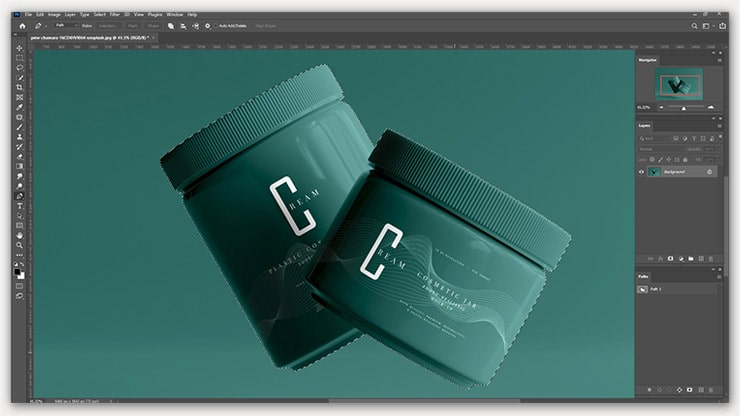
As a result, you will see the automatic mask of the product. The BG will be unprotected if you don’t use the Add Layer Mask option. Retaining the BG is also accessible by turning the Mask option off.
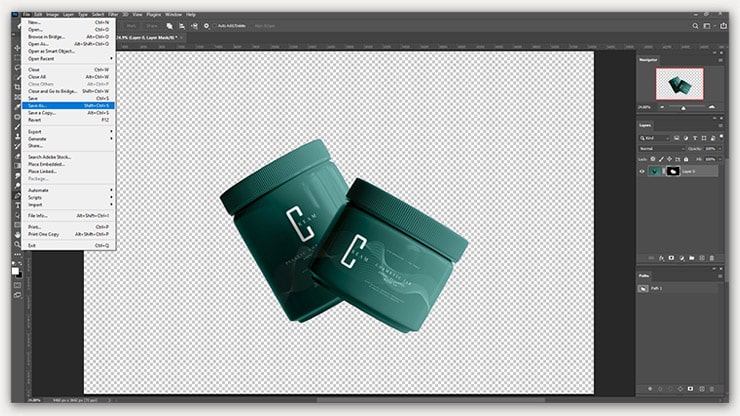
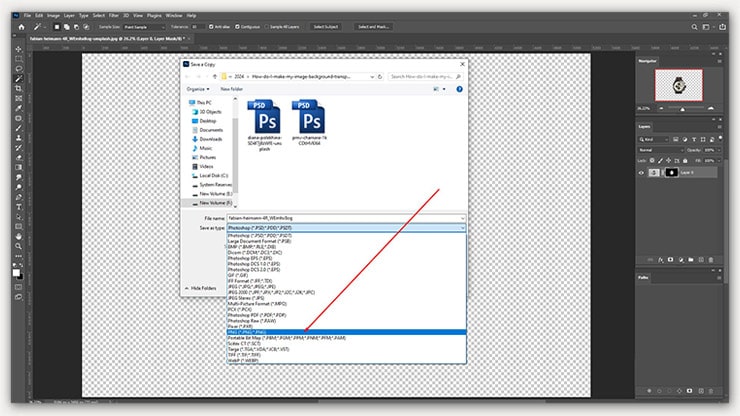
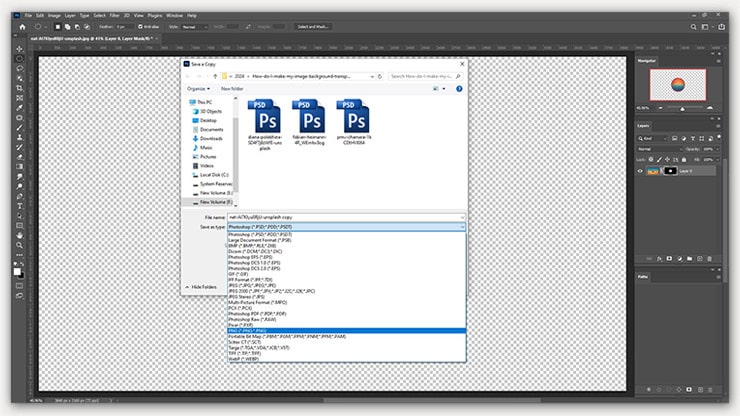
Step 11: Save the Photo
Save the image following the options below
For PNG,
File > Save As > Select PNG
PNG preserves image transparency.
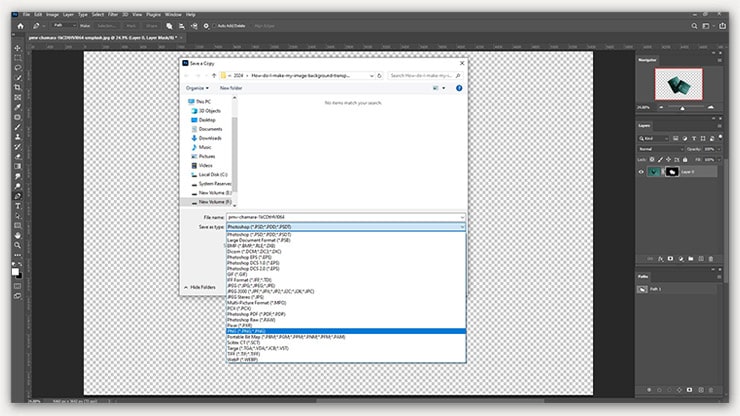
For PSD,
File > Save As > select PSD
PSD is required to save the Path and Layer. Note that PSD is Photoshop CC 2024’s default format.
Method 04:
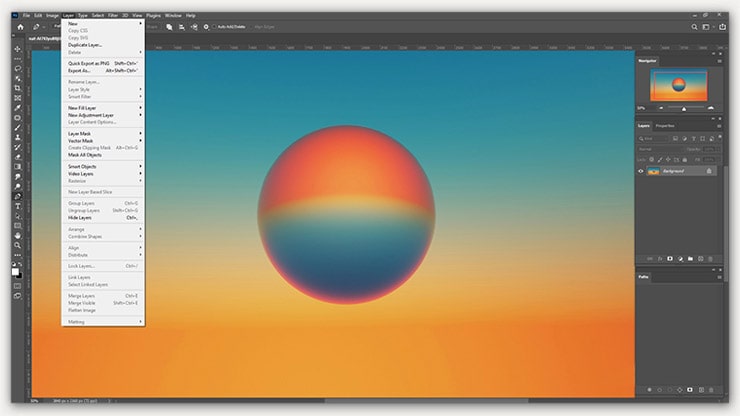
Make a Background Transparent Manually
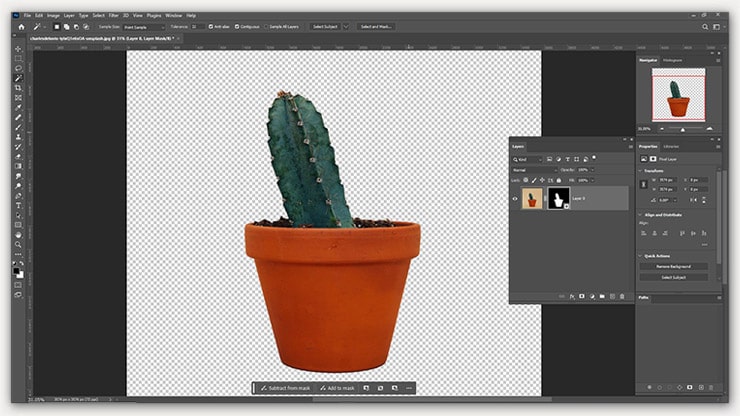
The manual process is suitable for complex images. This method starts from the end of the Step #03 of Method #02.
Step 01: Choose the Black & White Image
Photoshop CC 2024 creates a black-and-white image in the layer panel when the result is closer to the expectation. Click on this image.
Step 02: Using a White Paintbrush
Now, select a white paintbrush and start removing the Background. If you need to use the black paintbrush, select and use it.
Step 03: Save the File
After removing the Background, are you happy with the result?
If you answered yes, it is time to save the file.
Save the File as transparent PNG. On the other hand, if you want to make changes later, save the File as PSD.
Method 05:
Make Image Background Transparent with the Magic Wand Tool
The Magic Wand Tool is another of the best transparent background-maker tools. It will help you transparent a busy background.
Step 01: Open the Image in Photoshop CC 2024
The specialty of the Magic Wand tool is it can select pixels of a similar color. So, this tool is suitable for an image with a one-color Background.

We will be working on a watch image with a white Background. The Magic Wand tool works best with solid BG.
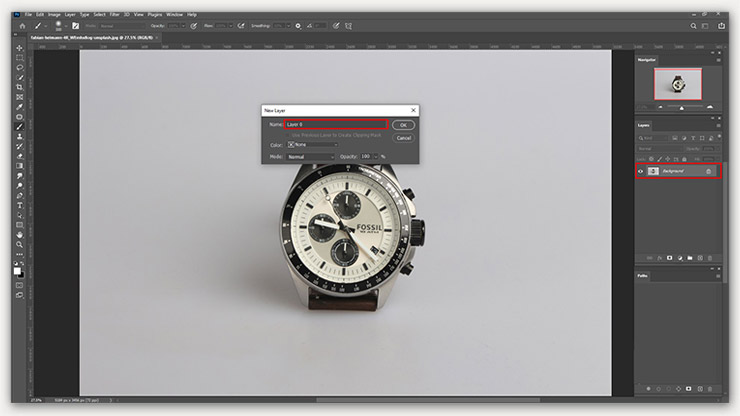
Step 02: Make a Layered File of the Image
Choose Layer from the Ribbon on the Photoshop CC 2024. Then go to New > Layer from Background. Also, keep the layer panel open.
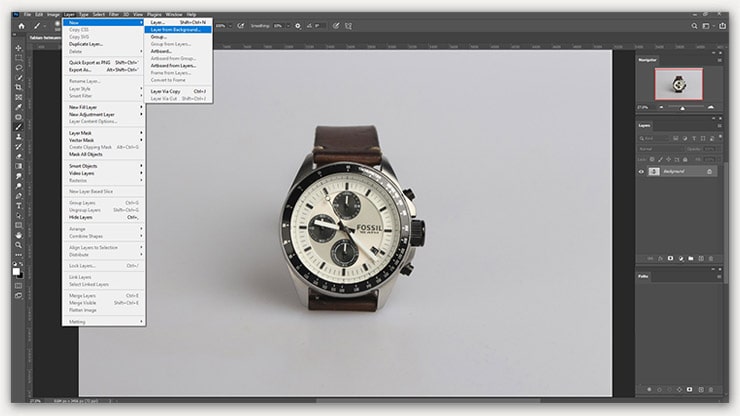
You must rename the layer by clicking OK on the New Layer Dialog Box. However, renaming is only sometimes necessary. Once renamed, the background layer gets unlocked. Thus, editing anything becomes more accessible from the layer.
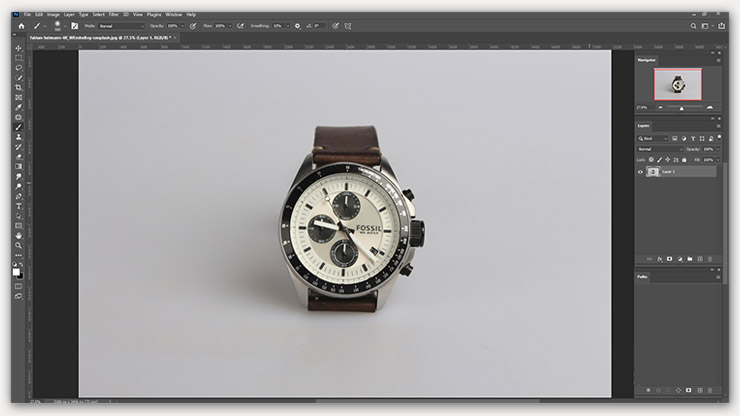
Step 03: Choose the Magic Wand Tool
Select the Magic Wand tool from the left panel of Photoshop. After that, choose the Select subject option from the Options Bar. This way, the subject will be selected automatically by Photoshop.
How do I know the selection?
You will see a selection around the subject.
What if the selection could be better?

Use the Magic Wand tool to add or remove the selection.
To remove the selection, press ALT + Click
To add a selection, press Shift + Click
If Loops are missing in the photo, press Alt and click on the Loops.
Step 04: Make the Selection Edges Smooth
Making the edges smooth is necessary to enhance the appeal of the image. You have to add Feathers for smooth edges.
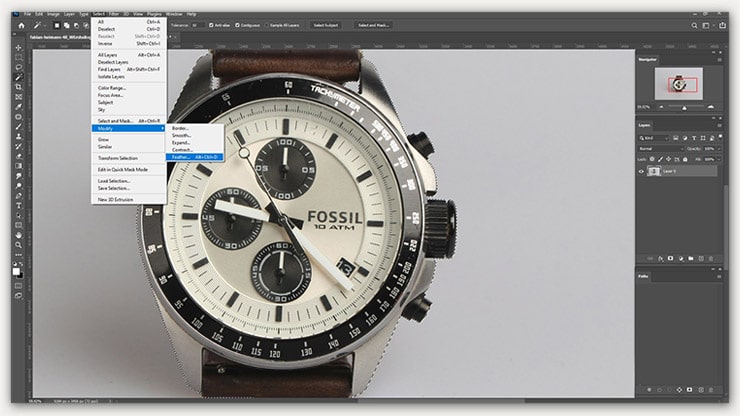
Click Select from the top menu and choose Modify > Feather or press Shift + F6.
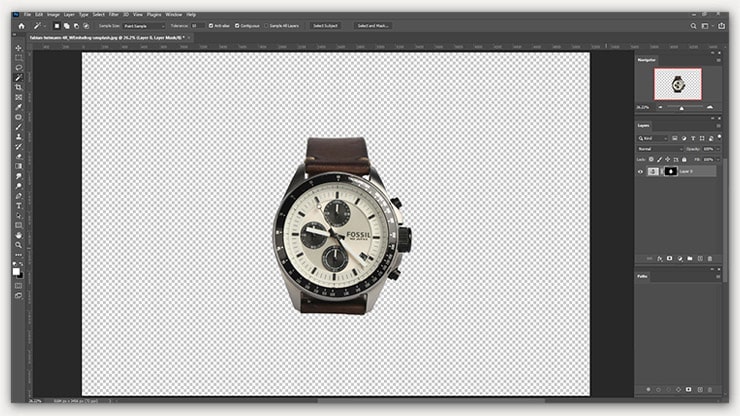
Step 05: Mask the Layer
Mask the layer after applying the Feather. It is crucial for preserving the Background. You can’t reverse a deleted background if you don’t do so.
Once you Mask the layer, the Background will become transparent.
Step 06: Save the File
Once the work is done, save the File. Maintain image transparency by keeping the photo in PNG format.
Method 06:
Make Image Transparent with Rectangular and Elliptical Marquee Tool
The Rectangular and Elliptical Marquee Tool will be helpful if your image background has a rectangle, circle, or square shape. This method is extremely straightforward to follow.
Step 01: Make the Layered File of the Image
You can create the photo into a layered file.
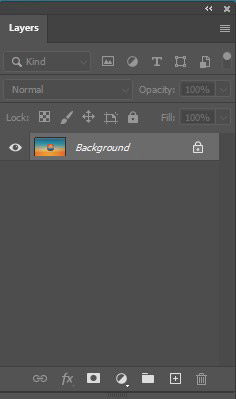
Hover your mouse to the top panel of Photoshop and Select Window > Layers.
Once selected, you will see an open layer panel.
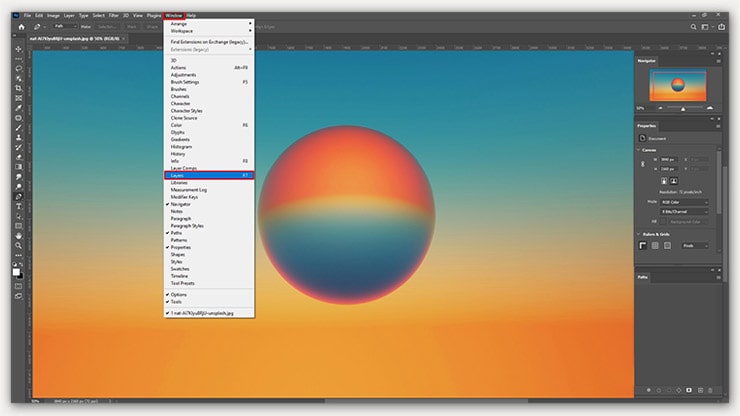
Go to the top row of Photoshop and select Layers > New > Layer from Background. Keep the layer panel open.
Click twice on the Background Layer. You will see a new Layer Dialog Box, which will want you to rename the New Layer. You can rename it by clicking OK or keep the default name Layer 0.
Once renamed, the background layer becomes unlocked. Thus, you can edit anything from the layer.
Step 02: Select the Elliptical Marquee Tool
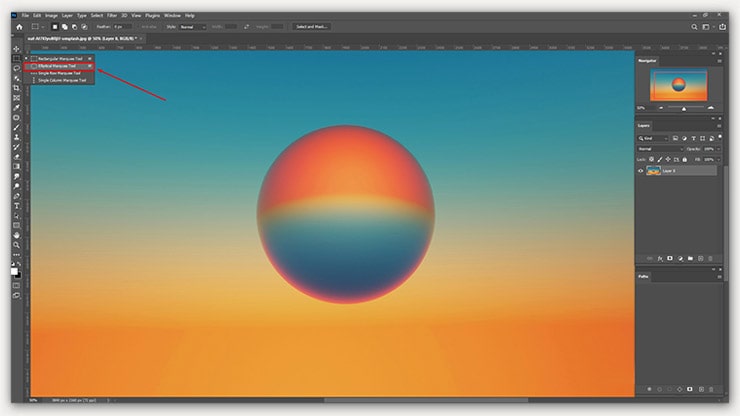
Locate the Elliptical Marquee Tool from the left-hand side toolbar. Our image’s subject is rounded, so we chose the Elliptical Marquee Tool.
For a square-shaped subject, you must choose the Rectangular Marquee.
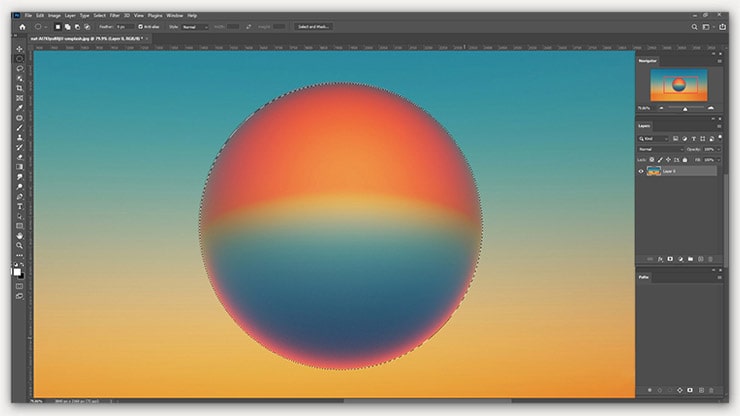
Now, drag the tool around the subject. This will make a selection that looks like “marching ants.”
Step 03: Add Feather
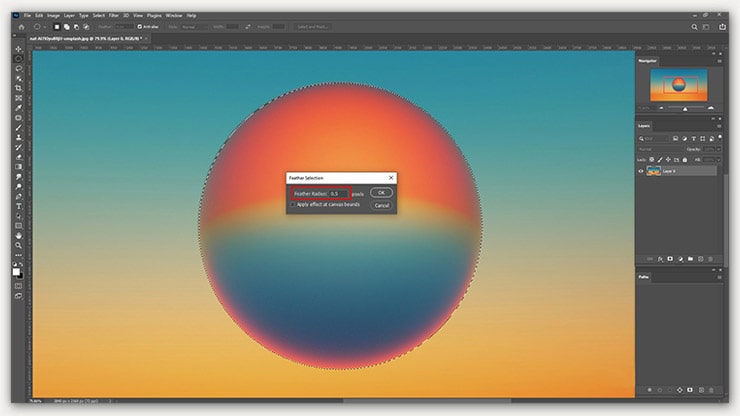
Then, make your selection’s edges smoother by selecting Select > Modify > Feather. Also, you can use the shortcut Shift + F6. The range for Feather radius should be 0.4-0.5.
Step 04: Add Layer Mask
You will see an option in the Layer Palette named “Add Layer Mask.” Choose it. Thus, an automatic mask of the subject will be created. This option will help you preserve the Background.
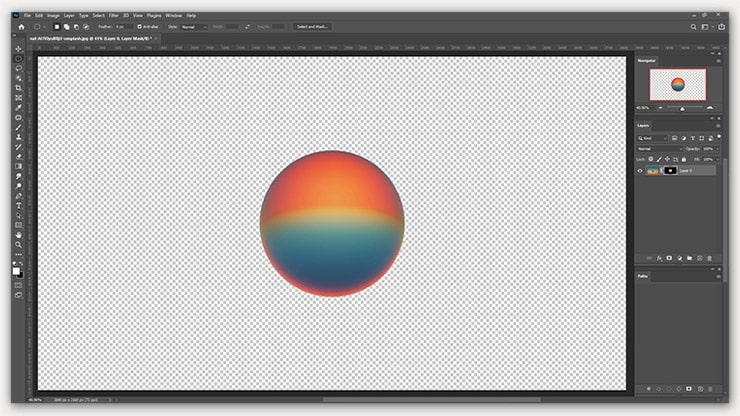
Now, the BG is transparent.
Step 05: Save the File
Go to the top menu bar, choose File> Save as, and save the File in PNG format. You can also save the photo in PSD format to ensure the File’s transparency.
The Benefits of Making Background Transparent
Here, I shared three significant benefits of making the Background transparent of an image:
- You can use an image with a transparent Background for different purposes
- Images with transparent Backgrounds are suitable for e-commerce websites
- Transparent background pictures can be used in many resources when the primary transparent File is saved
FAQs
To make an image transparent in Adobe Photoshop CC 2024, open your image file, and use the ‘Magic Wand’ or ‘Quick Selection’ tool to select the background you want to remove. Once selected, hit delete to remove the background, creating a transparent image. Remember to save your new image as a PNG file with a transparent background for online use or further editing.
Yes, you can create a transparent logo in Adobe Photoshop CC 2024. First, open your logo file, use the selection tools to select the logo, and then remove the background.
After you remove the background and create a transparent image in Photoshop, go to ‘File’ > ‘Save As’ and choose ‘PNG’ format. Make sure to check the option ‘Transparency’ to ensure the background remains transparent.
Adobe Express offers an online transparent background tool, making it possible to create transparent images without Photoshop. Upload your image to Adobe Express, use the background removal tool, and you can readily create a transparent background for your photo.
Besides Adobe Photoshop CC 2024, there are free online transparent image makers and background tools available. These online tools allow you to upload your image, remove the background, and save your image with a transparent background, though they might not offer the same level of precision or control as Photoshop.
Wrapping Up
So, this is how you get a transparent background of an image in Photoshop CC 2024? The above steps will help you make the Background transparent, no matter how complex the image is.
Learn the process and get the most out of your image with a transparent Background.
You may read: