Learn how to mask in Photoshop in a very quick and easy way. Try following these steps and learn the masking process in a few minutes.
As time passes, the eCommerce business famously grows more and more. It is making scopes for commercial photography. The platform of industrial photography has existed for a more extended period.
Earlier, the people in business used to depend on it for advertising their products.
But these days, it is also becoming the backbone of online business. The most demanding type of edit for commercial photography is masking images. Using Photoshop, an expert photo editor masks images and enhances those pictures’ appearance and quality.
Luckily, you can learn how to mask in Photoshop quickly and easily. Hence, stay with us from the beginning to the end and understand the simple masking process in Photoshop. So, let’s get down to the business.
Learn How to Mask in Photoshop – Quick and Easy Way
Photoshop allows you to do masking in two different ways; they are as follows.
● Layer Mask
● Clipping Mask
Both procedures are different, but their outputs are similar.
How to Mask in Photoshop Using Layer Mask
A layer mask is a sole layer that lets you work over a potion in an image by hiding a part. It uses white and black colors to reveal hidden and viewable details. Let’s learn this simple technique of image masking from the steps below.
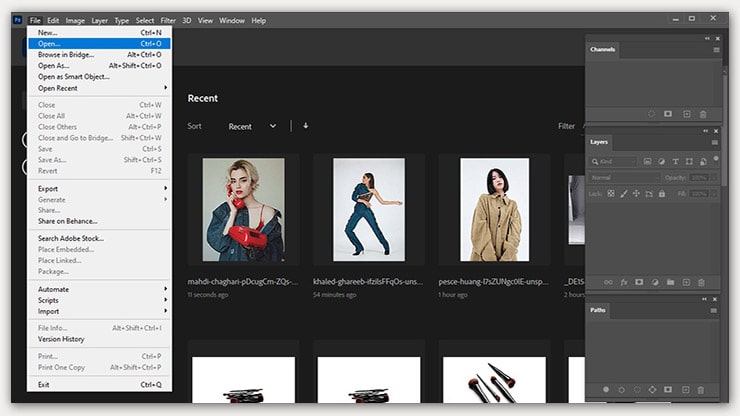
Step 1. Open File
To open the file, you want to edit, access the file, and click over the option “Open.” Then, your file will be opened and selected.
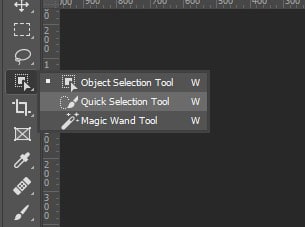
Step 2. Access Tool
Photoshop is packed with many valuable tools that can help you choose the area by making selections. Pen Tool, Magic Wand, Quick Selection Tool, etc. We will use Quick Selection to make a selection.
Step 3. Select Area
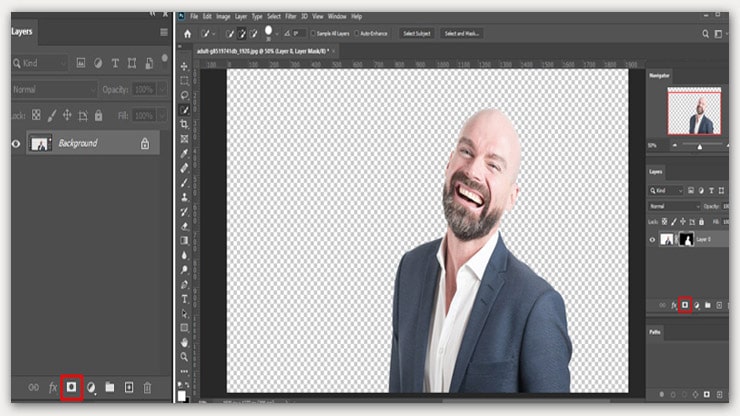
Go to the top menu and click over Select Subject from there. It uses artificial intelligence and can choose the area you want.

After selecting the subject, you can make corrections and bring perfection to the photo.

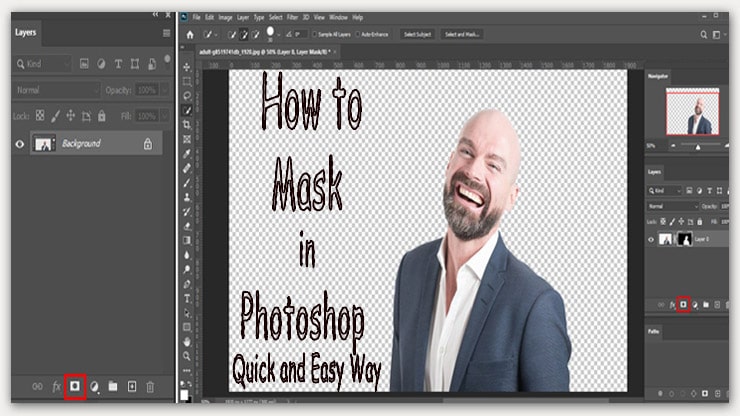
Step 4. Attach Layer Mask
Access the Layer menu, where you will find a box containing a circle, and click on it to attach a layer mask. You will find that the layer of your photo background is changed.
Step 5. Switch Color (Non-compulsory)
If you don’t like the existing color of the background and want to switch to another color, click on layer> New Adjustment Layer and then pick “Fill Color.”

Step 6. Save
To save the edited file, access File and click over Save As. Then, name the file and click Save. You can find this.

Grounds for Using Layer Mask
You should carefully make use of the layer mask. You don’t always require this special edit. Know when is the right time to use a Layer Mask.
1. When combining photos
2. When cutting objects out from pictures
3. When you need to limit editing on particular portions of an image
4. When revealing or hiding a particular part of the photographs
How to Mask in Photoshop Using Clipping Mask
Using several layers together, a clipping mask is created. We will now learn how you can make a layer group and use them to make a clipping mask.
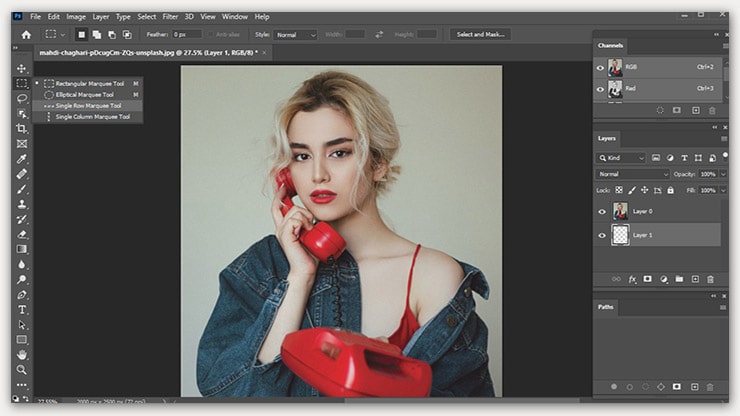
Step 1. Opening Image
The first thing you have to do is, open the photo you want to work on.
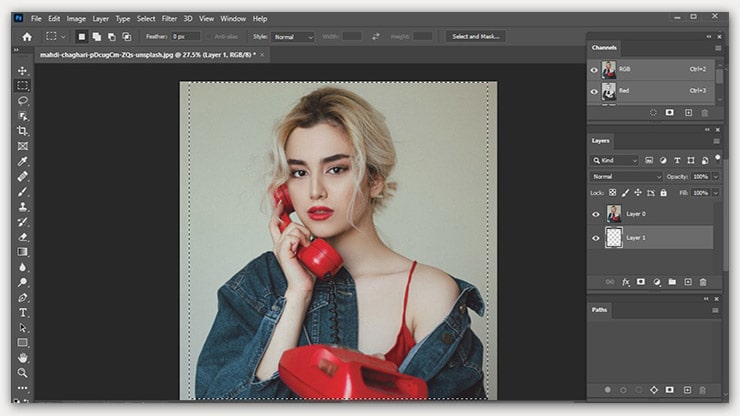
Step 2. Placing New Layer
The Marquee Tool in Adobe Photoshop can help you create a clipping mask. The focus is to place a new layer under the existing layer.
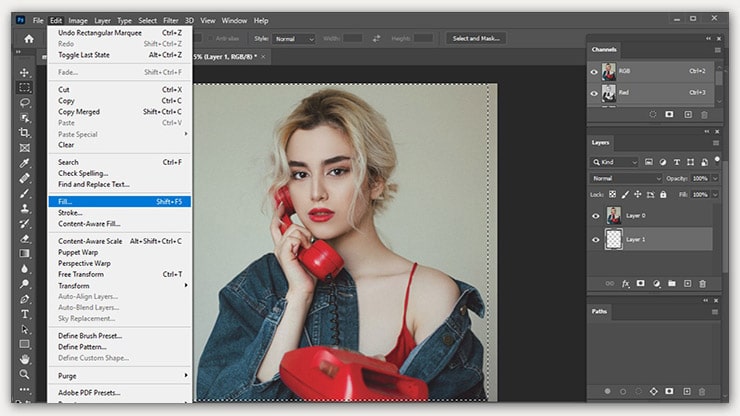
Then using the Marquee Tool, you need to draw a structure.
Afterward, fill the place and dispute it.
Step 3. Creating Clipping Mask
Then you can pick the top layer and then click over “Create Clipping Mask” to work over the layer.
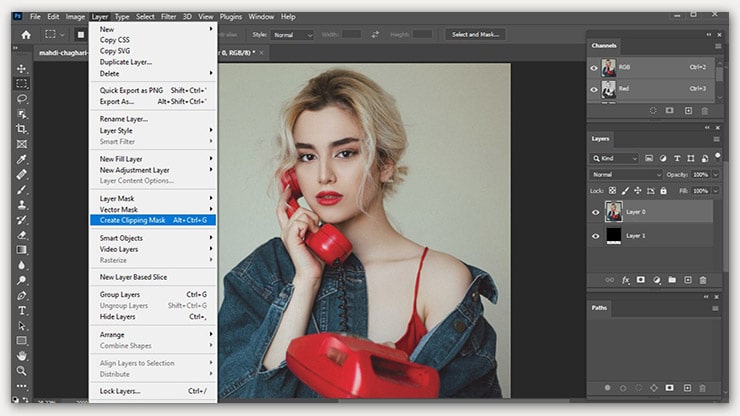
This option is found at the top menu. After you are done making the mask, it’s time to place the photo using the “Move Tool.” You can also make the necessary changes to your image at this stage.
Grounds for Using Clipping Mask
These are the proper utilization of clipping masks.
1. When you need to apply a layer over the layer beneath, automatically
2. When you have to control the clarity of a layer on another
3. While creating particular structures in layers
4. While using different editing techniques in an image
Do You Need Image Masking Services?
It will be helpful if you are here to learn the photo masking process out of curiosity. But if you hold an online store where you sell various products and want to learn this technique for advertising your items, it will not be that useful.
Because no matter how easy it looks to do image masking, a person who hasn’t mastered these methods would need a longer time than usual in editing.
It’s possible to be a beginner-level image editor and mask 3 to 4 photos daily. However, you can’t mask pictures of hundreds or thousands every day.
It will require professional edits and need a pretty long time to mask one photo only. So what can you do to mask all those pictures for advertising? The best is to take an image editing service.
Many online and local companies have hired professional photo editors. This is because they are so skillful in every kind of photo edit. By spending a little on them, you can get all your photos masked quicker than you can imagine.
FAQs
To mask two photos in Photoshop, you must attach a layer mask. Select the document containing two pictures but on different layers. Choose the top layer of your image from the Layers panel. Click over the option “Add layer mask” to add a white layer.
Masking lets you make some parts of your image viewable and others hidden. Besides, it’s a non-destructive process of editing images, and it is considered a huge advantage of masking in Photoshop.
Final Thoughts
We hope this article was helpful for you to learn how to mask in Photoshop – a quick and easy way. Of course, you can master these techniques pretty soon if you try masking your photos daily on your own.
But if you already have many pictures to mask, it would be best to take the Photoshop image masking service instead.
You may read: