Photoshop masking is an exclusive, non-destructive editing technique to modify a specific portion of an image.
Besides, masking is applicable to photo composite or manipulation, Removing the background from a photo, and applying adjustments to an area.
Photoshop Masking is generally associated with Layer Masks. However, there are different types of masks in adobe Photoshop CC, like layer masks, Alpha channel masks, clipping masks, color masks, etc.
It is a technique to cut out soft edge images like fur, hair, transparent objects, etc. The most potent aspect of masking is your control to affect precisely where, how & how much modification will affect the original image.
It is essential to know how to use Photoshop masking for different kinds of adjustments or transformations.
Besides, it is also necessary to understand how to remove skin spots and dark edges by burning & dodging tools without harming any pixels. Masking knowledge helps to take your Photoshop editing skills to the next level.
It will develop your photo manipulation skills. I will walk you through the basics of image masking, types of masking & a complete guideline about Photoshop masking techniques now.
What is Photoshop Masking?
Photoshop masking determines the visibility of the layer. It is not easy to understand the meaning of masking for ordinary people outside the graphic design region. The simplest definition of masking is to apply something to a specific area to hide or reveal something.
Photoshop masking is helpful when you need to improve the photo quality in product catalogs, model or celebrity photos, advertisements, brochures & many more. In the case of product photos or models, often, you won’t find any alternative to photo masking.
Because these photos need audience attraction & highlighting the feature to increase sales, image masking ensures efficient background removal to create your photo eye-catchy.
The model retouching, like spots, wrinkles, blemishes, etc., cannot adjust without image masking. The ultimate aim of masking is to make the photo vibrant & pop up. So a transparent, solid background is essential.
Besides, Photoshop image masking services are the best convenient & efficient way to separate the image into layers. This technique helps you to highlight the subject & enhance the beauty of your image.
The best thing about image masking is that it applies to any complex background removal without harming the image quality. All types of crucial editing can be quickly done by image masking.
Let’s see how photoshop masking techniques make your editing experience easier & marvelous.
Types of Photoshop Masking
There are three major types of masking: Layer masks, Clipping masks, and Alpha Channel Masking. Layer masking & clipping masking has some theoretical similarity, but it has vast application differences.
Let’s learn about the different types of masking in Photoshop.
Layer Masking
When you talk about masking in Photoshop, the first thing that comes to mind is a layer mask. You can apply layer masks to adjust the opacity of the various portions of an image.
Besides, layer masking helps to hide or reveal some specific parts of the pictures. We can change the opacity from the layer panel’s slider, which changes the image opacity.
A mask helps to control any single portion of the image more precisely. When you want a layer at 50%, you will reduce the opacity from the layer’s opacity panel.
The layer masks photoshop definition is referred to as a process that can change the visibility of an active layer. It allows hiding any portion or partial hiding completely.
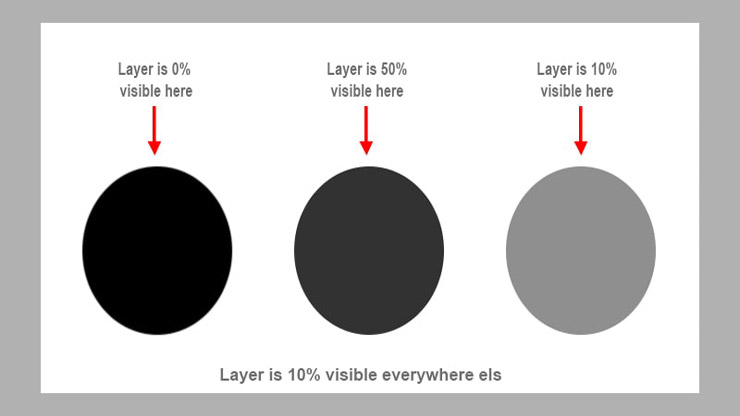
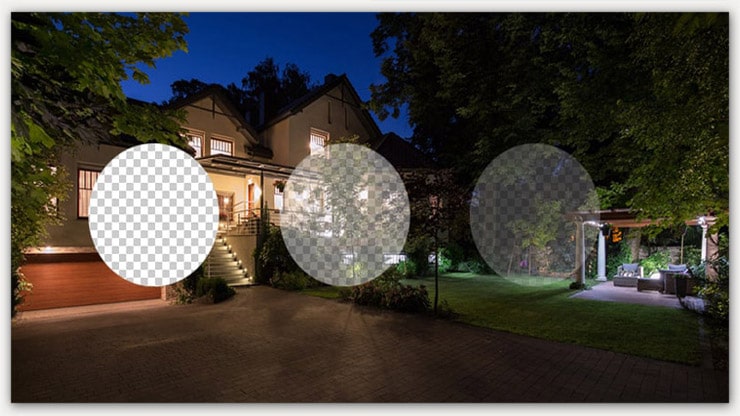
When you want to make any area completely transparent, paint with black color on the mask. That makes the underlayer visible. If you wish for transparency, like 50% or 20%, you can paint with gray.
You can control the transparency percentage depending on how much gray you pick for the brush. If you want to hide any layer, paint it white entirely, which means opacity is zero.
This is the basic idea of layer masking, which is very common in photo editing.
Clipping Masks
There is some similarity between clipping mask & layer mask though as a beginner, you will find it a little bit contradictory comparing Clipping mask & layer mask. The clipping mask uses a single layer to define the transparency in separate layers.
In this process,
- Heap two layers, one on top of the second one. The bottom layer controls the transparency of the top. This way, you won’t need to paint black & white like a layer mask.
- Clipping masks borrow opacity from the layer used to create them, like the bottom layer. If you want to make some portions of the top layer transparent & some are unclear. Then pick the bottom layer that has some obscure parts & some transparent areas. You need to apply a Clipping mask to the top layer using these bottom layer values.
- It is challenging to visualize this masking technique without an example. You can clear your concept when seeing an example in action.
Photoshop Clipping Masks Process
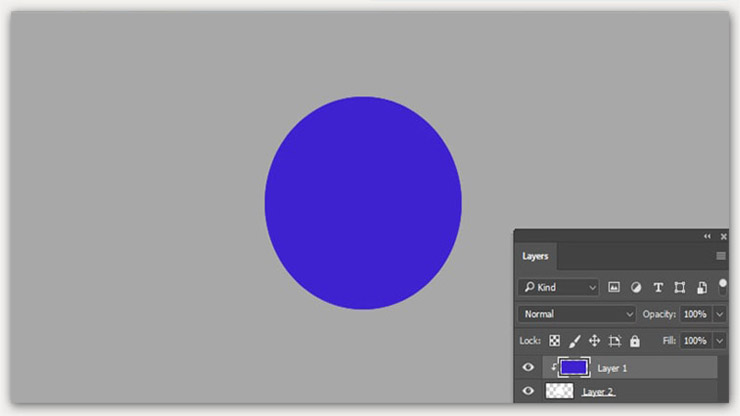
Let’s assume that our goal is to cut the blue cardboard layer to be in the shape of a circle; those two layers are shown below. Here the blue cardboard is the bottom layer & the circle is the top layer.
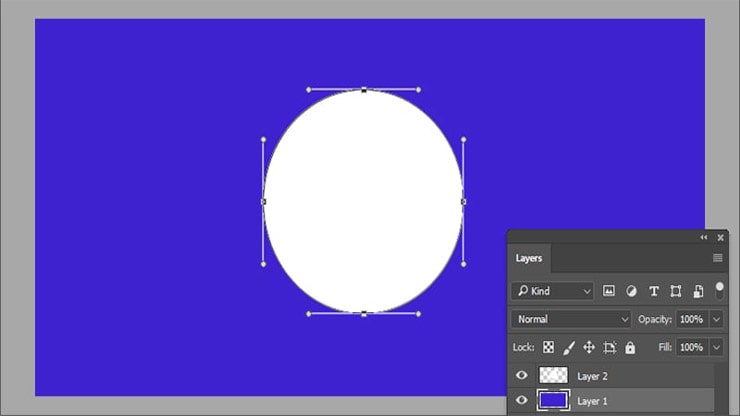
We exchange the positions of the two layers to achieve the target. That makes the cardboard on the top layer visible. Then you can select the layers menu & choose Create Clipping Masks.
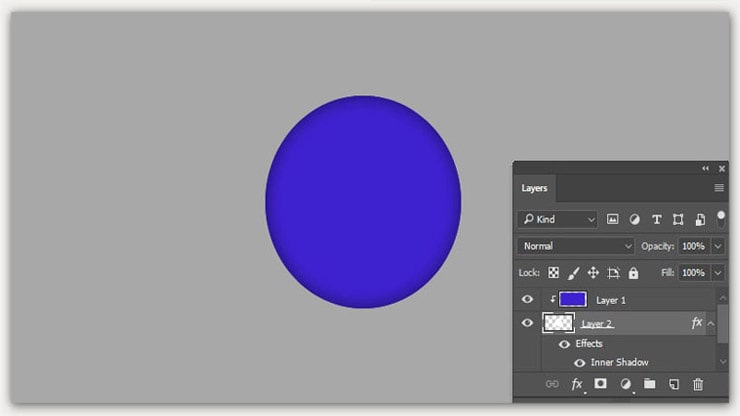
Now we have achieved the target shape that we want to get. The circle was unclear in some areas, but now the cardboard area is unclear & the circle layer area that was transparent now the cardboard area is transparent.
It is a juggling process that allows changes in each layer freely. You can drag the cardboard layer to move the board’s position inside the circle bounds while the circle remains fixed.
Moreover, you can use the layer results in the composition through the bottom layer. For example, choose the circle layer & add an inner shadow that gives the below result.
Clipping masks are exciting & short-cut ways to achieve a fantastic transformation. It is trendy in our daily life uses. I hope this information is enough to understand the functionality of the Clipping mask & get an advantage from clipping masks.
Alpha Channel Masking
In the case of Removing background, the different attributes cutting are complex, like hair, jacket, furry areas & much more complicated subject. Other subjects need a separate process to remove the background correctly.
Though Alpha channel masking is a tricky masking process, it is efficient. Without alpha channel mask Photoshop it is not possible to mask out the hair & furry areas.
It isn’t easy to select these areas & very time-consuming with the brush. There is no use of the Pen tool & magic wand tool.
- To maintain a smooth edge transformation, you must pick a soft brush.
- Photo editing is crucial when dealing with fine-line objects like hair, rice grains, etc.
- Photoshop alpha channel masking is the technique to cut such complex objects easily & flawlessly attach them with a new background.
- It reduces your editing complexity & a juggling process to make your image high-quality.
What is an Alpha Channel in Photoshop & How Does it Works?
The Alpha channel masking process is easier to use when the subject & background has enough contrast. In short, what is an alpha channel in Photoshop & how it works are given below. Keep reading to know the details.
To find out the most contrast channel applies the channel palate. When you work with the blue channel, you make a copy of the channel & use level to balance the contrast rightly.
Sometimes you need to make the layer 100% black. For that, you paint over the new blue channel with black color. Then you swap it to make the black to white & white to black.
After that, you copy the channel & paste it on a new layer from the layer tab.
- Moreover, you can use dodge & burn tools to make the edge portions softer, darker & brighter.
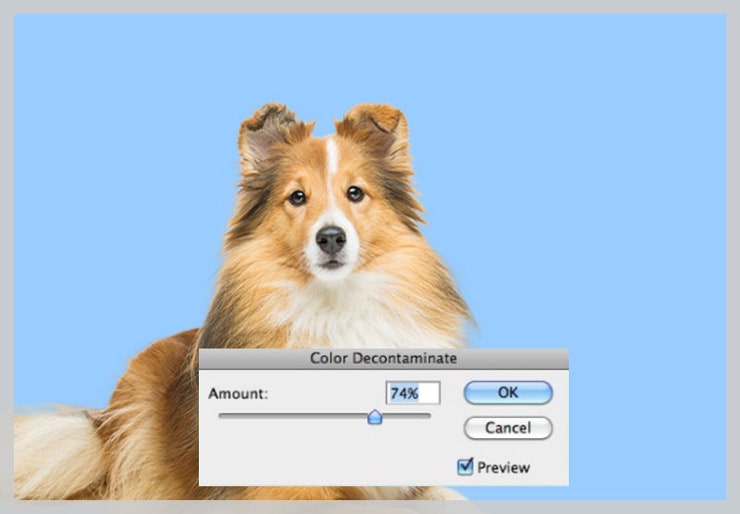
- Also, you can select the layer> Matting > Color Decontaminate menu to apply color decontaminate.
- It often gives outstanding results. You must make a copy before applying the color decontaminate that is safe. This is the basic idea of channel masking.
Change the Channel
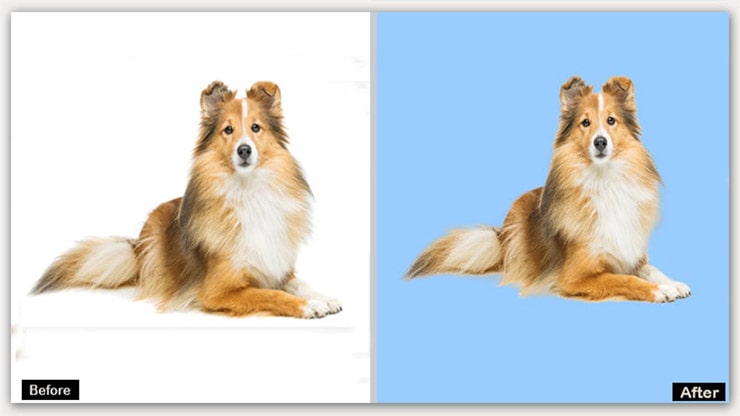
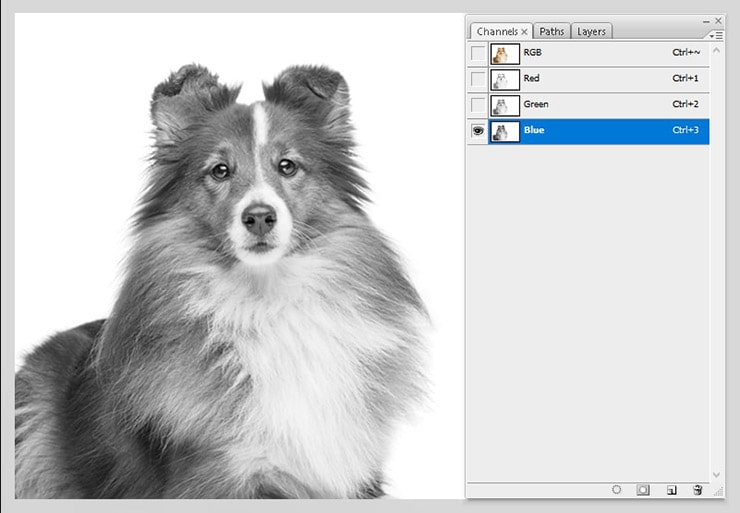
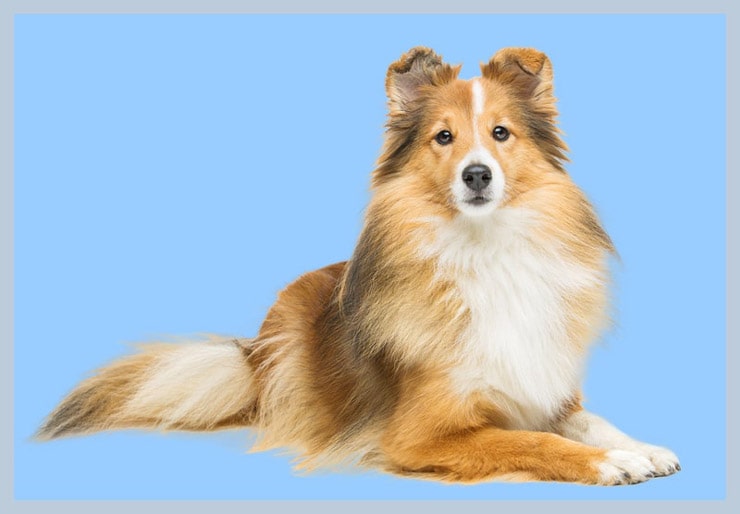
To explain how alpha channel masking works here, I mention an example. Let’s see. The below dog needs to be cut out from the background. It has plenty of contrast that makes the masking task easier.
The fundamental factor of masking is finding contrast & strategy of how to draw it out.
Here we use a gray dog on a solid white background that gives us a chance to achieve our goal quickly & use the contrast into an appropriate mask.

You first need to select the most contrast from the Channels Palette as we want the channel with a darker dog & brighter background, which means work with a blue channel.
Please do the following According to My Above Instructions
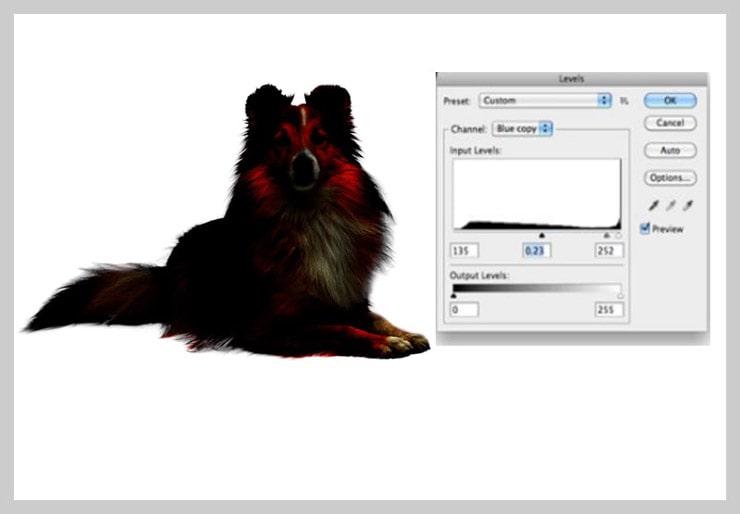
- Make a copy of the blue channel.
- Then, select it & to make level adjustments,
- Here, you can increase the contrast or use the keyboard shortcut Command > L.
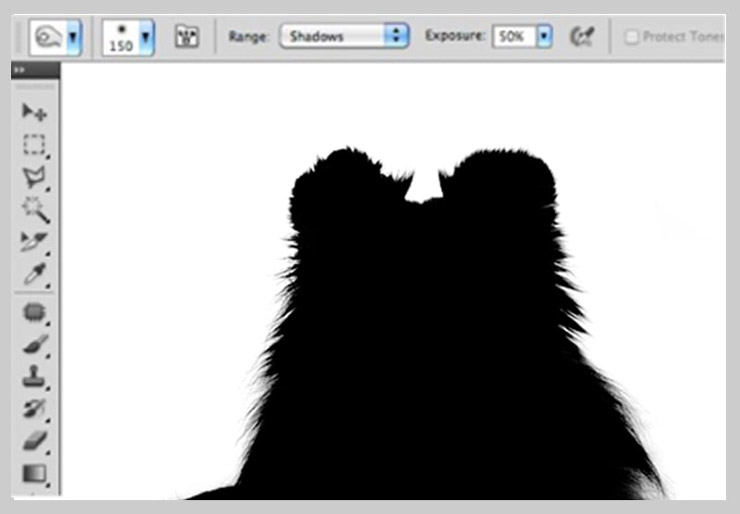
- However, you need to maintain a sufficient amount of contrast like the below image, so make the shadows & mid-tones a bit darker.
- You must make these adjustments carefully. Then you need to zoom in on the photo & check the hair on the edges of the fur to ensure that you are not cutting much.
- You will try to make the assumption area of black & white is not precisely perfect, Although some gray points can remain in this step.
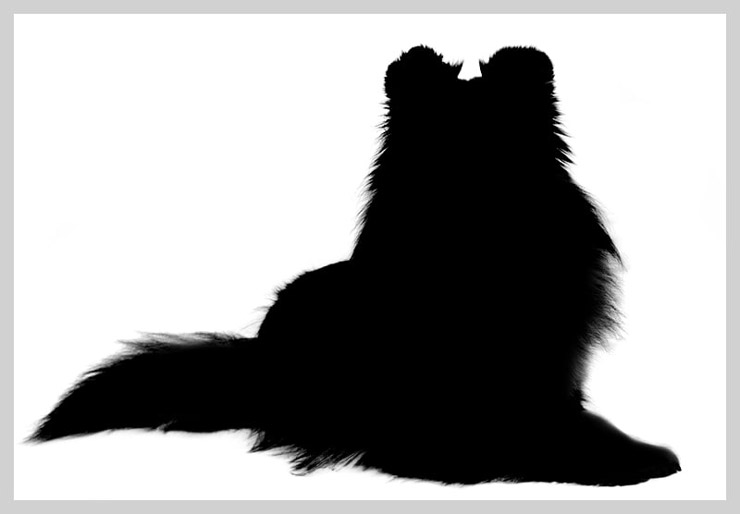
The most tricky part is coming now. The motive is to make the dog as black as you can. So that you can use a black brush & paint the face & inner portions, and random spots correctly. (See Image Below)
But the edges of hair needs special attention. The best way to handle edges hair is to use the dodge & burn tools. These tools are fantastic because they can accurately deal with specific ranges of gray.
The dodge tool is used to highlight a portion & the burn tool is used to achieve the shadows. You can select a medium soft brush to complete these tasks & create like the below edges image.
These tools are fantastic to work out. You will able to get a super result within one minute.
After that, use Command > Shift> I to swap the channel that converts the black dog to white & the white background to black. You know that in the case of the photoshop masking technique, the white layer is unclear & black is transparent.
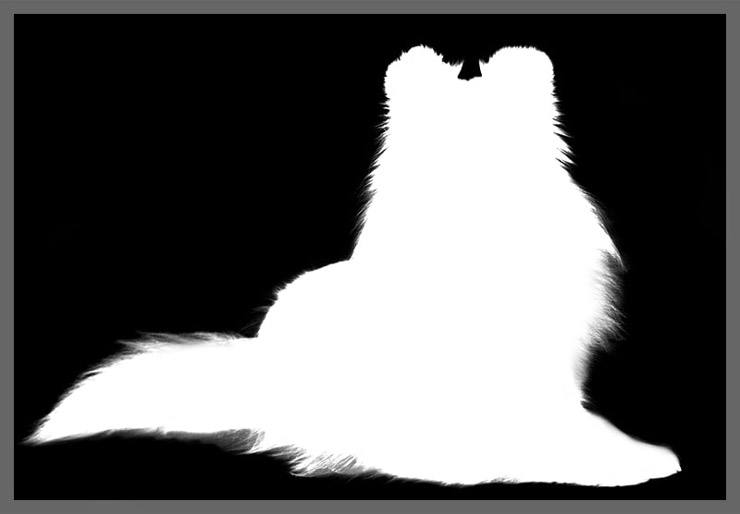
Converting the Channel to Mask
Now we successfully create a channel but need to convert it. There are several ways to convert, but I pick the easy way to share. You can select Command > Click on the channel to fill in a selection.
After loading the accurate selection, you can return to your dog’s layer & apply the New Mask button. That’s all for conversion.
Defringing the Mask
After converting the channel to a mask, still, there is some white fringing appearing on the edges. You can’t remove it properly if you don’t know the exact process. I am going to share a fantastic way for beginners.
You can use a new Mask Palate in conjunction with refining edges to make some vital adjustments to the mask. You need dedication & practice to use this tool correctly. So, please give some time & effort to play with this tool.

But sometimes this process can’t give any good results, so you must apply the alternate options I mentioned before.
From the entire layer menu, you choose Matting > Color Decontaminate. In our case, this command helped to reduce the rough edges amazingly.
Another trick you can apply in problematic areas is clone brush over the fringes. The masks remain beautiful & the clone replaces additional colors with actual colors from the dog’s fur. It brings a natural look to the hard edges area.
Finish The Task
Now the task is almost done. You need to polish it to make it cleaner & beautiful so that you won’t lose a single pixel. There are no bounds of improvement in the case of complicated masking like this one.
Perfection is a word that is impossible to touch. But you can better your work if you target perfection.
Depending on your time, utilize it for polishing. As your skills improve, the polishing time also decreases & this part will be more accessible for you.
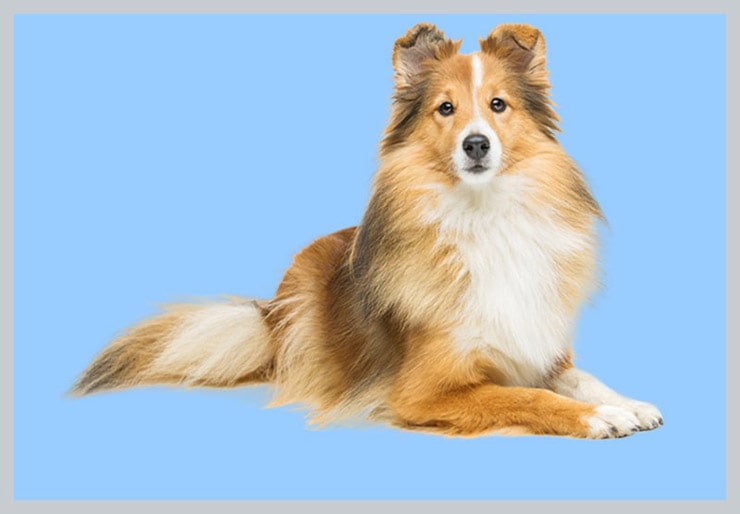
Photo masking is a non-blasting process. We can change our masks at anytime as much as we want. It allows retrieving any unwanted erasing areas that are difficult in image editing.
It is an easy & safe way to hide a particular portion of an image. If we later need the part, we can regain the area. That is only possible by photo masking.
When to Use Photoshop Masking?
In photo editing, there is no alternative to using masking techniques. The use of Photoshop Masking is given below:
- Hide or reveal any specific area of the entire image.
- Cut the subject from the background.
- Objects with fine lines like hair, furry, or translucent purpose cannot be selected using the pen tool. There is no alternative to cutting these objects using masking.
- To modify the particular area of a picture.
- Photo masking is essential to edit models or future editing.
When not to Use Photo Masking?
Though masking is a robust technique that has lots of fields to apply, there is some scenario where photo masking is not used, which are given below:
- Pictures that contain sharp edges.
- When the subject & background color are the same.
Last Words
There are thousands of tricks & ways of photoshop image masking available. Here I mention the basic & popular skills among all the masking processes.
The practice is the pre-condition to reach your destination. Just be optimistic & visualize the ways to find the best masking process you need for your image.
Though masking looks simple, it is a time-consuming task. Regular practice is the only way to be the master of photo masking.
There is no doubt that image masking is a handy & generative tool. Thus, learn it properly & watch the transformation of your editing skills.
Read more: