Learn how to color correct and fix tone with levels In Photoshop and become color correction master. We all have taken an image of something that looks impressively beautiful in the beginning. Later, when we find that the image lacks a different color available in the original scenario.
So, how to retain the original tone and color of the image using the Photoshop Color Correction process? Fortunately, the Photoshop color correction ensures the color of your image will remain accurate. This tutorial will teach you how to color correct and fix tone with levels In Photoshop. That gives a new life to a lifeless image. Let’s go through the below sections to learn more.
What is color correct?
Setting the right tone and changing the color of an image is the primary purpose of color correction. Inadequate lighting or improper setup of the camera can damage the natural color of an image. Even a single small thing can change an excellent looking mage to dull looking.
At this point, the Photoshop color correct process comes in handy. This process works on every single thing to give an image an engaging look. It improves the quality of an image by fixing the tone, hue, brightness level, contrast, saturation, etc. Changing the exposure of any photo or any color is much more comfortable with Photoshop color correction.
Color Correct With Levels in Photoshop
Changing color in Photoshop is a breeze with Match Color Command. Using this command, you can fix the color tone of single or multiple images. This feature is active in RGB mode only.
Following the range of color mode, it is necessary to select the original image’s color or color range. The great thing about this feature is that the subject’s face is automatically detected and fixed. As a result, retouching the subject’s face is effortless.
You can also use two other tools: The Eyedropper and Color Picker.
Finally, post-processing and using the tool relies on the purpose of the color correction.
How to Color Correct And Fix Tone With Levels Tutorial [Step by Step]
Let’s look at an example so that you can get a clear understanding. I decided to fix the tone and colors of the below image.

Step 01: Setting Up the Levels Command for color correction
Open the image in Photoshop. Then, let’s set up the Levels Command correctly.
At the topper portion of the screen, find the Image Menu and click it. Then follow Adjustments > Levels. You also can press the shortcut keys. For Windows, Ctrl + L or Mac, Command + L. This way, the Photoshop dialog box will appear. Then look for the Eyedropper icon. Hopefully, you will find it at the bottom right corner. The right Eyedropper icon is known as White Point Eyedropper; double-click it.
Thus, Photoshop Color Picker will come. Look intently at the downside of the Color Picker option. You will see a few letters: R, G, and B. These three terms come from Red, Green, and Blue. Now change the number of these colors to “245.”
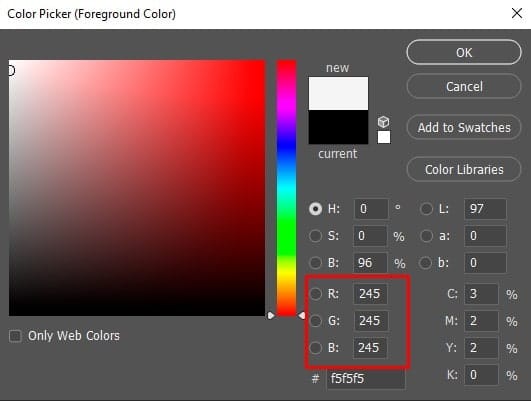
“255” is the White Point Value that comes in the input box by default. When we lower the value of Red, Green, and Blue to “245” from “255”, it will let you maintain the lightest part’s detail, and the image will not receive a 100% white look.
Once you put the number, click OK, which will let you close the Color Picker window. However, we will work on this option again after a while.
We will now work with the Black Eyedropper icon positioned at the Photoshop dialog box’s left side. Double-click on the icon.
Photoshop Color Picker will appear again with the color option, and this time you will see fewer default numbers (0) in the Red (R), Green (G), and Blue (B) input box. Change the number to 10. This time, the image will prevent from getting pure Black. And we will be able to maintain the details in the shadows. Then click OK to exit the Color Picker Window.
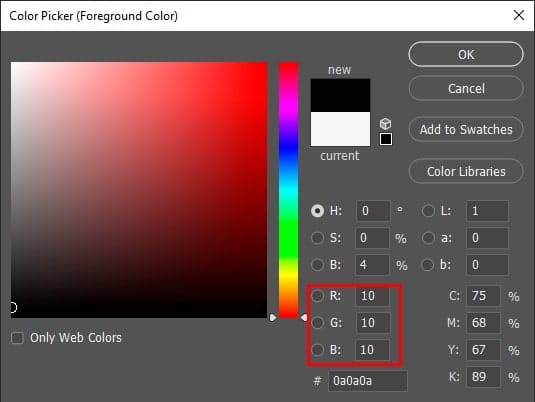
After closing, a message will come saying, “Save the new target colors as default?” Ensure clicking. Yes. The great thing is, you don’t need to change this setting again and again because this setting will save until you change it also.
So, we have finished setting the white and black point value that will benefit us in the upcoming steps.

In the upcoming steps, we will fix the overtone and color of the image.
Step 02: Add “Threshold” Adjustment Layer, which will Assist to Find the Image’s Lightest Areas
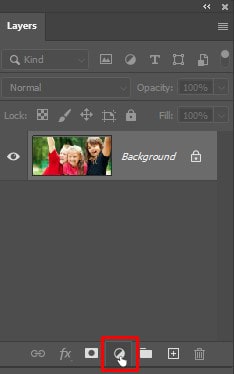
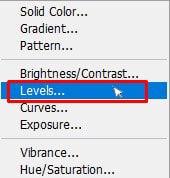
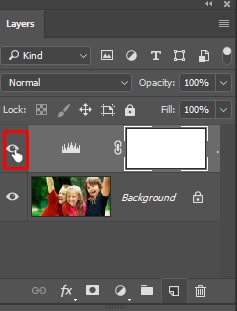
Before correcting the lightest areas of the images, we will need to find the exact areas. The good news is, finding these areas is extremely easy. You will thank the “Threshold” Adjustment Layer once you use it. Go to the Layer’s Palette, and from the bottom, select New Adjustment Layer.
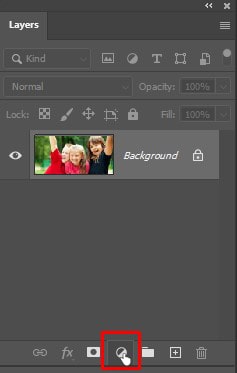
You will find “Threshold” in-between the Invert and Posterize option.

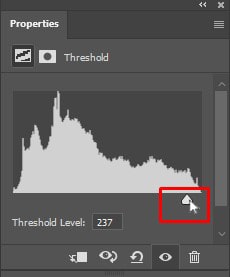
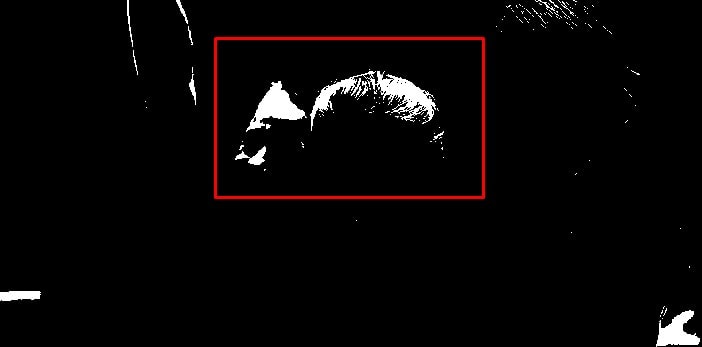
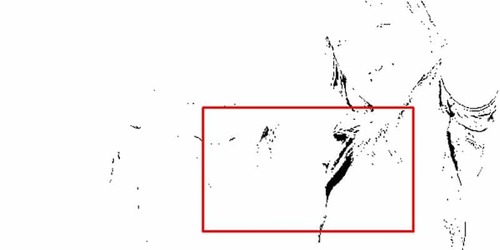
After selecting, the dialog box of Threshold will appear. At the dialog box bottom, you will find a slider. Hold and drag it to the right side. The entire image will turn black. Then hold the slider again and drag it slowly to the left side. As a result, white areas of the image will start appearing. Once you start seeing the white areas, don’t drag to the left side anymore. The white areas are the image’s lightest areas.
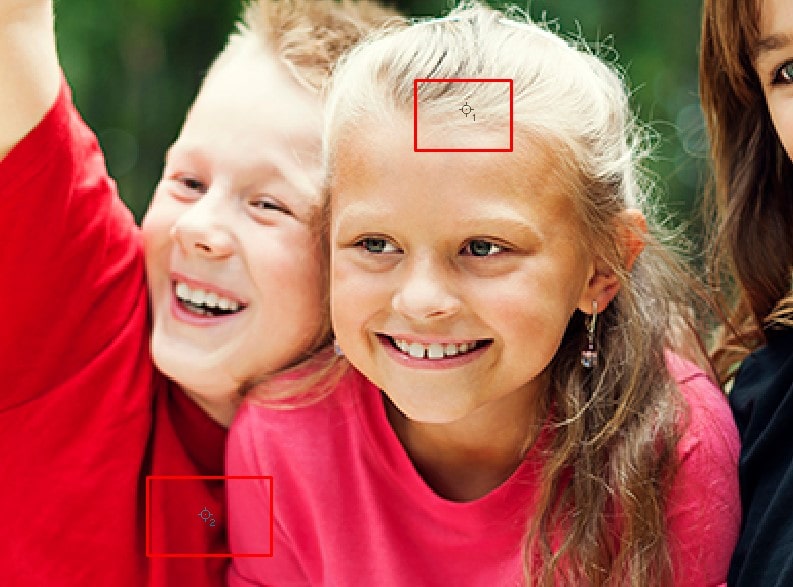
Step 03: Placing Target Marker Inside the White Area
Now we have to take the Eyedropper Icon inside the White area, and we can do this by moving the cursor over the white areas; when you see the Eyedropper Icon, press and hold the Shift key. This will replace the Eyedropper icon with the Color Sampler icon. Then, inside the white area, you will need to click, Target Marker will be placed. In the markers bottom right, the number 1 will appear in tiny form. It is called Target number, which will help us correct the images’ highlights quickly.
Step 04: Working with the Darkest Part with the Help of the Adjustment Layer Part
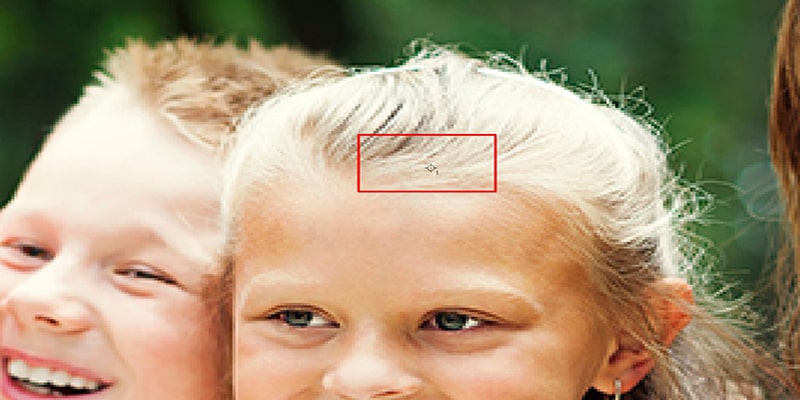
We already worked with the lightest part and gave that a number. In this section, we will work with the darkest part, and the process is quite similar to finding the weakest part. Again open the Threshold dialog box, drag the slider to the left. The image will turn to complete white.
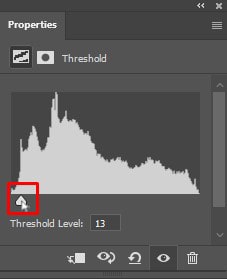
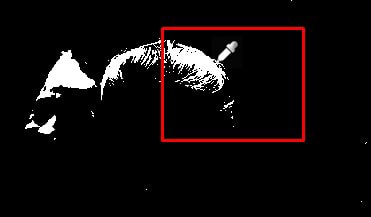
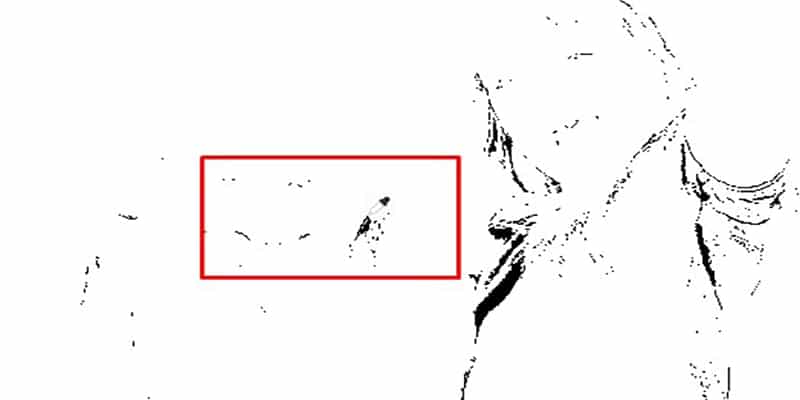
Then hold the slider again and drag it slowly to the right side. As a result, black areas of the image will start appearing. Once you start seeing the black areas, don’t drag to the right side anymore. The black areas are the image’s darkest areas.
Step 05: Placing Target Marker Inside the Black Area
Now we have to take the Eyedropper Icon inside the Black area, and we can do this by moving the cursor over the black areas; when you see the Eyedropper Icon, press and hold the Shift key. This will replace the Eyedropper icon with the Color Sampler icon. You will then need to give a click inside the black area; Target Marker will be placed. In the markers bottom right, the number 2 will appear in tiny form. It is called Target number, which will help us correct the images’ highlights quickly.
Step 06: Threshold Adjustment Layer Removing
Now, in our image, we have two targeted numbers. At the bottom right corner, the first targeted area is numbered as “1,” the lightest areas, and the second one is numbered as “2,” the darkest areas.
We don’t require the Threshold layer anymore, and we need to remove it. The dialog box has the Cancel button at the top right corner to cancel it. Both targeted numbers will disappear, but the fact is, they are merely hiding. They will appear again once we add the Levels adjustment layer, and we will do it in our next step.
Step 07: Adding Level Adjustment Layer
Again select the New Adjustment Layer placed in the Layer Palette’s bottom portion.
A list will appear and select “Levels.”
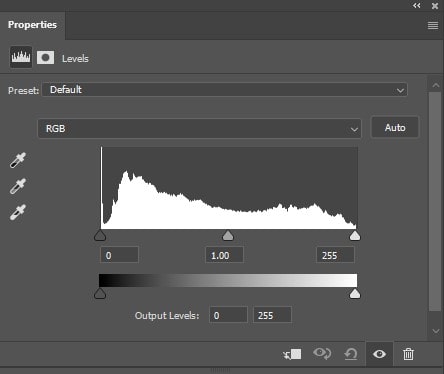
As a result, you will land in a new dialog box named Levels. As we changed the white and black points default value at the beginning of the tutorial, the dialog box is similar.
Once you look at the image intently, you will find that both targeted markers are visible with the level dialog box opened.
Step 08: Overall Tone Correcting
Correcting the overall tone and color corrections is easy now. Let’s open the White Point Eyedropper again.
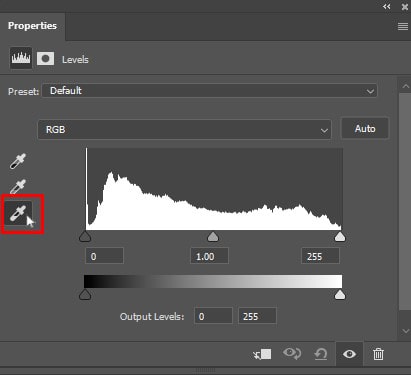
When selecting the White Point Eyedropper, click on the first targeted marker to fix the tone and color correction.
You may face a problem to line up the Eyedropper icon in the middle of the target market; to do this correctly, you have to press the Caps Lock button. Thus, the Eyedropper Icon will be replaced by Target Marker Icon.
Once they both disappear from the screen, you will know that you will completely align both target markers, at which point, correcting the highlights will require a simple click of the mouse.
Step 09: Correcting the Darkest Areas to correct color
We have successfully corrected the lightest areas. Now let’s begin with the darkest areas. Again select the Levels Dialog Box’s Black Point Eyedropper Icon.
When selecting the Black Eyedropper Point, click the second target marker to remove tonal and color imperfections from the image.

Providing two simple clicks on the mouse, we completed fixing the color changes and tonal corrections.

Find the comparison before and after the image above. The original image is on the left side, and you will see the corrected one at the right. The targeted markers are hidden temporarily, and I did this by pressing Ctrl + H (for Windows) or Command + H (for Mac).
Following the same shortcut method, you can bring them again.
Step 10: Adjusting the Center Slider to Brighten the Midtones if Necessary
Even after correcting an image, you may find that the image is still looking a little bit dark. However, you can fix it too, without any significant trouble. The Levels Dialog box has a Midtone slider; see the below image for your better understanding.
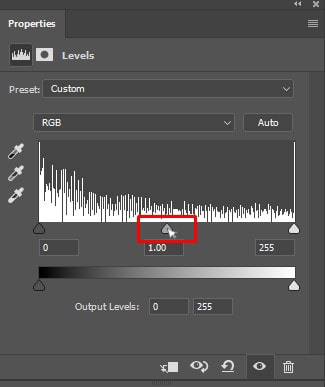
Now drag the slider to the left, and when doing so, keep a close eye on the image. The more you drag the slider to the left, the more you will get a bright picture. And the good thing is, too much dragging of the slider to the left is unnecessary because if you do so, you will get a dull looking and washed out image. Dragging the slider entirely depends on your preference and the quality of the picture.
After increasing your image’s brightness, select OK to close the Levels Dialog box, and ensure accepting all changes before closing.
Step 11: Removing the Target Markers for Color Correction
Do you think why we didn’t remove the target markers? I guessed right. The truth is, removing them is also possible.
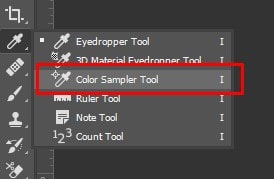
Go to the Tools Palette and click Color Sampler Tool. Behind the Eyedropper tool, it is hidden by default. Clicking and holding the Eyedropper Tool for a few seconds Color Sampler Tool will fly out.

Selecting the Color Sampler Tool, go to the top of the screen’s Options Bar, and look for an option named “Clear.” Clicking on this option will allow you to remove the Target Markers from the image.
Removing the Target Marker is not a mandatory task. It is because, when you take the print out, these Markers will not be printed. But removing them is a good idea because they are saved in the image, and you will no longer work with them.
After you remove the Target Markers, the whole tutorial of Photoshop Color Correct is complete. In the beginning, you may face problems with the above steps, and ending the entire process may take a long time. Once you practice the whole process with multiple photos, you will never face a problem to accomplish the project within a short time.
Take a glance at the original image for comparison.

And below is the final output.

Final Verdict on Color Correct With Levels
So, that’s all for today. Hope you now learn how to color correct and fix tone with levels.
Photoshop color correction is a widely used tool nowadays. This feature has a significant impact on the eCommerce sector. Moreover, in the fashion industry, professional photographers prefer this feature to enhance an image’s beauty.
Thanks for reading this article!
Read more:
Clipping Path vs. Masking: What is the Difference? With Example
How To Fix Grainy Photos In Photoshop
What is Photoshop Masking? A Complete Guide to Mask an Image