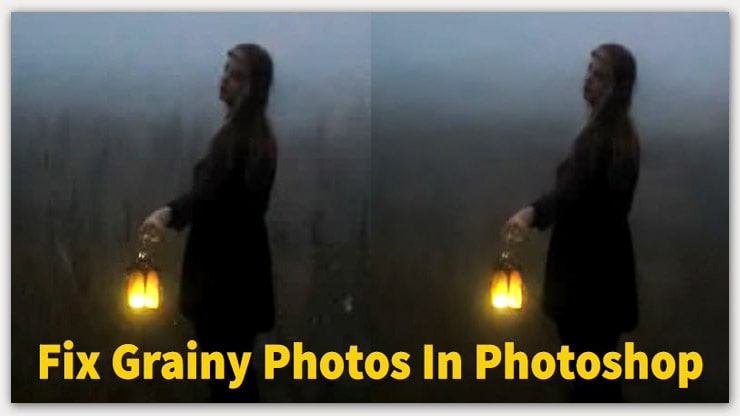
You can get grainy photographs due to low-camera quality or a darker background which is frustrating. However, you never want a distracting photo that lacks quality. This article will give you guidelines on how to fix grainy photos In Photoshop.
The workhorse photo editing apps & Adobe Photoshop software can help to fix grainy photos as Photoshop is the best photo editing tool. In this case, photo retouching is a must to fix grainy pictures in photoshop.
It’s not so easy to reduce noise in photoshop from your blurry pictures. You must follow various steps of retouching in photoshop to get grain-free pictures.
Grainy photos are not suiting in a professional portfolio or Shutterstock. However, if you are suffering from grainy pictures, go through my article, and you will get the best solution to fix the pixelated photo.
What Is Grain in Photos and Why Does It Happen?
If you take photos with your smartphone or DSLR camera, you may notice grainy images. This can be caused by many factors, including poor lighting conditions, low-quality lenses, and too much light coming through the lens.
However, there’s another reason why you might see this effect in some photographs: grains are actually present in the image sensor itself.
Image noise or grain is like visual distortion, which hampers image quality badly. This distracting defect can make a wrong impression on the digital images to viewers.
Causes of Grains & Prevention
Images that capture in daylight are at low risk of being photos grainy. But it is not possible to always shot in light. There are multiple reasons for appearing grain or digital noise in the photo.
The causes & prevention ideas are given below:
Insufficient Light
Lighting is the critical factor in producing grain or digital noise in images. When the digital cameras fail to rectify proper light, the photograph gets grainy.
Artificial lights can help corrupt photos. So, you should try a good lighting setup to avoid grainy photos.
Professional images need to be flawless & attractive. So, be conscious about lighting to get rid of grains in photoshop. You can use flash to boost your light conditions.
In the case of studio photography, you must use the reflector to reduce any dark area. This can prevent you to produce grainy images.
The image gets more grain when you use small CMOS or the CCD sensor. A big sensor contains a lot of light-sensitive spots to make a grain or noise-free image. When you use low-quality smartphone cameras, It’s natural to get grainy images.
So, you need to remove unwanted noise or fix grainy photos in photoshop.
So, you need to research & find out the exact ISO settings to avoid grain & noise but produce crystal-clear images. To make low ISO, you can use a tripod that reduces your shutter speed.
The low-quality camera also produces grainy or blurry photos. If you have a budget problem, then follow post-processing. If you don’t have a budget issue, buy a high-quality camera to get a grain-free photo.
You can choose Nikon Z50 or Canon Powershot, etc. The high-quality camera protects you from grainy shots due to their modern technologies. The chance is low in the case of an excellent camera to produce grainy images.
Grain can also occur from the film. Prevention is always a good step that makes your post-processing easier & saves valuable time. If you take enough prevention, you still get a grainy photo.
Don’t worry. I will cover the process of how to fix grainy or how to remove digital noise. Both are similar. Post-processing is the only way to reduce grain in photoshop. Let’s learn the way.
How To Fix Grainy Photos- Step-by-Step Tutorials
How often do you take photos and then realize they look grainy or blurry? If you’ve ever had this problem, you know how frustrating it can be.
Luckily, there are ways to fix these problems with photo editing software without having to spend hours editing them in post-production.
In this article, I’ll show you three simple steps to get rid of those annoying grainy images.
Step1: Open the Image File in Photoshop
Open the photoshop software from your computer. Now open the grainy photo in photoshop. Then from the tools tab select File> Save As> Rename the file name. It helps you save the original image so you can do further editing.
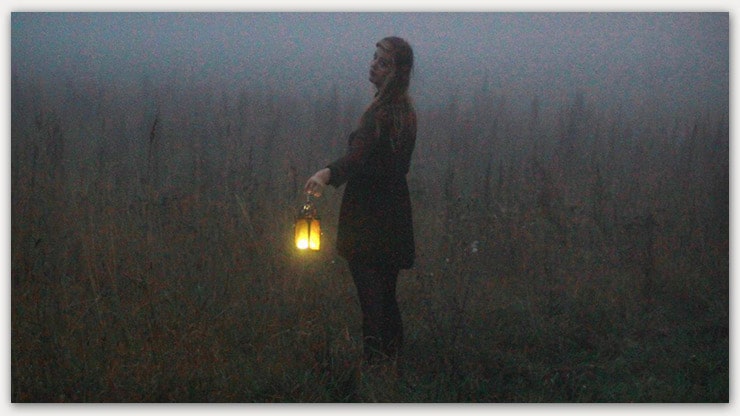
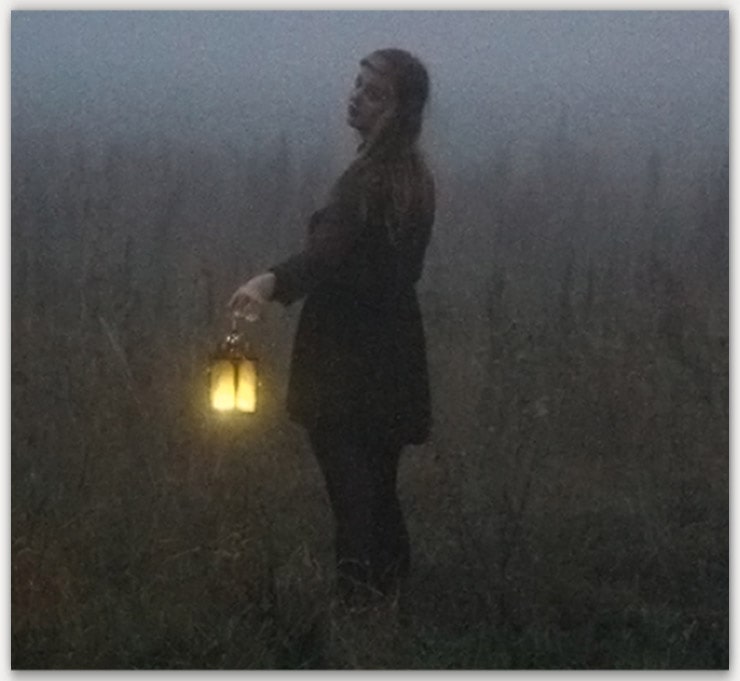
See the below image. I choose to reduce grain in photoshop. The image is too distracting & makes the picture a low-quality one.
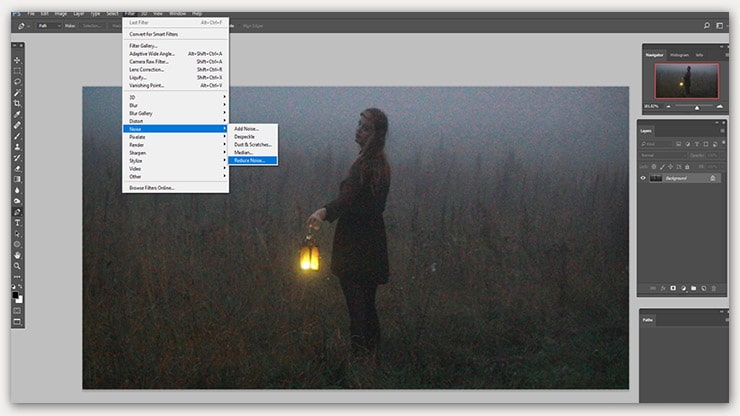
Step2: Amplify Noise Reduction Filter
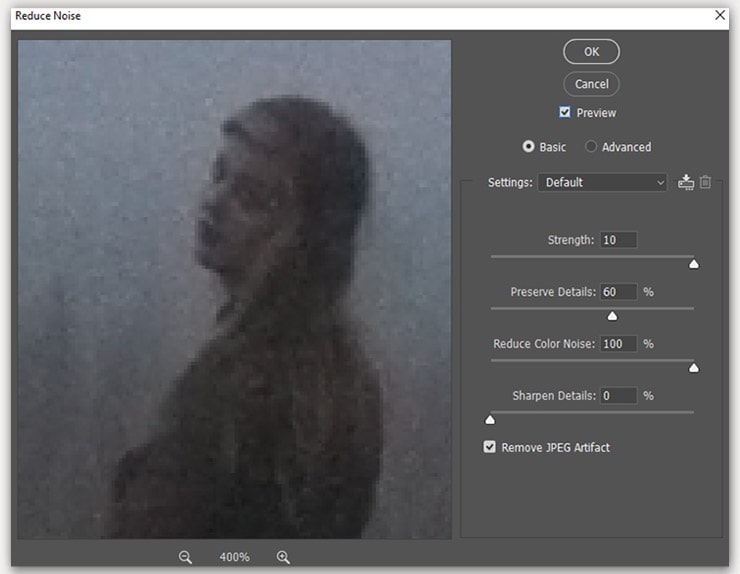
From the menu, choose Filter > Noise & then click on Reduce Noise.
When you select Reduce Noise, there is a pop-up where you get Strength, Observe Details, Reduce Color Noise & Sharpen details.
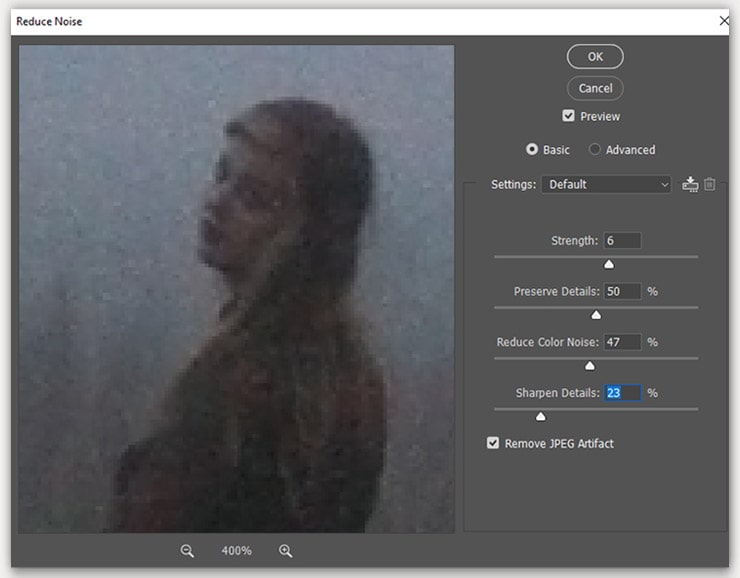
Step 3: Adjustment
Now make adjustments among the three sliders below. That is Strength, Reduce Color & Sharpen Details. You will try these adjustments to make photo-less grainy photoshop.
So, you will apply different values until you can remove grain photoshop & get the desired outlook.
After finding all these sliders’ values, click on OK to see the improvement of the image. Or you can click the Remove JPEG Artifact to check the image quality.
Finding the appropriate value takes a lot of work. Experience is an excellent way to see this value earlier.
If you fail to set the value correctly or don’t have enough time, outsource a professional photo retouching service. They can accurately set the value & give you a perfect high-quality photo.
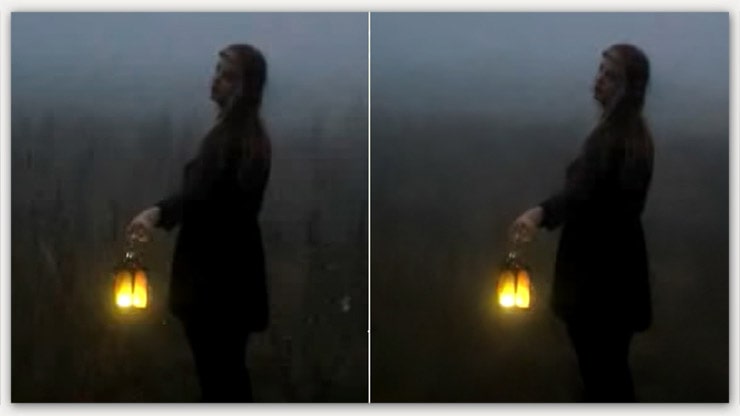
See my analysis and set the Strength value 6 to 10, reduce Color Noise to 98% & choose the Sharpen Details to 10%.
Now check the below image to see the difference or improvement in my step.
This trick is enough to minimize the grains & give you a photo that contains less-grains than I mentioned before. This is because now the remaining fixing process is becoming easier.
As you can compare the before & after effects quickly, I attach both photos here. See both qualities & visualize the change.
Step 4: Refining Works With the Smudge Tool
After completing step 3, if any part of the image is still grainy or dull, you need to select the smudge tool from the toolbar. If you like perfection, zoom in on the photo.
Now, select the grainy areas in photos & scroll over those specific areas. It will convert the grainy areas into sharper & smoother regions.
Step 5: Fixing Imperfect Parts With Blur Tools
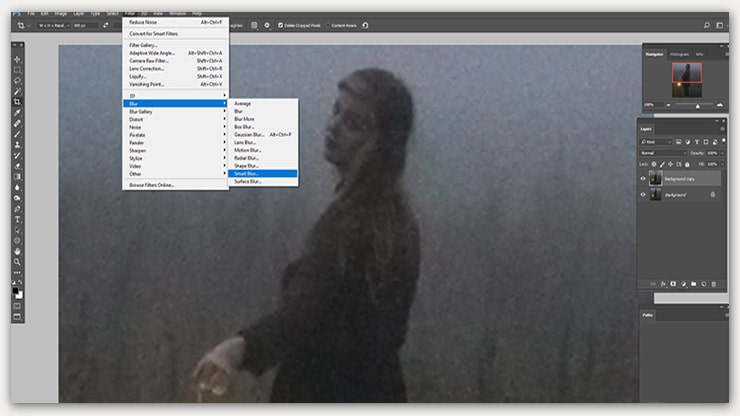
Another tip you can try the “Blur” tool. Suppose the image contains grain till now, select Filter> Blur > Smart Blur. See the below photos.
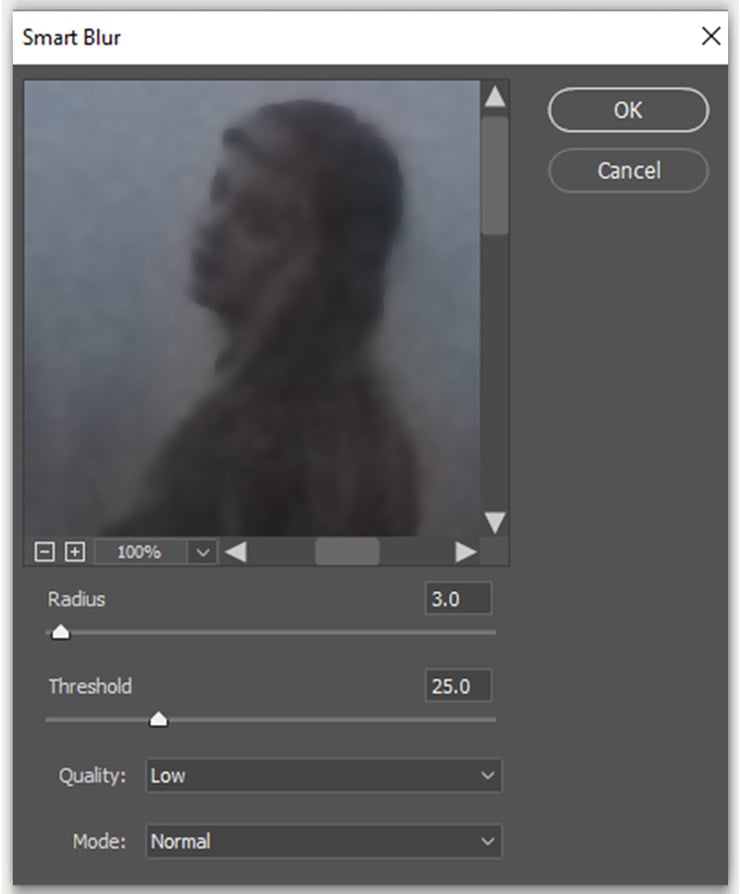
When you click on Smart Blur, you will get a new pop-up where you will find a new slider to adjust the sharpness of the image.
You can select the slider value to derive the exact sharpness. This step is similar to step 3. Suppose you need clarification or more support as you are not an expert. You better take help from Clipping path service or Photoshop services.
I frequently take help from them to save my time & they do magic. I was impressed with the image quality. The experience is always essential to remove grain in photoshop.
The professional service provider knows the tricks to find the perfect value to give a fantastic outlook.
After fixing the adjustments, click on OK to save your work. Additionally, you can read refine edge in the photoshop tutorial.
You may read:
How to Color Correct And Fix Tone With Levels In Photoshop
Product Photography & Post-Processing Tips for Beginners
Outsource Photo Editing Service to Fix Grainy Photos
It isn’t easy to make your images completely grain-free. You can reduce the graininess of photoshop that looks prominent.
However, in the case of close-up shots & nighttime photos, situations are more complicated. In this case, it is pretty impossible to delete grain.
You better outsource the best photoshop service for this complicated grain fixing. Some photo retouching service providers have an experienced team to make your images grain-free.
However, if you are a person who wants perfection to make your pictures standard & unique, there is no alternative to outsourcing a photo retouching service.
The Clipping path service provider can cut the grainy background & attach a prominent one that matches the subject. Removing the background with a hand-drawn clipping path is a challenge. It needs attention & efficiency.
If you try my tips & tricks properly & have a keen eye on that case, you can do the magic by fixing grainy or noisy photos in photoshop. You need practice, dedication & experience.
It’s all about your editing skill & assumption power to improve the image quality accurately.
There is some exception in the case of detailed images where you need to take photoshop service. If you are a seller or professional photographer, you know the value of a high-quality picture. Online business robustly depends on images.
So, always strive for image quality for a little bit of money. But it can ruin your business. So, pick the best affordable photoshop service to derive into digital photos that can grab the client’s attention & bring fame to your company.
Final Words
My tips & ideas will reduce noise in photoshop. If you are suffering from grain, apply my tricks to get rid of grain in Adobe Photoshop Express. I also share some prevention ideas to make your task easier.
If you still face grainy issues or excessive noise after all these steps, you need to outsource the photoshop service. So, this is a complete solution to fix grainy photos in photoshop.
If you want to make your image stands out or talk of the town within the million’s web photos, apply this process. You will get highly professional eye-catchy images that fulfill your dream.
To get the best result, you need to experiment with my steps smartly with grainy pictures. If you can apply tricks correctly, you must get vivid results. There are many processes to fix grainy pictures, but It’s your choice.
You may also read: