White background product photography helps a successful e-commerce business. whether it’s Etsy, eBay, Shopify, Amazon, or anything. Having a crisp, clean product photograph is the pillar of brand promotion. It will help you get sales by assisting customers in understanding what it is that they are buying from you.
Mind it; people dredge up 80% of what they see and only 20% of what they read. So, the phase of using beautiful product photos must be addressed. If you are not including your images on your selling profile, then, for sure, you are going to lose some severe sales margins.
With this complete discussion, we will help you learn why you need to consider this a mandatory aspect and why it’s important to succeed in eCommerce or any product business.
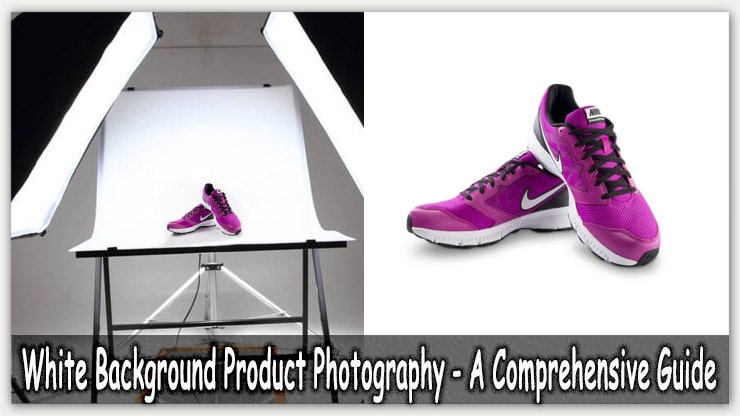
What is White Background Product Photography?
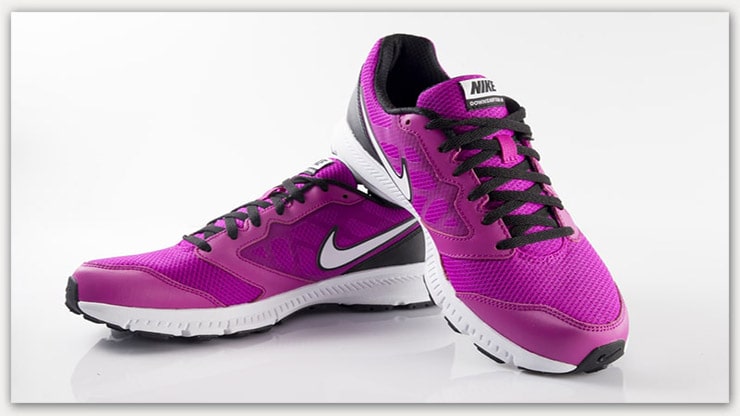
White background product photography is the practice of photographing products on a pure white background. This is done to create a sense of minimalism, which helps to draw attention to the product itself and not any other distractions.
White backgrounds are also beneficial in that they can make it easier for customers to visualize what their purchase will look like in their home or in their person.
Additionally, white background is often used for product photographs that will be featured in advertising campaigns or on websites and social media pages.
Advantages of Product Photography with White Background
There are so many advantages of product photographs with white backgrounds. The editing will splendor much more if you can do good photography.
It doesn’t mean you have to get a full-packed professional setup. Let’s look at how you can shoot product photography in a budget-friendly way.
Well, the question remains for all marketers or e-commerce entrepreneurs: why should you use a white background when shooting product photos? However, the reasons are apparent. These are –
Easy to Edit
Since editing photos often requires attention from brands, one can do quick editing if the product image is on a white background. You can change the background color or do brand-related background editing if required.
Detailed Product Demonstration
According to marketing experts, your target customers prefer to view a product image with proper detailing, as the first impression is the principal force behind a conversion.
The prime aspect of using a white background is viewers can get a complete and detailed glance at your product demo.
Campaign Acceptance on Multiple Channels
As an e-commerce business person, you want to spread your product marketing stunt on different platforms.
We should let you know that some of the effective product marketing and selling websites, like Amazon, emphasize more on product photographs with white backgrounds or RGB (255,255,255).
Cost-efficient Product Showcasing
You don’t require a lot of investment on a professional green screen set up to shoot your product or merchandise.
Any household clothes, fabrics, or papers can be used as a background. It’s cheaper and easy to proceed. Hell yeah, that is all you want. Right?
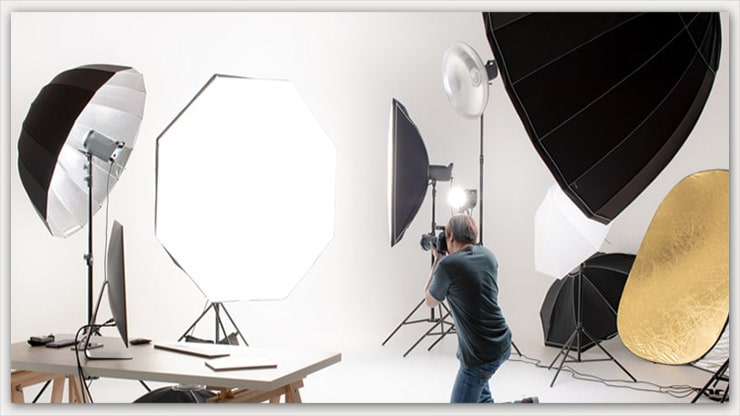
Equipment for White Background Product Photo Shooting
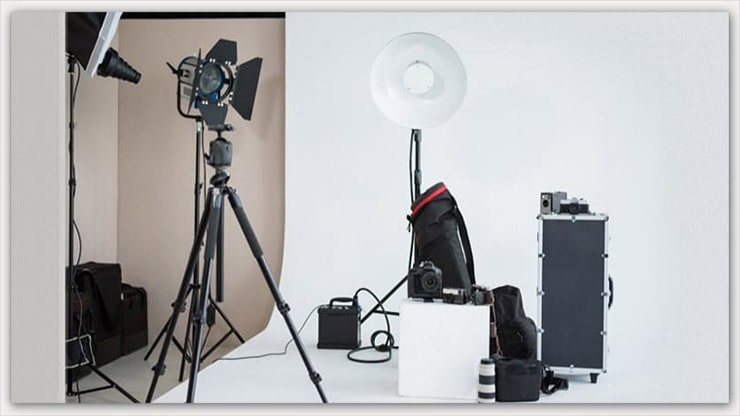
Before jumping into the details of the photography process, you should organize the essential photography equipment.
Camera for White Background Photography

It’s possible to tackle photography with a smartphone with an excellent camera specification. This is the most cost-efficient way for DIY photographers to capture product images. Here are some of the best camera phones for product photo shots.
- iPhone 13 Pro & Pro Max
- Xperia PRO-I
- Galaxy S21 Ultra 5G
- Samsung Galaxy S10
- Apple iPhone 12 Pro
- Google Pixel 6 Pro
- Huawei P50 Pro
But if you have enough bucks to invest in a DSLR or a professional photographer, it’s always appreciated.
Tripod for Camera
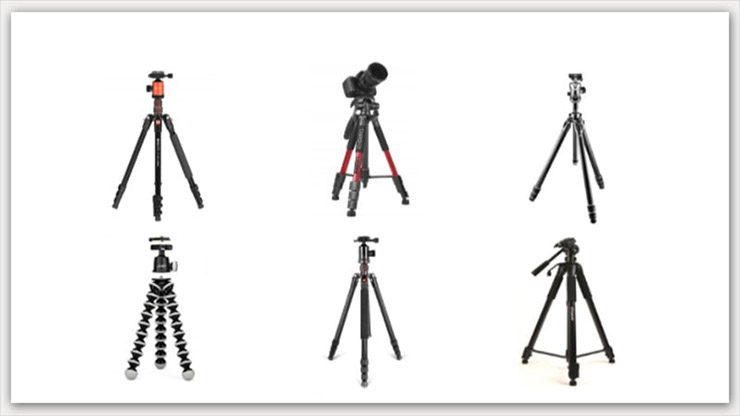
Generally, the tripod holds the camera or smartphone in the right position. It’s necessary to have a tripod because, in diy product photography, you cannot rely on your hands as they always shake.
Therefore, the chances of getting blur photos or wrong focus points will appear on your output image. Furthermore, the undeniable stuff you need is the white background material. You can use a white fabric like a window curtain or white wall as your background.
Also, you can get pieces of white poster board from your local store only for 50 cents. Whatever you use, make sure it’s bigger than your object.
Lights for Shooting

You can consider flash and regular bulbs to lighten the object and background. Usually, 100 watts of bulbs are enough to tackle the situation. You can also watch some tutorials on Youtube to learn how to make DIY lights for photography.
Table for Shooting
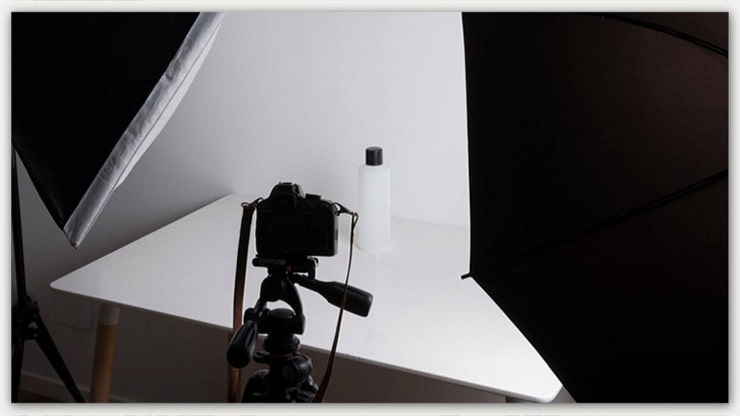
The shooting table is where your product will stand or lie down as a model. If the background is formed with a mounting paper studio and you have a toy as a product, then a shooting table is the best way to frame a scene.
Reflector to Optimize Unnecessary Shadows
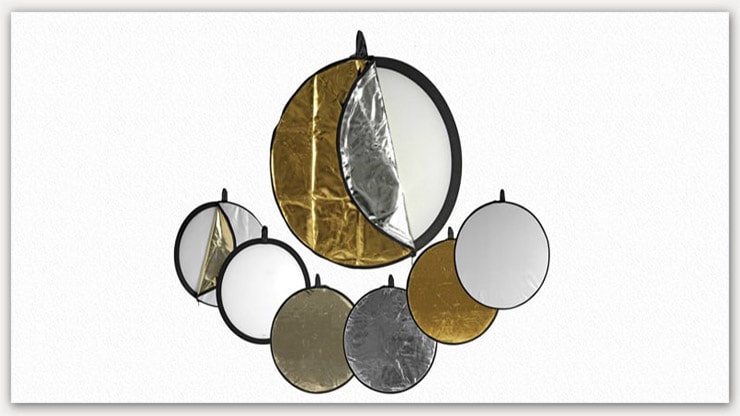
Consider using a reflector depending on the lights and captured results. Reflectors are used in photography setups to optimize unnecessary shadows from the frame.
Lighting Setup
For white background product photography, we will show three methods today. You can go forward with any of these as your preparations.
Setting Up Flash Lights
Ideally, your flashlight will have an umbrella on it. The flash could be mounted on the camera or right at the point of it. You should ground it 2 feet from the subject for photography or filming.
If you use one light, which is common in this scenario, you must place your product 8 inches from the background.
Now, it’s important because we need that one light to illuminate the product and the background.
Remember, if you have this light or the product too far away from the background, you will lose the background to gray. And that will defeat the purpose of what you want to achieve. Usually, the flash is set to 1/4 power if you use one.
When you capture a photo with this setup, you will see everything’s fine, but a shadow is showing off on the camera’s left side of the subject. It is because the light is coming from the camera’s right side.
There is a super easy fix for that. All you need to do is take in the reflector and place it on the camera’s left side. Ensure the reflector is not showing in the Image; keep it out of the frame. And then prop it up with something.
Now, if you take a photo, you will see the shadow is eliminated by bouncing light back in on the subject.
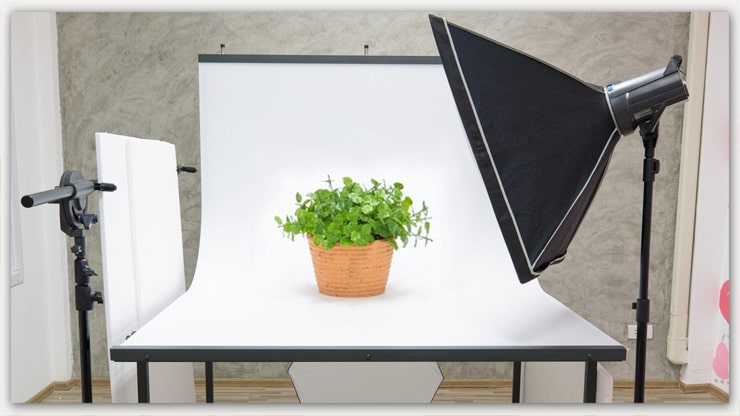
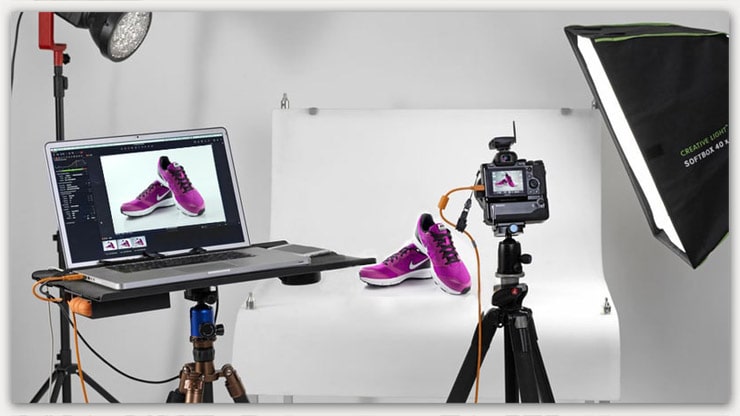
Setting Up The Light Box
For setup number 2, you are going to need a lightbox. You can find it on Amazon in different budget ranges.
Here, your light is positioned on the camera’s right side, pointing at diffusion material in the lightbox towards your subject. The camera settings and flash settings are both identical in this case.
There won’t be any shadow when you photograph with this setup.
Fortunately, it happens because your lightbox has a built-in bounce panel that bounces the light back in to fill those shadow areas we got from the first setup.
Utilizing The Natural Light
For this following setup, we are not using a flash. Instead, we are using two continuous lights. If you have a lightbox, you can do this by placing them inside the box.
Don’t worry.
You don’t need LED lights, as some professionals use. You can use clamp lights from your local hardware store or other lights to control the directionality.
That said, this is how the complete setup will look – two lights on two sides and your camera in the middle of them. You have to put the subject very close to the background. Try to put it about 1.5 inches away from the background.
Then, your right and left cameras are both about 8 inches to 8.5 inches away from the subject.
All camera settings will remain the same without the sync speed. Change it to 250th of a second. To learn more about the camera settings, hover over the next section.
Camera Settings
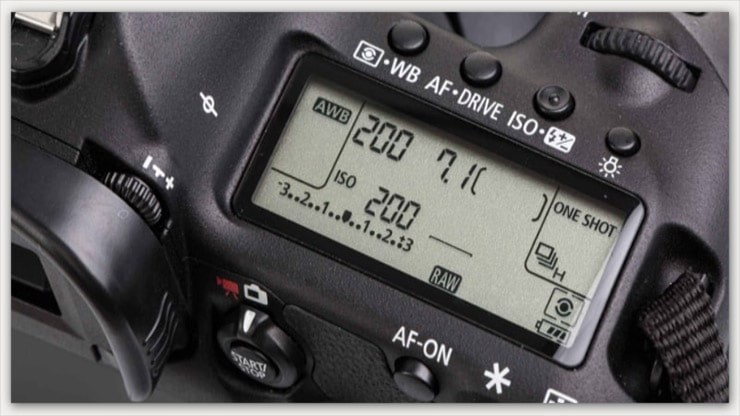
The basic camera setting required is ISO 200, which is the lowest in some DSLRs. Use F7.1 to ensure your subject is entirely focused from front to back. We prefer using 160 seconds or the maximum sync speed available on your camera.
However, an important note here is that your camera settings will vary depending on the lights you use to illuminate your subject. So, what is mandatory here is how you set up the subject, where it relates to the background, and where those lights are.
7 Tips to Edit Product Photographs in Photoshop with White Background
We will share the editing process from the firmer perspective of someone who already knows Photoshop and has well-versed in that photo editing software. And this is to share an idea about the perfect white background editing and making process with 7 simple tricks.
Tips 1: Using the Selection Tool
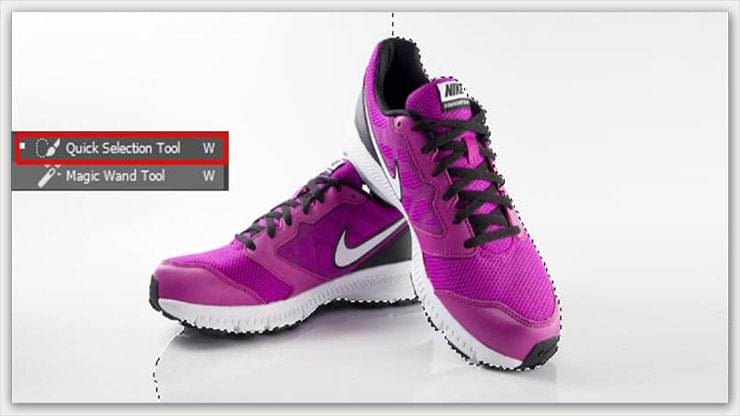
First, we open up the product photo in Photoshop that is captured with a white background. Then, we will select the Selection Tool and then select the Image. Here you will see there is an extra unnecessary area around the picture.
So, select the Minus Selection Tool and select the extra area. When the selection is complete, then press the Delete key, select the White option, and press Ok.
Tips 2: Using the Magic Wand Tool
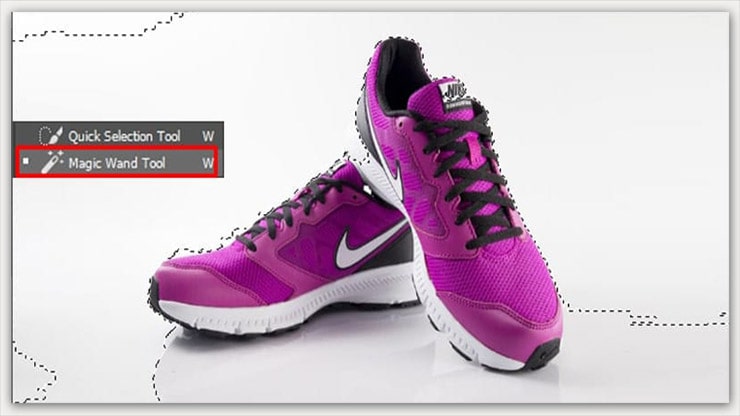
For the next trick, we will use the Magic Wand tool. Click on the icon from the left bar and then select the Image. Follow the same process as the first trick. Now, we will click on the Select option, click Modify, and select Features at 0.3 pixels.
It is necessary to get a smooth round area. Click on Done. Press the Delete key to open the Fill popup window. Select the White option from the Context part and click on Ok.
Tips 3: Modify the White Background Using Curves
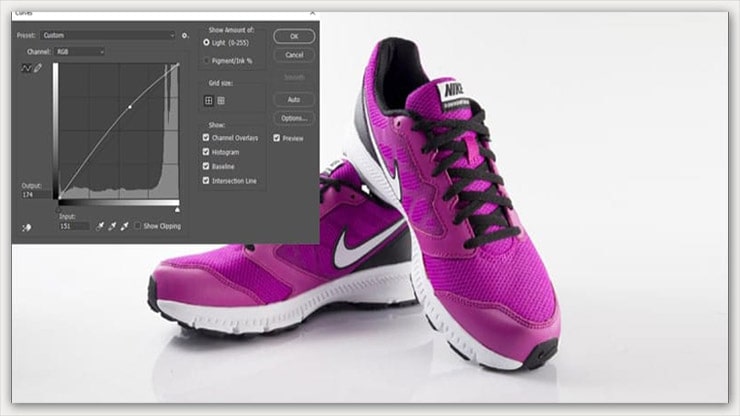
Go to Image from the upper panel and click on Adjustments. There are select Curves. You can use Ctrl + M as a shortcut also. In the pop-up window, select the third eye drop icon and click on the white background parts of the Image multiple times.
Change the input value according to your satisfaction and click on Ok.
Tips 4: Adjust the White Background Using Levels
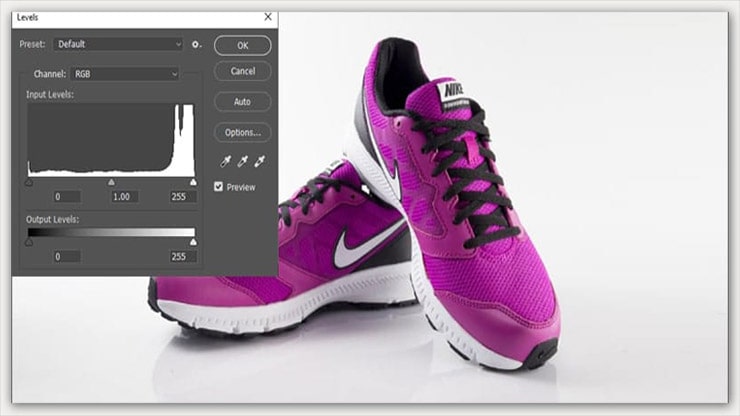
Like before, click on the Image> Adjust and select Levels this time. Alternatively, you can use Ctrl + L also for a quick jump. Select the third eye drop icon and click on the white backdrop of your product image. Change the Input Levels as needed and click on Ok.
Tips 5: Edit White Background by Replacing Colors
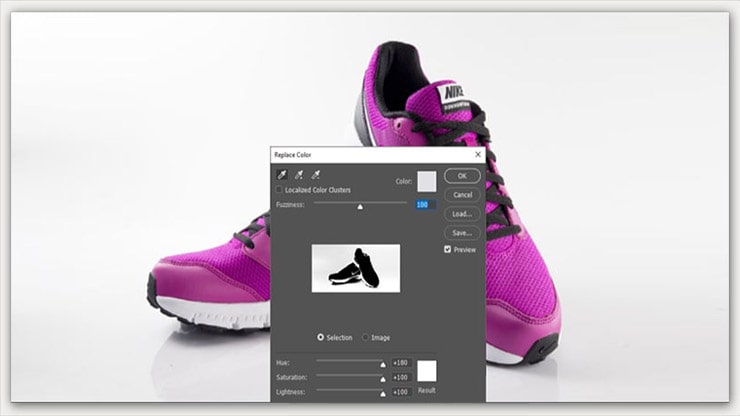
In the fifth trick, we will jump onto the Image again. Then click on Adjustments and select Replace Colors. You will see a popup window will appear. There, click on the Plus Eyedropper tool and click on the desired area.
Use it like a brush to remove the shadow you can see in the preview. Then select Lightness to 100% and press Ok.
Tips 6: Adjust Background with Rectangular Marquee Tool
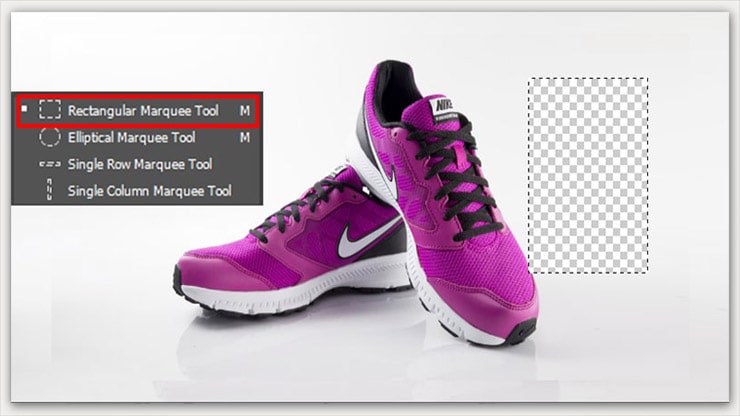
We can find the tool again in the left toolbar section. After picking the device:
- Select the background area of the product image.
- Click on the Select option and select the Similar option.
- Click on different areas multiple times.
- Press the Delete key to open the Fill window.
There again, like the White option and click on Ok.
Tips 7: Edit Background with Pen Tool
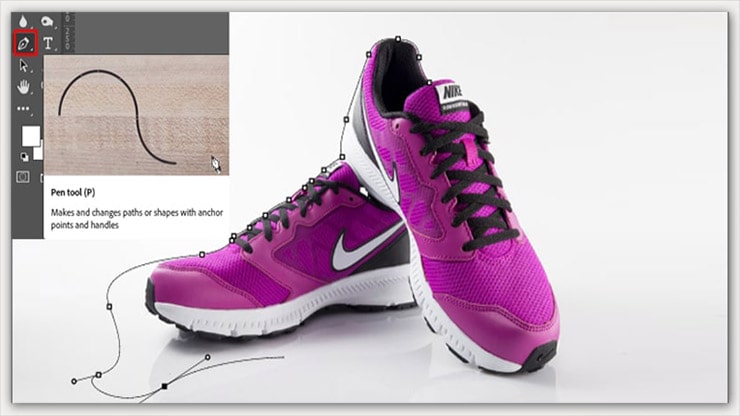
In the final trick, we will use the Pen tool (this technique is known as the clipping path service) use for making selections for background removal. You can find the tool in the left toolbar section. Now, mark the main subject body part first.
If you are done with marking, right-click on the mouse, and from the popup, select the Make Selection option. Change the Feature Radius amount to .5 pixels and click on Ok.
These are Photoshop’s 7 tricks to edit product images on a white. If you can follow all the tricks properly, you can easily blow up your product image white background. Though ultimately, professional touch requires some extra effort.
Why You Need a Professional Product Photo Editing Service
We have said before that any product photographer could start editing their photographs. But, we believe everyone has their job to perform – a marketer should focus on marketing, and a designer should not enter his nose into that business.

As you are the ambassador of your business, you should only focus on the margins. We are here to tackle any of your product presentation needs. With our nearly decade of editing experience, we know how to express your message through your product pictures.
So, reach out to us if you want to eradicate the hassle of the objective of editing white background product photos. We will get back to you with quotes that will suit your budget. And remember, 100% revision support is always our commitment to start.
Conclusion
A white background is an essential part of any e-commerce photography. It helps to showcase the products in a professional and attractive way, making them more appealing to customers.
By following the above-mentioned product photography tips, you can easily get a white background product picture. However, if you want to ensure that the results are perfect and professional, it’s best to outsource this task to a professional product image editing service.
They have the expertise and experience needed to produce high-quality results, making your product stand out from the competition.
Learn more: