Removing white Backgrounds in Photoshop is an everyday task for photographers, graphic designers, and digital artists.
Whether you need to cut out an object for a product shot, create a transparent background, or achieve a specific aesthetic effect, knowing white background removal is essential.
In this article, we will show you the step-by-step process of removing the white background of your image in Photoshop.
We will cover various techniques, such as the Magic Wand tool, the Quick Selection tool, and the Color Range tool.
Additionally, we will explore more advanced methods like the “remove background” button using the Magic Eraser Tool, layer masks, and refining edges for a seamless result.
Whether you are a beginner or an experienced background remover, this guide will help you remove the white background from images and get professional-looking results.
Here are 05 methods you can follow to remove the white backgrounds quicker than the methods you approach. So, let’s not talk further and jump straight into the methods to learn “How to Remove White Background in Photoshop.”
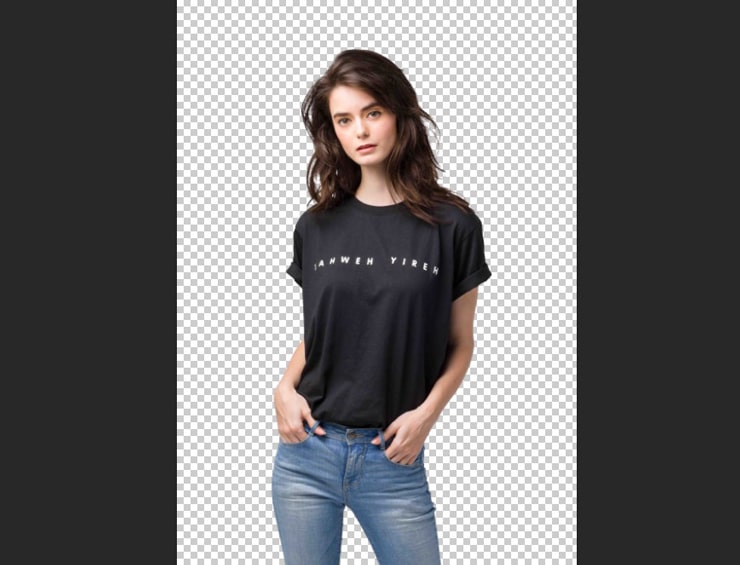
Remove White Background in Photoshop
A white background color of an image is not always pleasing. To make a picture of the next-level creation, we sometimes need to remove white backgrounds. Later, we can add another environment that suits the image subject the most.
But if you fail to delete or change background from images like photo editing experts, you will ruin the beauty of the image. Generally, professional-level editing takes a long time to provide the best output.
(Method 01)
Remove White Background Using “Remove Background”
You can approach this method only if you have Photoshop CC 2020 or the newer versions. So, if you have a previous version of Adobe Photoshop, skip to the following technique. The “remove background” is a button that you will find in the “Properties Panel.”
It can create a selection and apply it to a layer mask. This option will cut a photo and provide a transparent background by eliminating the white one in just a click. It doesn’t require manual selections.
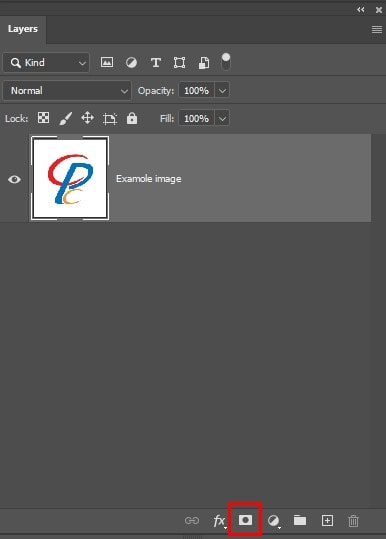
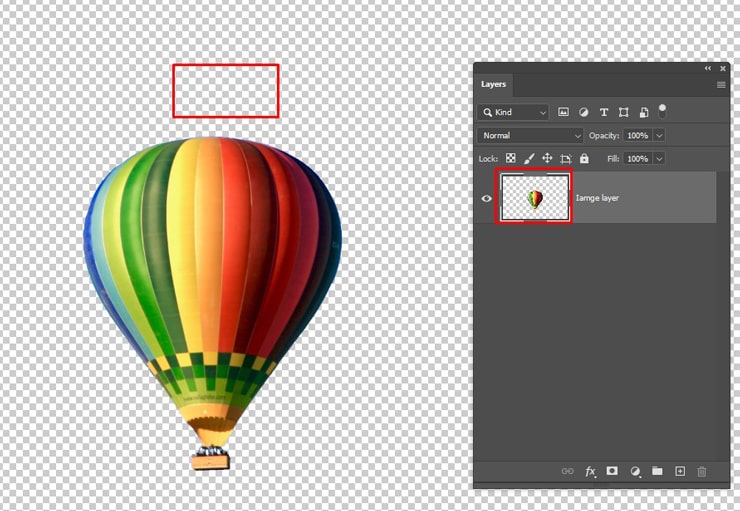
Step 1. Choosing the Image Layer
The first thing to do is choose and unlock your photo layer from the Layers Panel.

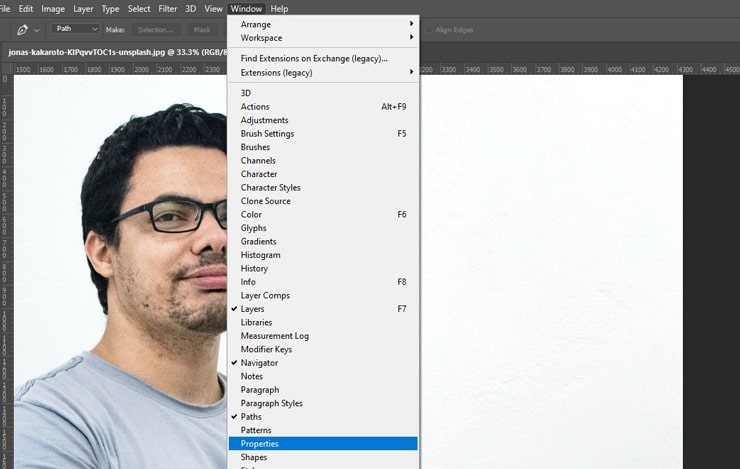
Step 2. Opening Properties Panel
Now, go and open the Properties Panel. If you can’t find this option, click on Window > Properties, and the panel will open.
Step 3. Clicking on “Remove Background”
Scroll down to the Properties Panel to find the “Quick Actions” option. After clicking, two buttons will arrive. One is “Remove Background,” and the other is “Select Subject.”
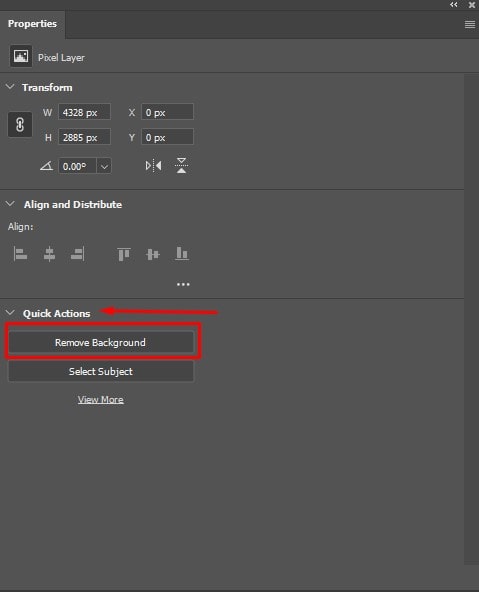
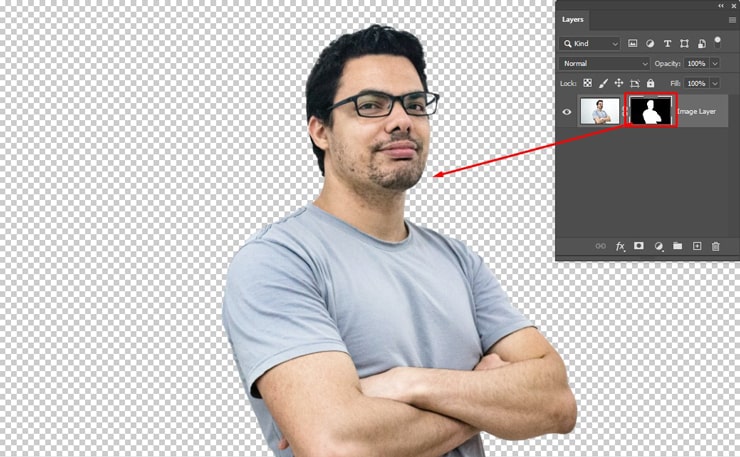
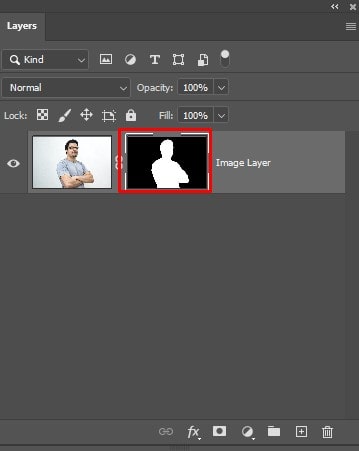
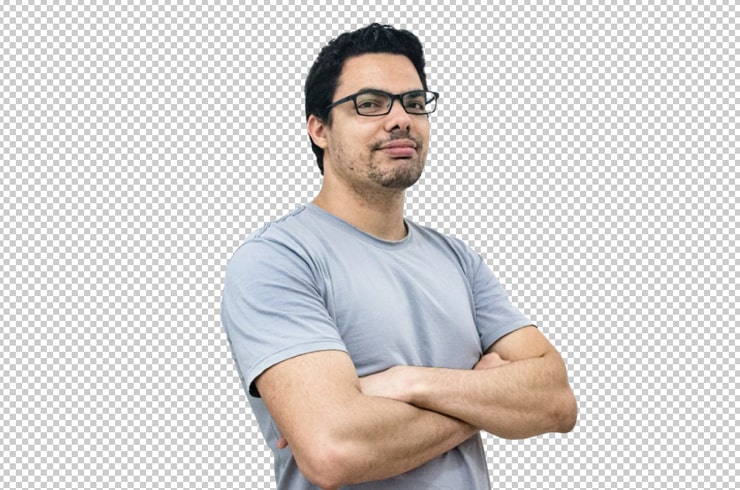
If you only click over the “Remove Background,” it will make a selection of your image subject and apply it on a layer mask. After clicking once, you will get a cut-out picture with no background.
But if you made a mistake and want to refine the mess, using “Select Subject,” you can fix the mistake because this option can automatically select the photo’s subject but doesn’t apply any masks. After you have removed the background from images, it is time to refine it.
Step 4. Refining the Newly Made Layer Mask (If Required)
Sometimes Photoshop also makes mistakes, and when removing a background, it may eliminate some portion of the image. Fortunately, you are allowed to adjust it with the layer mask. But how will you do it?
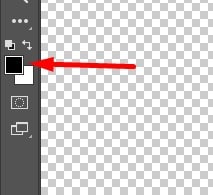
It’s simple; at first, click upon the layer mask to select it.
Second, pick the brush tool and choose white as the foreground color. On the contrary, to remove some areas, set the black as the foreground color.
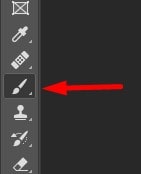
To properly refine the image, paint over the missing parts. Then, Photoshop will add back all the removed portions of the picture.
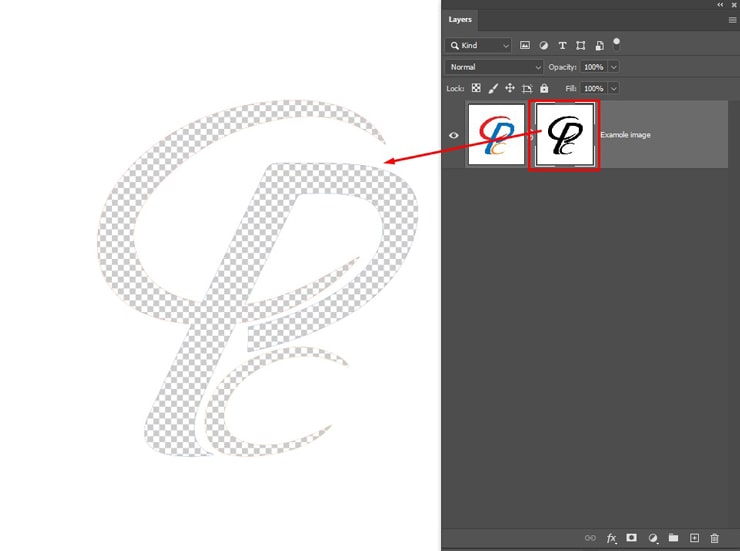
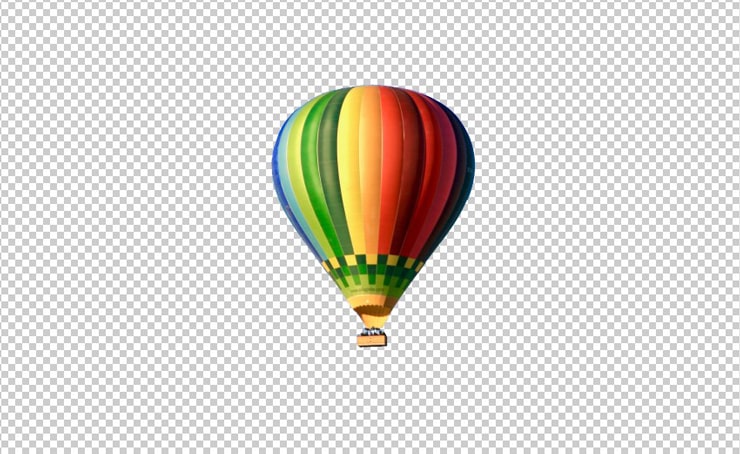
Step 5. Get The Result
You will get the output now that will have a transparent background. You can save the file in PNG file format. ( If you save images in JPG format, it will forfeit the transparency)
(Method 02)
Cutout White Background from an Image Using the “Magic Wand Tool”
The magic wand tool can give you a professional-level background. In addition, the device can make selections depending on the similar color of the photo.
However, you need to use it the way expert image editors use it because it works great with only some particular settings.
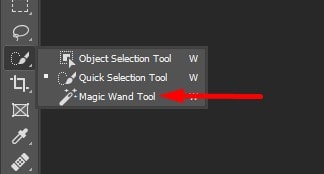
Step 1. Selecting the Tool
You can access it in two different ways. One way is by pressing the “W” on your computer keyboard, and the second way is by finding the option in the toolbar and then selecting it.
Sometimes, you will not find the option directly in a few older or newer versions of Photoshop. In such cases, choose the Quick Selection tool because it hides the Magic Wand tool.
Step 2. Choosing Sample Size
After selecting the tool, you are required to set the sample size. Set it to “T by 5 Average” or “Point Sample.” These options are used to choose the amount of sample colors you want to consider.
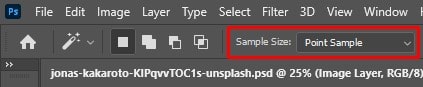
The “point sample” option works best when the photo has a solid white color background under a graphic. On the other hand, if the white background has various shades, the “05 by 05 average” option will be better.
Step 3. Setting Tolerance
The following job is to set the tolerance. Please set it to 25 since this value is considered outstanding output. However, if your image contains white color with different shades, it’s better to put your tolerance to 50 or 60, depending on the image requirements.

Step 4. Checking the Anti-alias
You will find the Anti-alias option on the right side of the tolerance. Make sure to tick on the option.

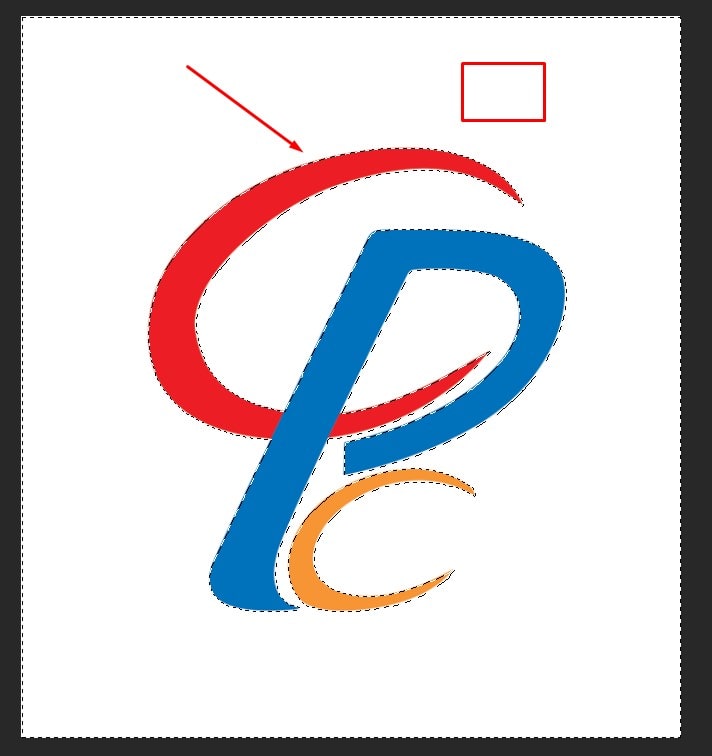
Step 5. Creating a Selection
By clicking upon the white BG, make a selection. Photoshop will collect the color samples from wherever you click and pick a similar color.
Step 6. Apply the Selection
Since the selection is inactive, you must apply it on a layer mask to make the background transparent.
Go to the Layers panel located at the bottom and click over the layer mask.
Now press Control + I (on Windows? Or Command (on Mac). It will make the subject visible again by inverting the layer mask.
This way, you will have the image without a background.

(Method 03)
Background Removal with “Color Range”
The Color Range Tool is very effective in eliminating all of one color. The color can be white or any other.
The color range tool is the best background remover for automatically removing backgrounds from images with a solid or gradient backdrop. The steps below will help you quickly get a transparent background from the white one.
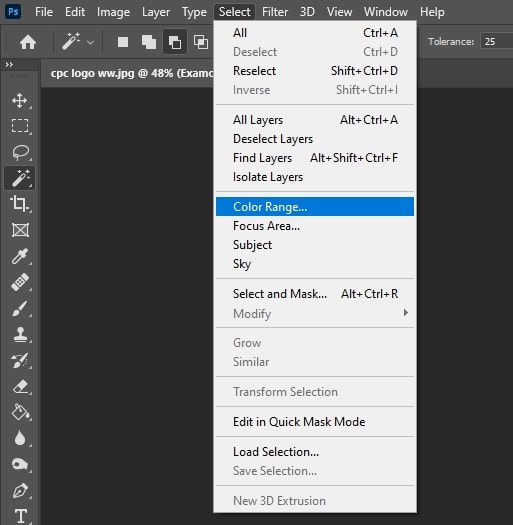
Step 1. Clicking on Select > Color Range
First, select the layer of your image and then Click on Select > Color Range.
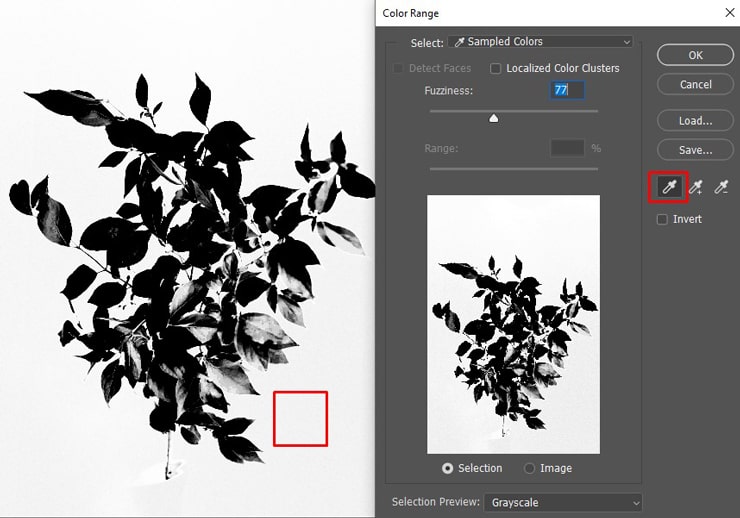
Step 2. Collecting Sample
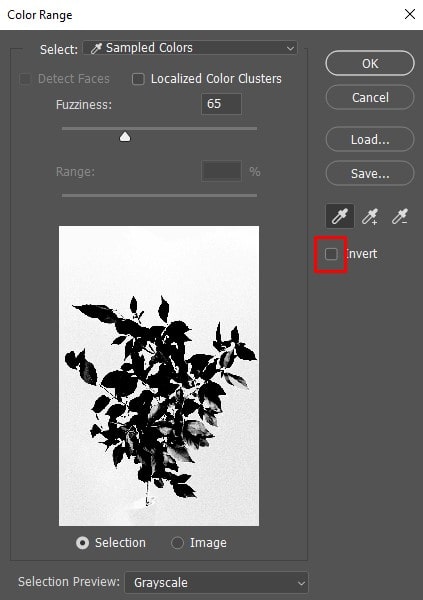
A dialogue box will appear where you will see the eyedropper tool is already selected. Now, you have to sample the white color to make a selection.
Step 3. Refining It
Generally, people get an accurate selection with one sample only. However, sometimes the selection does not look pretty fitting, meaning it’s not entirely white. In such a case, you better refine it.
The sample will automatically be reset by default when you click over a new region on the picture. Once you get the excellent background sample, to refine it, you can subtract some portions of the image or add using a few simple keyboard shortcuts.
To subtract a portion, press Alt (on Windows) or Option (on Mac) and keep clicking over the colors you want to remove from the sample. To add to the sample, click on the parts you want to fill with white paint while pressing the Shift key.
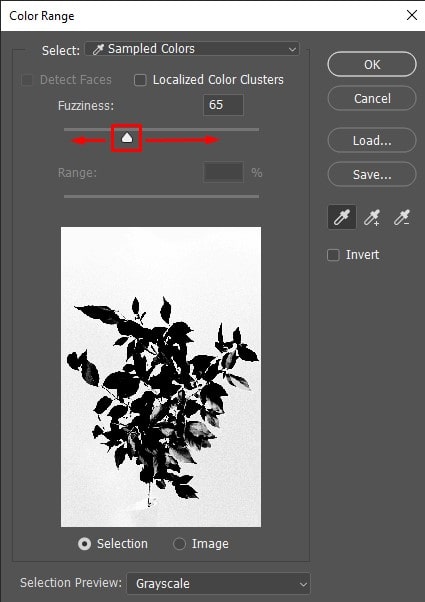
Step 4. Adjusting Fuzziness Slider
This option helps you control the sample’s shade tolerance. For example, if your background has multiple white shades, you can increase the fuzziness slider to add all those shades to the selection.
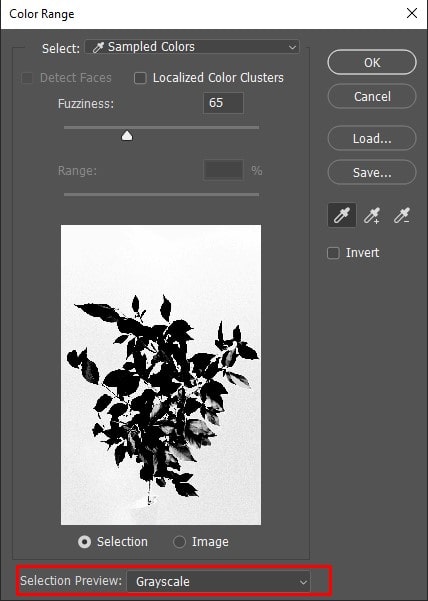
To preview your changes, click on the Selection Preview and choose Grayscale.
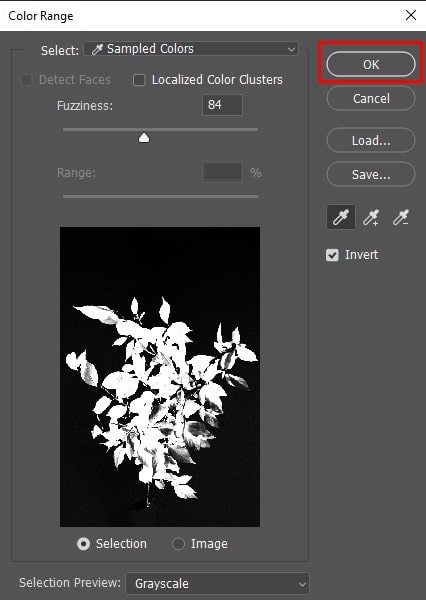
Step 5. Inverting the Area Selected
If you are OK with the sample settings, then click on the option “Invert.”
Step 6. Press OK
Now press the OK to make a selection.
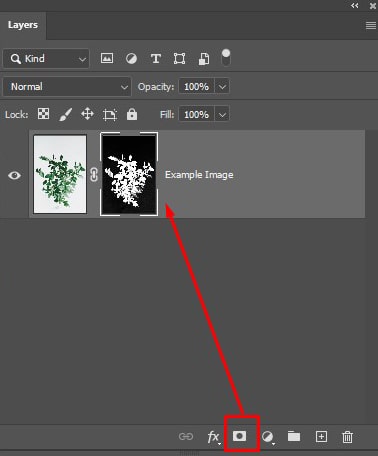
Step 7. Add Layer Mask
While the selection is active, click over the picture to apply a layer mask, and the white background will be removed.

(Method 04)
Remove the White Background from the Image Using the “Magic Eraser Tool.”
The Magic Eraser tool and the Magic Wand tool work almost the same in removing a white background, except for one difference. The only difference is while the Magic Wand tool works non-destructively, the Magic Eraser tool works destructively.
It’s capable of deleting the background permanently. So, if you are looking for a straightforward way of removing the white background, this will help you.
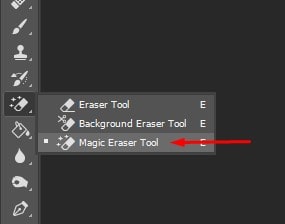
Step 1. Choosing the Tool
By pressing over the “E” on your computer keyboard, you can access the Magic Eraser tool. If this way, you fail to get access, click the Eraser tool and hold it for a while. The Magic Eraser tool will be revealed.
Step 2. Setting the Tolerance
Find the Tolerance option at the top setting bar and change the tolerance there. For example, please set it to 25. However, the more white shades on the image require higher tolerance.

Step 3. Checking Anti-alias
To keep the remaining settings the same, tick on the Anti-alias option.

Step 4. Setting Opacity
If the opacity is not set to 100% already, fix it to at most by yourself, or the white background will not be eradicated.

Step 5. Removing the Background
Select the layer of your image and click over the white. This way, Photoshop will first sample it and then delete it.

Sometimes, you might unexpectedly delete something you didn’t want to remove. Don’t worry because by pressing Ctrl + Z (on Windows) or Command + Z (on Mac), you can go back to the previous state of the image.
(Method 05)
How to Remove the White Background Using The “Channels”
This is the last method you might like for removing the white background. You can follow the procedure for getting your expected output of any photo. However, it will work best for images containing complex subjects.
Some pictures with graphics and several texts or images containing portrait and flyaway hairs use this technique to get top-notch selections around compliment edges.
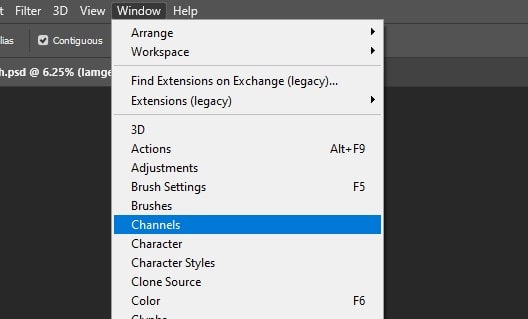
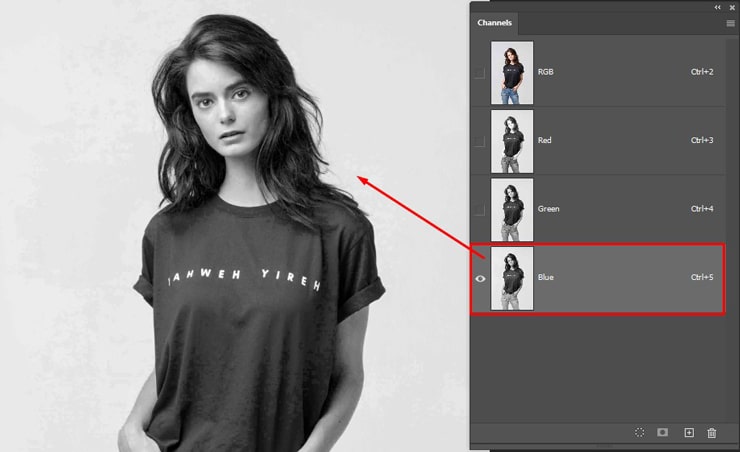
Step 1. Accessing the “Channels Panel”
First, you need to access the Channels Panel. You can generally find it beside the layers. If it’s not visible there, click over Window > Channels.
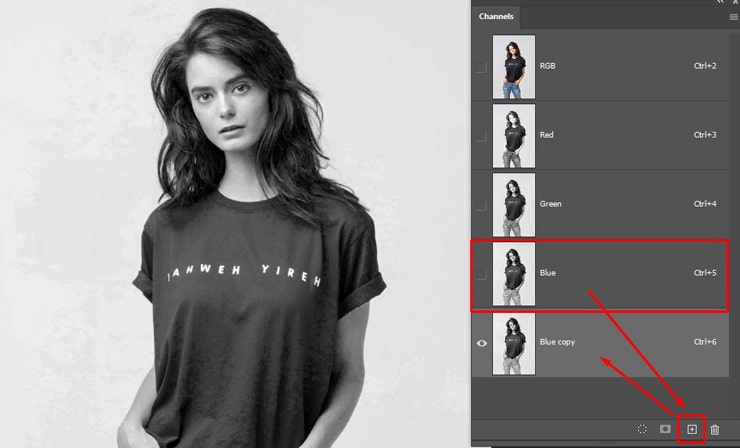
Step 2. Duplicating the Channel
There are three various colors found in the Channels Panel. One is red, and the other two are blue and green. To view all the contrasts, click on each of them differently.
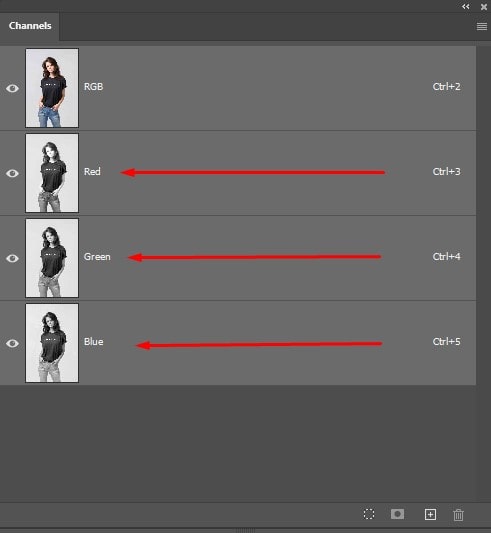
After viewing, you will understand which has the most contrast; select that channel. After this, add it to the new layer to duplicate by clicking over it and dragging it on the icon.
Step 3. Adding A Levels Adjustment
Select the duplicate channel layer and press the Ctrl + L buttons (on PC) or Command + L keys (on Mac). A level adjustment will be applied. A dialogue box will pop up on the screen; drag its shadows to the right side and the highlights to the left.
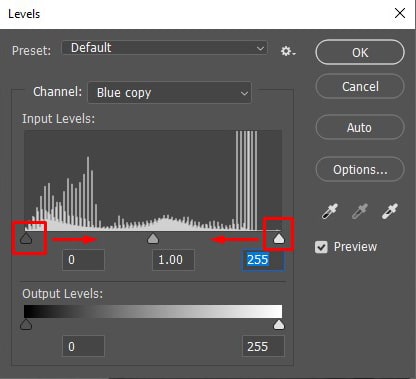
The focus is on adding more contrast until the image background gets white. The subject, however, will look completely black. After finishing the adjustment, click on “OK.”

Step 4. Making a Selection of the Duplicate Channel
Hold the Ctrl or Command button and click over the thumbnail of the channel layer to make a selection of the same channel.

Step 5. Applying the Selection Over a Layer Mask
While the selection is active, go to the “Layers Panel” and click over the photo layer. Now again, click on the layer mask, and the selection will be applied to the mask.
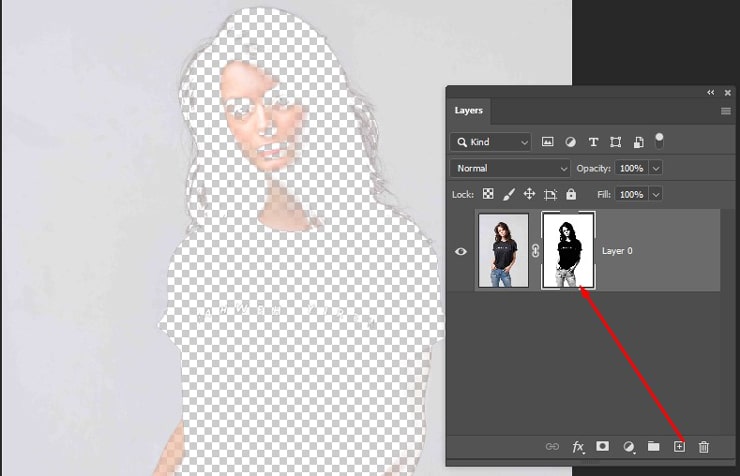
Now, on your Windows PC, press Ctrl + I or your Mac Book, and press Command + I to select and invert the mask. It will remove bg from the image (with the background selected). This way, you can add a new background also.
Frequently Asked Questions
White background removal is removing the white area in an image. This technique is helpful when you have a white background image and want to change it to a background you like.
Regarding removing image backgrounds, the PNG format is the best option. Additionally, PNG files are lossless, meaning they do not degrade in quality when saved or edited multiple times.
Unlike other formats, such as JPEG or GIF, PNG supports alpha channels, allowing smooth transitions and detailed cutouts.
Yes, it is possible to remove the white background from a logo. Once you have opened the logo in the software, you can remove the white background using selection tools like Magic Wand, Quick Selection tool, Pen tool, etc.
When the background is selected with the tools, you can delete it or make it transparent. This will allow you to use the logo on different backgrounds or overlay it onto other images seamlessly.
Closing Remarks
Fortunately, with our shared five ways, “you can knock out background quickly and easily. So, try any suggested methods to reduce editing time and effort and get the best background-removed images.
You may read: