Navigating the background removal in Adobe Photoshop CC 2024 can be a daunting task. If you know the process of background removing in Photoshop, it will become easy to take your work to the next level.
With some powerful Photoshop tools, Photoshop AI, and built-in Photoshop quick action, background removal is effortless nowadays. But you have to know the right tools and techniques to do it.
You can remove an image background differently using Photoshop AI Generative Fill, Object Selection Tool, Magnetic Lasso Tool, Pen Tool, etc.
When you go through this step-by-step Photoshop tutorial, you will explore the right tools and effective techniques and become a pro background remover.
Let’s learn the different tools to remove the original background in Photoshop.
Remove Background Using Photoshop Generative Fill
Photoshop 2024 comes with new improvements. The Photoshop Generative Fill is one of these.
If you quickly remove the background in a picture using just a few clicks, use the Photoshop AI Generative Fill. Remove background from your image using AI power Generative Fill is an easy task.
Here’s how you can use it.
Open Picture in Photoshop
Open the picture you want to edit in Photoshop. Use your preferred Selection tool to choose an area around the background you want to remove.
Generate with Generative fill
Then, pick “Generative fill” and click “Generate.” This tells Photoshop to remove the selected part with a new background that matches the nearby colors and pixels. If you want to add something specific, type it before clicking “Generate.”
Background Removal with Generative Fill
Now, your selected background will easily remove from the picture. It can even handle complex tasks.
Check out this picture where the background is gone, but the ground and the fence still look normal, even if they have a bit of a strange texture.
The reflection in the water is slightly different, but it’s hard to notice that the picture was edited when you first see it.
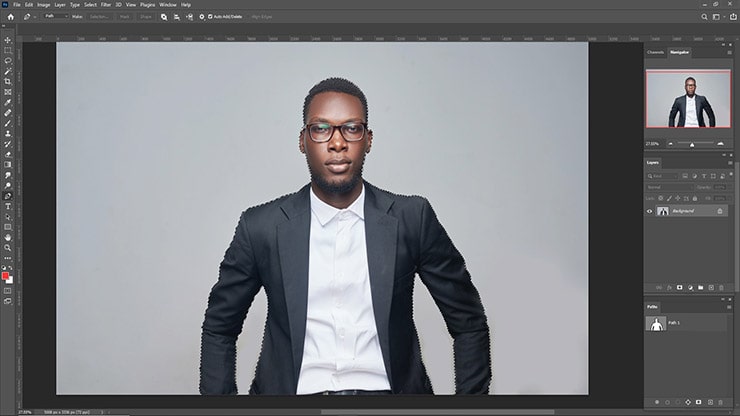
Remove the Background Using Object Selection Tool
Photoshop 2024 features the Object Selection tool. It does a lot of the work for you by using innovative technology.
Follow the below steps.
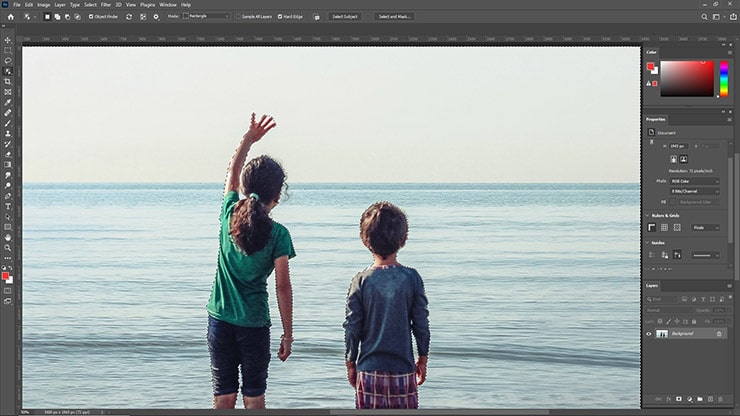
Open Photo in Photoshop & Select Tool
Open your photo in Photoshop and find the Object Selection tool on the left side, near the Quick Selection Tool.
Select Subject
Select your subject by moving your cursor over your subject until it turns blue. Move your cursor in small circles if it doesn’t turn blue immediately.
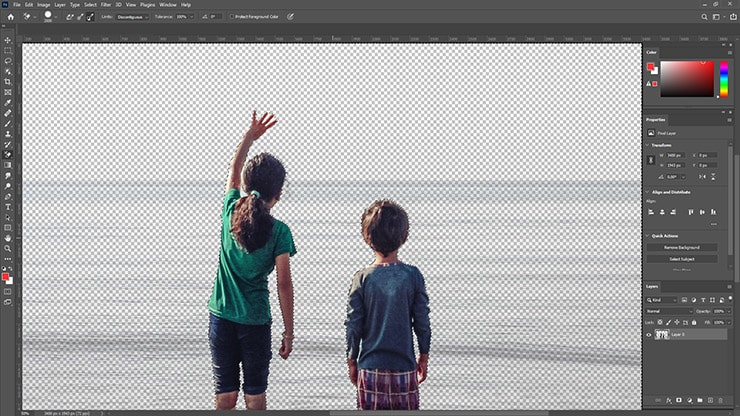
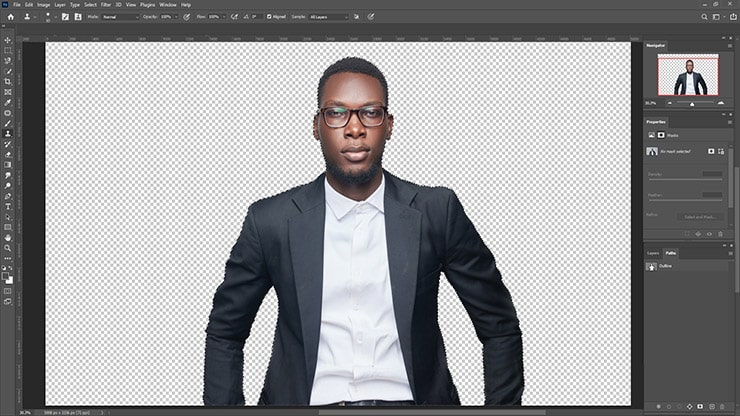
Remove the Background
To remove the background
- Press the Shift key and select all the objects you want to keep. This makes a selection around each thing.
- Go to Select > Inverse. Now, the background is selected instead of your objects.
You need to unlock your image depending on what you want with the background.
For example, you want it to be transparent.
Then, unlock it clicking the lock on the right side of the layer of your photo. The layer name changes to “Layer 0” if no other layers exist.
To remove the background, use the Eraser Tool (choose a big brush) and start erasing.
Important Note: Don’t worry about losing your selections. If you need to choose your objects again, hover the Object Selection Tool over your objects..
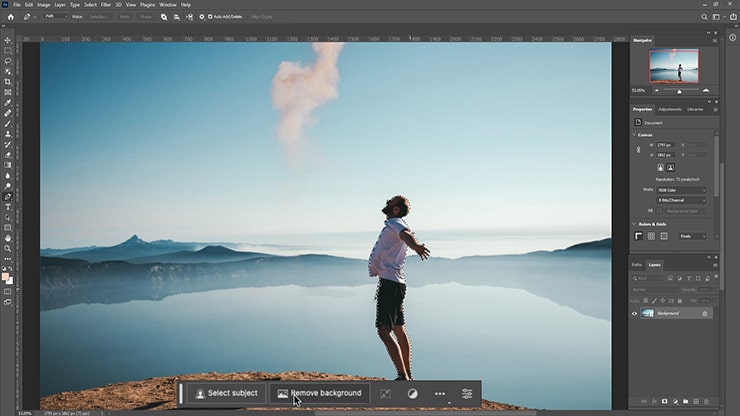
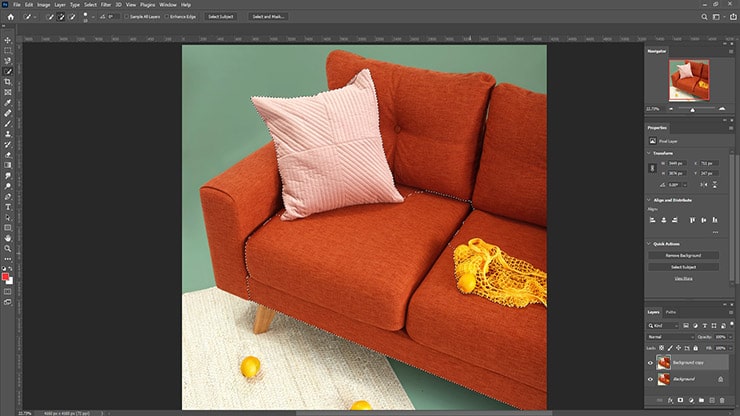
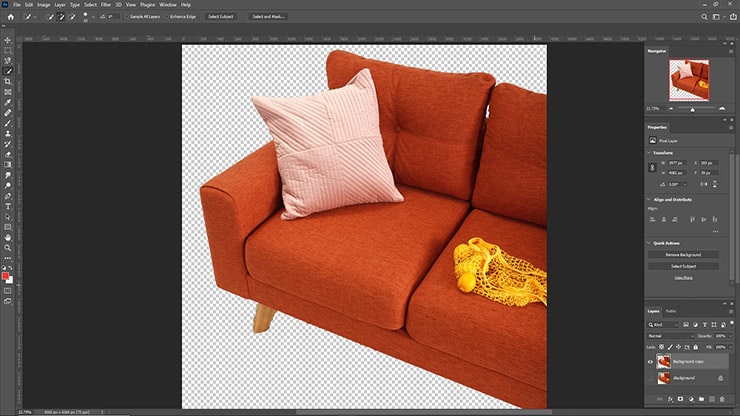
Remove a Background in Photoshop Using Quick Action
Photoshop Quick Action tool is excellent when you want things done fast. It works best with pictures with a clear contrast between subject and background.
As it’s quick, be precise when using the tool. Otherwise, the expected results might be different.
Here are the steps to follow.
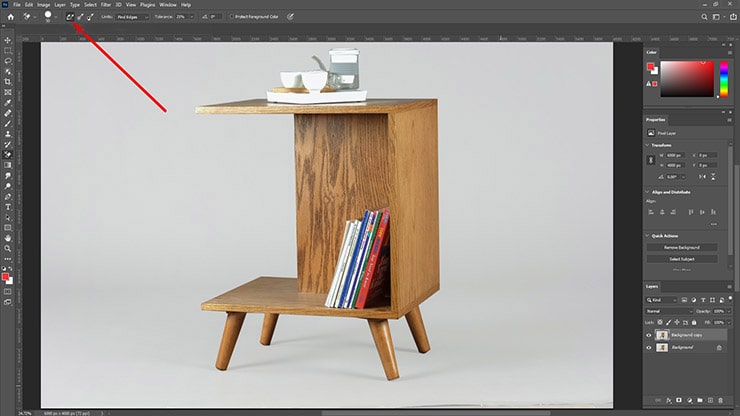
Open Your Image in Photoshop
Open Photoshop and open image in it.
Adjust layer for Background Removal
Right-click on your Background layer and choose Duplicate Layer. Give your new layer a name and click OK. Please turn off the original layer by clicking the eye icon.
Open Properties panel
Open the Properties panel going to Window > Properties. You don’t need to click it again if it’s already open. If it’s not open, click it to show it on the right side.
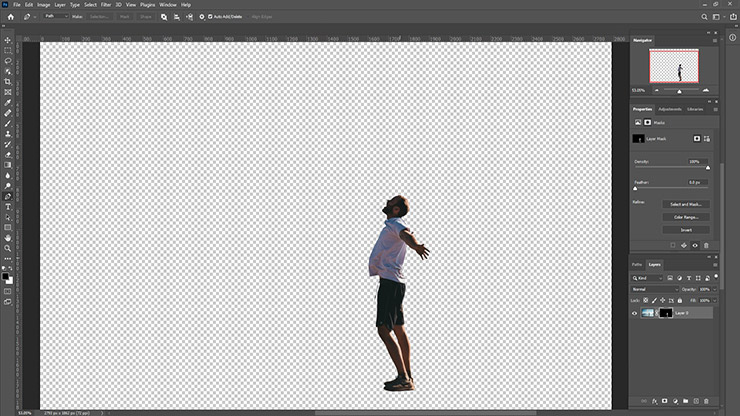
Use Remove Background Button to Cutout Background
In your Layers panel, click on your new layer. In the Properties panel click the Remove Background button.
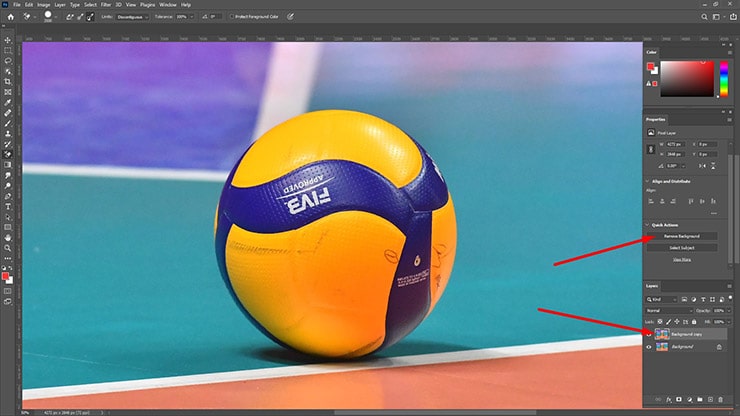
You will get an image without background. But your layer has a mask around the Subject.
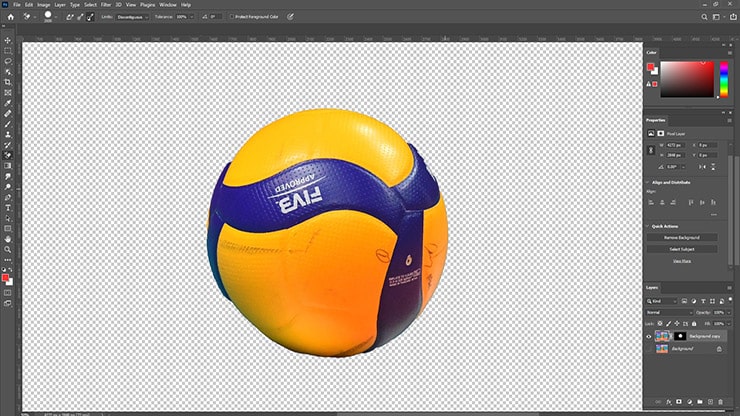
Fix it by going into the Mask. Then, make changes as needed (like under the ball’s bottom of the picture).
Remove Background in Photoshop With Background Eraser Tool
Want more control over background removing?
The Background Eraser tool in Photoshop is the best option. This tool can be very effective and save time but requires effort.
Open your Photos in Photoshop and Adjust Layer
Open your picture in Photoshop.
Right-click on your Background layer and choose Duplicate Layer. Give your new layer a name and click OK. Please turn off the original layer by clicking the eye icon.
Select the Background Eraser Tool
Find the Background Eraser tool on the left side of the toolbox. It might be hidden. Click and hold the tool, you will see more options. Select the Background Eraser tool from there.
Adjust the Options Bar
Click the brush icon in the options bar at the top to show the brush panel.
Set the hardness to be near or at 100%. The size can be whatever you think is suitable for your picture. I choose 50px. You can change it using the square brackets ([ and ]).
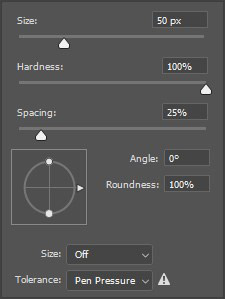
In the Options bar, set the sampling to continuous.
Set the Limits to Find Edges and the Tolerance to be around 20–25%. Note that lower tolerance picks fewer color variations, and higher tolerance picks more colors.
Delete the Background
Start deleting the background around the subject by clicking and holding while moving the brush. Keep crosshairs inside the tool away from your subject. Zoom in to look closer if needed.
Use short strokes with the brush to Undo if you make a mistake. In tricky areas, adjust the brush size as required.
If resizing the brush doesn’t work and it erases your subject, undo your Action.
Then, in the Options bar, set the Sampling to Once, Limits to Discontinuous, and Tolerance to around 10%. This way, the brush only uses the color under the crosshairs at that moment.

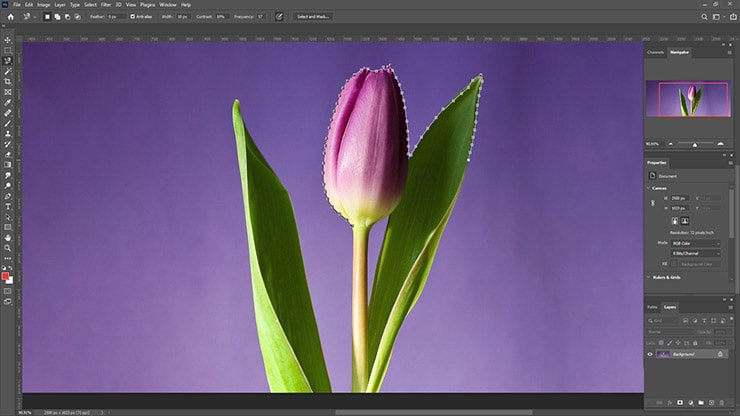
Remove and Make Transparent Background using The Pen Tool
The Pen tool is a reliable way to remove backgrounds from an image in Photoshop. It gives you much control but can take a while because it needs patience.
Open the Photo in Photoshop and Adjust Layer
Open your picture in Photoshop.
Right-click on your Background layer and choose Duplicate Layer. Give your new layer a name and click OK. Please turn off the original layer by clicking the eye icon.
Find the Pen Tool
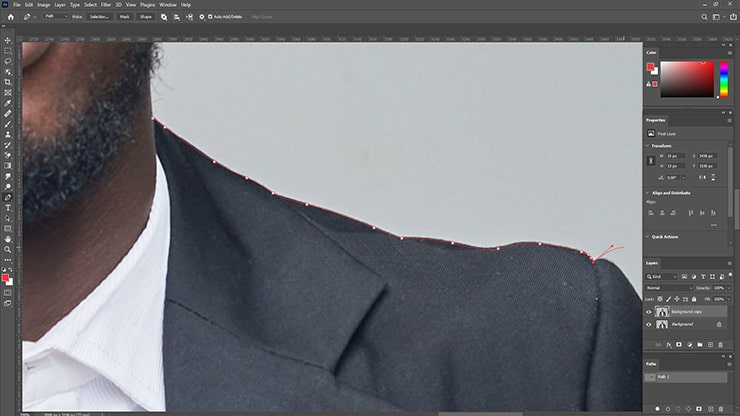
Find the Pen tool on the left side of the toolbox (above the Text tool). Zoom in to a part of your image to start.
Create Clipping Path Adding More Anchors
Begin at the edge of your subject (or a good starting point) and click to make the first anchor. Then, work the way around the subject, adding more anchors to outline it.
If you need a curved line, click, hold, and drag to create a curved line. Move the mouse to adjust the curve.
To fine-tune an anchor point or directional lines, use the Direct Selection tool (hidden under the Path Selection tool) in the toolbox.
Go to File > Undo or use your keyboard shortcut (Command + Z for macOS, Control + Z for Windows) to undo an anchor.
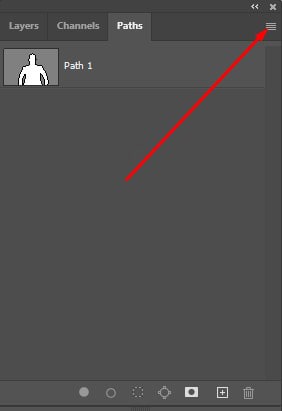
After finishing the path around your subject, connect it to the starting point. Save the path once you’re done.
Go to Window > Paths to see the Paths panel (usually on the right). Click the three bars menu, choose New Path, and give it a name. Now, your path is saved.
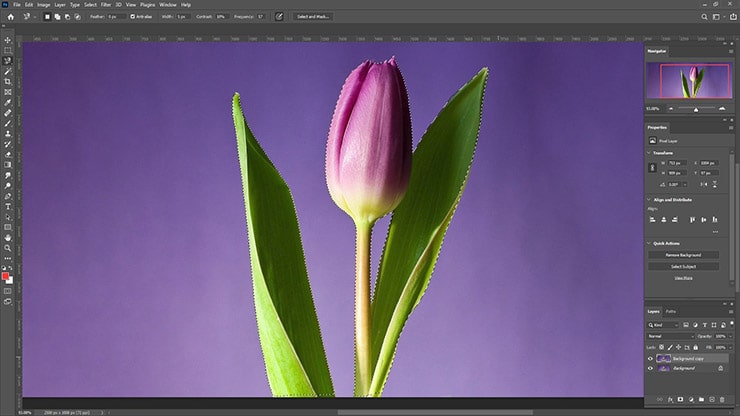
Make Selection
Next, right-click your new line in the Paths panel, choose Make Selection, and click OK in the box (keep the defaults). This makes a marching ants outline of where your path was.
Cut Out the Background
As our target is not to erase what’s inside the outline, we must change it to everything except the Subject.
Go to Select > Inverse. Now, the outline is around the whole picture and the subject.
To cut out the background, press Delete. You will see a white/gray checkered background and the old one replaced.
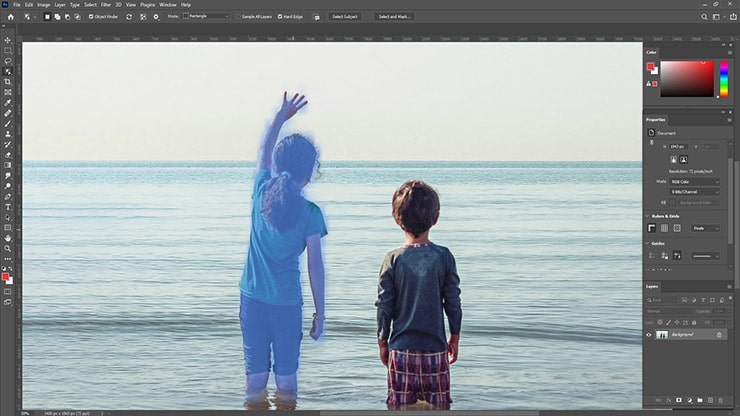
Use Magnetic Lasso Tool for Background Removal
Here is the step-by-step process to cut out background in Photoshop using the Magnetic Lasso Tool.
Open the Photo in Photoshop and Adjust Layer
Open your photo in Photoshop.
Right-click on your Background layer and choose Duplicate Layer. Give your new layer a name and click OK. Please turn off the original layer by clicking the eye icon.
Select the Magnetic Lasso Tool
Select the Magnetic Lasso tool from the toolbox on the left. Start drawing along the edge of the subject. The tool will follow the edge as you move your cursor. Be patient, and move slowly and carefully.
Create and Save Selection
Once you’ve started, go around your subject and connect to where you started. Click the starting point, and the selection will turn into marching ants around your subject.
To save selection, go to Selection > Save Selection and naming it.
Remove the Background
To remove the background, go to Select > Inverse to flip the marching ants. Click delete. You should see a white/gray checkered background instead of your old one.
If you need to fix the selection, go back a few steps and try again for better results. Or, you can use other techniques mentioned here to get closer to what you want.
Background Removing Using Quick Selection Tool
This tool is handy when the Subject is visible. It’s also great for saving time while getting fairly provides accurate results.
The tool works well on many photos since it finds colors to determine the selection.
Open the Picture in Photoshop and Adjust Layer
Open your picture in Photoshop.
Right-click your Background layer and choose Duplicate Layer. Then, give the new layer a name. Click OK. Turn off the original layer by clicking the eye icon.
Find the Quick Selection Tool
Find the Quick Selection tool in the toolbox on the left (it might be under the Object Selection tool).
Create and Save Selection
Use the tool to paint your subject. Marching ants will appear as you paint. Adjust the tool size with [ or ] keys.
Hold the Option key (macOS) or Alt key (Windows) if you paint outside the subject. The tool changes to a – symbol, which will be removed from the selection. Hold the Option/Alt key and paint the part you are interested to remove.

Go to Select > Save Selection and give it a name for future adjustments.
Delete the Background
To delete the background, go to Select > Inverse. Marching ants should now be around the edge. Click delete.
If you miss a spot or need more adjustments, go back a few steps, refine, and save the selection again.
FAQs
o open your image in Photoshop, go to ‘File’> ‘Open’. Then select the image you want to open in Photoshop from your file explorer and click ‘Open.’
The magic wand tool is one of the selection tools in Photoshop that allows you to select a specific area of an image based on color.
This can be especially useful when there is a high contrast between the subject and background. Once the background is selected, you can delete it to remove the background.
The brush tool allows you to paint areas of an image. When combined with a mask, you can use it to remove an image’s background manually. However, it’s essential to adjust your brush size to ensure precise editing.
With the tool, you can click and drag to erase the background directly. It works by comparing the information in the center of the brush to the rest of the pixels. Anything matching the center will be erased.
Last Word
You now learn how to make selections around the subject and remove background in Photoshop. You can now remove the entire background, create a white background, replace the background, or How to make the background transparent.
Please practice more and more to be successful in background removal.
You may read: