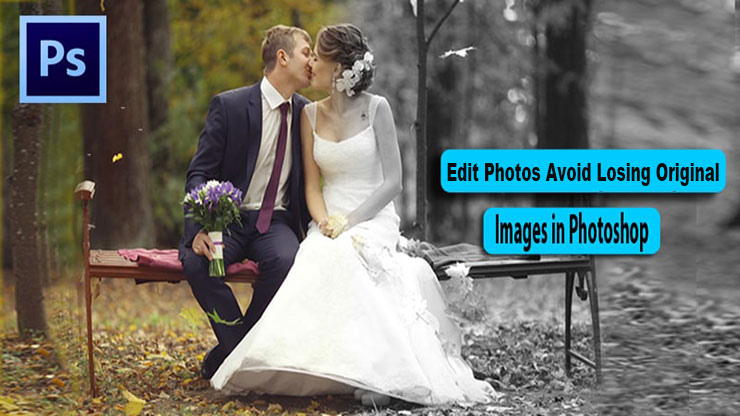
It’s irritating and tiresome if you lose the original images when edit photos in Photoshop CC. But, it’s easy to avoid losing original images in Photoshop.
Whether it’s making a simple adjustment or a complex manipulation, there are certain measures we can take to protect the original photo.
In this article, we will discuss some useful tips and techniques to edit photos in Photoshop while avoiding the risk of losing the original image. By implementing these strategies, you can confidently enhance your photos without the fear of losing the original file.
Here, in this article, I have described my favorite ways to avoid this problem ever happening. Also, I will share tips on how you can save the original image along with the changes you make in Photoshop.
So, let’s jump into it.
Avoid Losing Original Image in by Saving the Image as a Copy
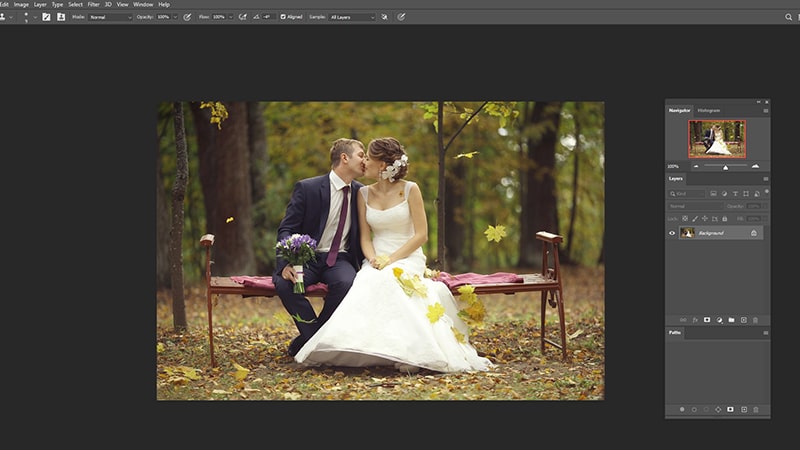
First, duplicate the image and open it in Photoshop.
To duplicate an existing image/file-
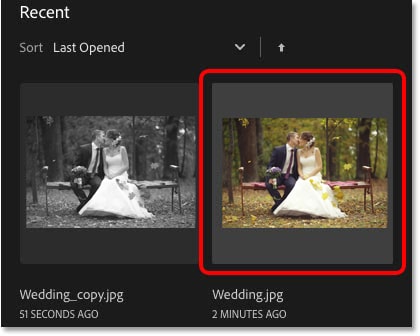
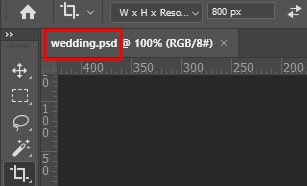
- First, go to the top right side of your PC screen. You can see the file name. In this case, The file name is “Wedding.jpg”.

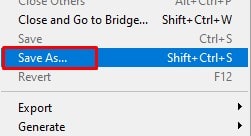
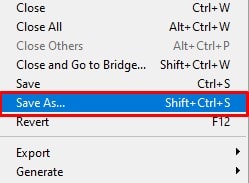
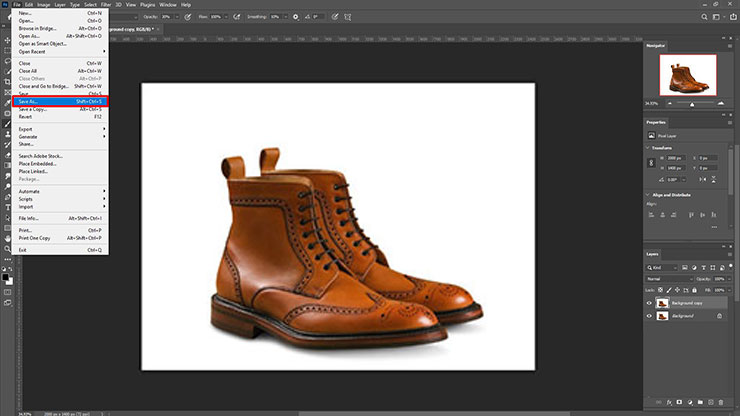
- At this point, If you make any changes in the image then save the changes. To save the picture, Hit the File menu, which is in the Menu Bar.
- After clicking on the File menu, you can see the Save As option. Keep in mind that you don’t do any overwrite in the raw file. Because it’s not good. Save the image as a copy so that you can avoid overwriting the file.
Save The Images
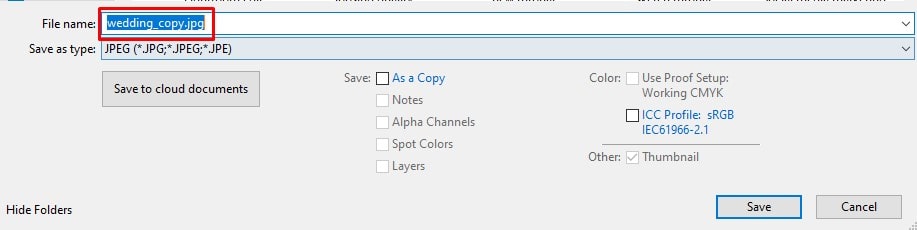
After clicking on the Save As option, a dialog box will open. In there, you need to give the file name. After writing the name click on the Save option.
If you are working with the JPEG file, then Photoshop will open a dialog box.
In the dialog box, select the Maximum quality of the image, like 12.
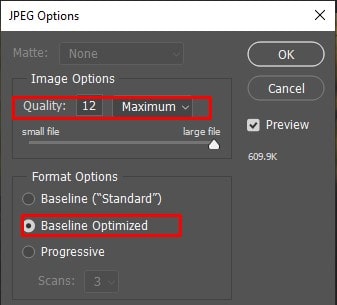
And in the format options, you can see the Baseline Optimized option; click on it. Next, click the OK option.
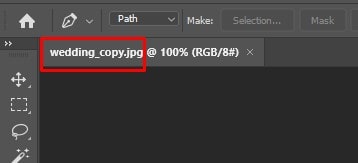
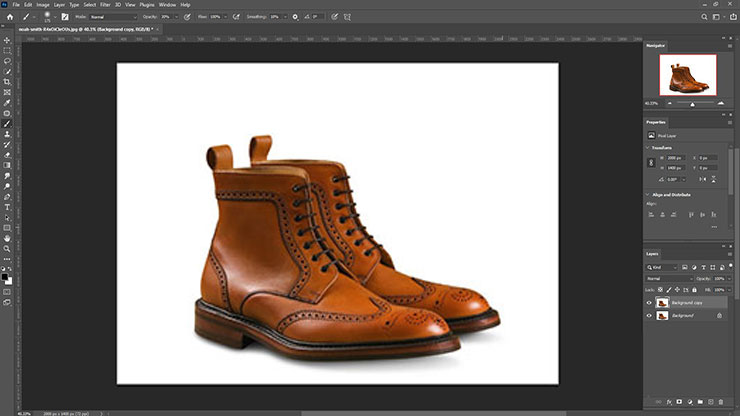
Now, again, go to the document’s tab. You can see the file name “Wedding_COPY.jpg.” You can change that before saving the file.
That means you were working on a copy of the photo. For that, your main file will be safe. After finishing all of the photo editing, you need to save the copy. Don’t see the original file.
Edit the image
For editing the image you need to go to the Image menu. After that, select the adjustments, then select the Desaturate.
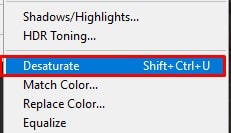
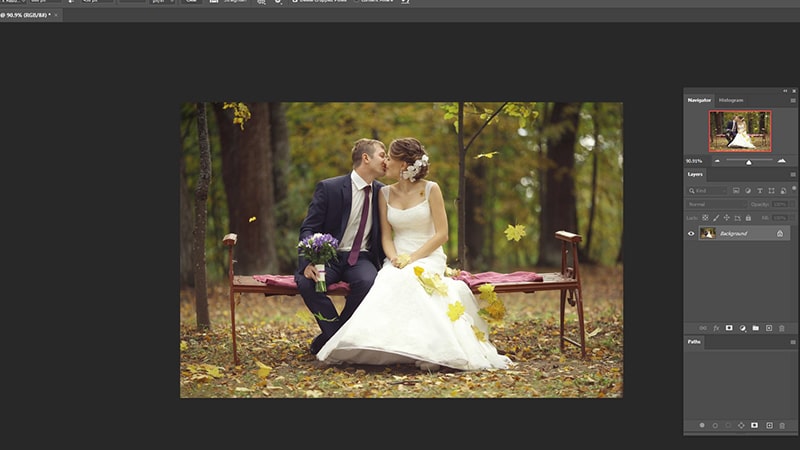
I mean, Going to Image > Adjustments > Desaturate. Here’s the picture:

That’s not the best way to transform the photo into black and white. But it’s good for our purposes. It’s just desaturating the picture color:
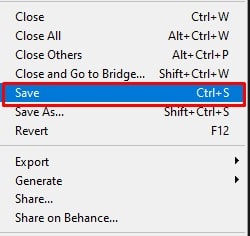
Save and Close the Document.
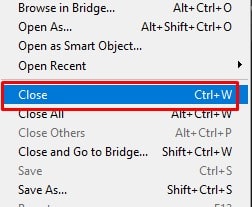
Now it’s time to save your work. Hit the File menu, which is on the Menu bar. Click on Save:
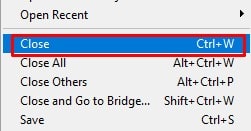
Next, you have to close the document. So again, go to the File menu. Select the close option.

Again, Open the Original Image
Again, you need to open the Original Image. So, reopen the image. To reopen the image, go to the Home Screen. In the Home Screen, you can see the thumbnails which you opened before.
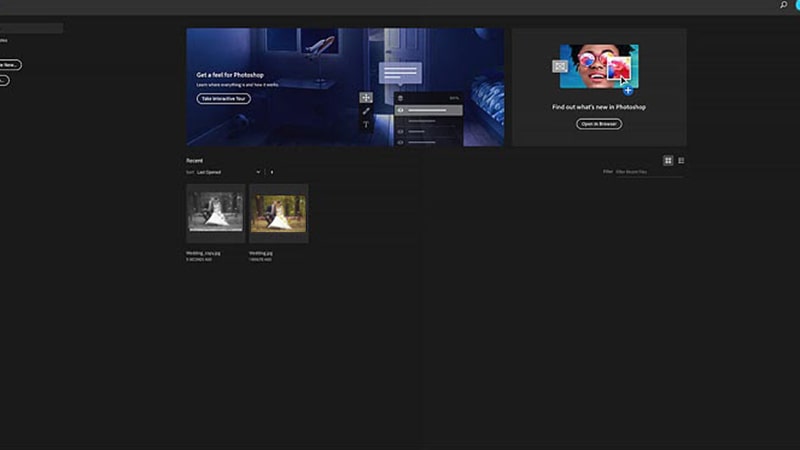
Look at the picture; You can see the copy file, which is on the left side of your PC. But now you need to reopen the main file. So, click on the original thumbnail.
So, now you can see the original image which reopens in Photoshop. See, its color is intact.
Save Your File as a PSD Format
This second tip is relevant to the first tip. In the first tip, you save the image in the JPEG. Format. But the next step is to save the image in PSD format.
If you want to overwrite the original image, then the PSD file won’t prevent you from doing that while keeping the originals, too.
Save the Image as a Photoshop Document
To save the file in the PSD format. Hit the File Menu and select the Save As option.
Then, a dialog box will be open. After that, you can change the Image Format. Here, the file extension will be in PSD Format.
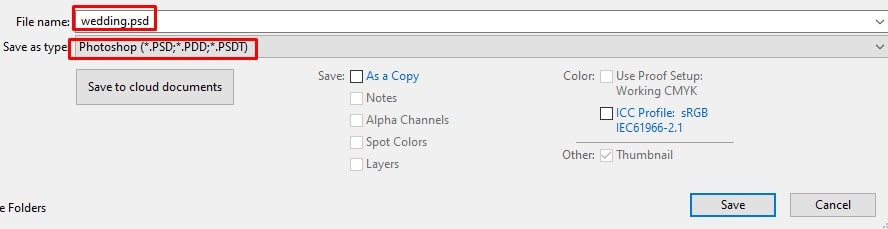
I believe you know that, PSD. Stands for “Photoshop Document”. After giving a name with PSD Format, click on the save option.
Now, look at the Document Tab. You can see the name with PSD. Format.
Work on a Separate Layer Without Losing Image Quality
In this third part, you need to edit the photo on a separate layer. Keep in mind that you saved the image file as a PSD.
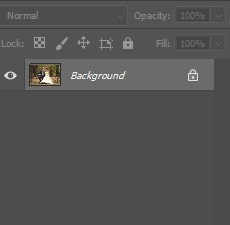
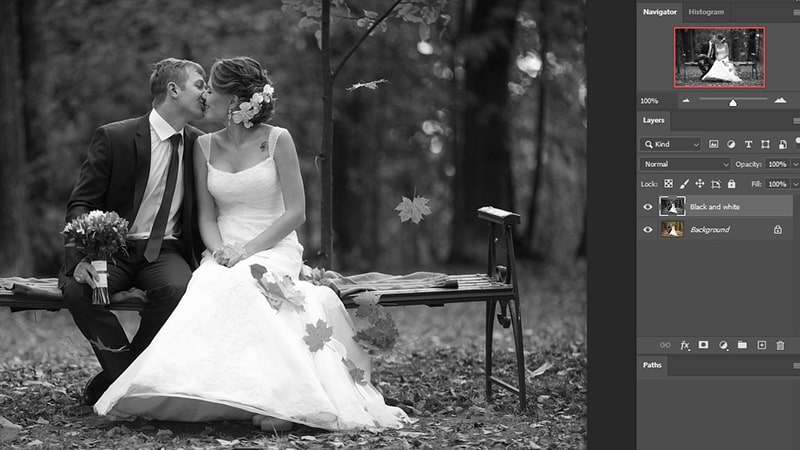
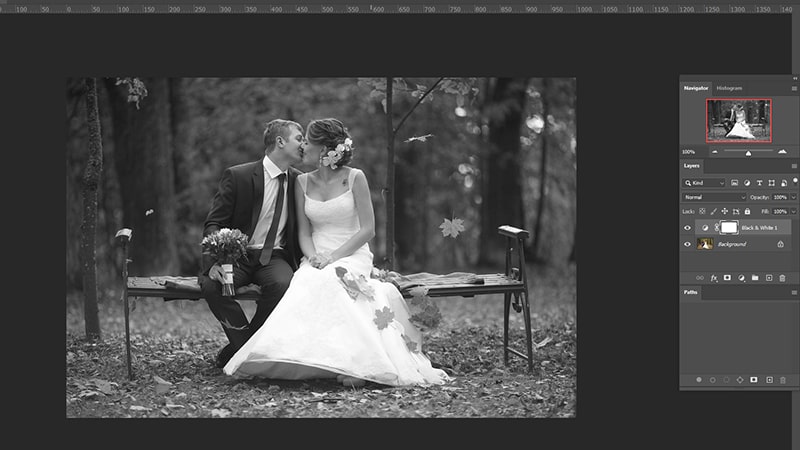
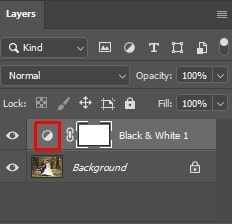
Look at the layers panel. You can see the image open on a background layer.
It’s better to edit the photo on a separate layer. For that, you won’t lose the original photo when you start making changes to the layer.
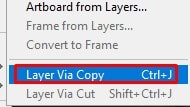
Copy a Layer
To make a copy of the background layer, click on the Layer Menu, then select New. After that, select the Layer Via Copy option.
On the other hand, Press the keyboard shortcut. Press Ctrl + j for Windows. At last, for Mac, click on Command + j.
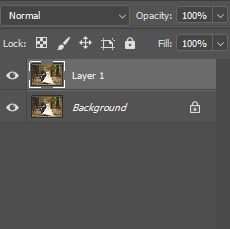
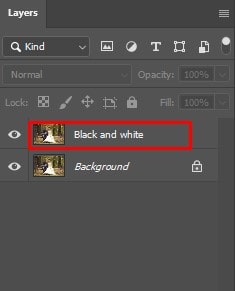
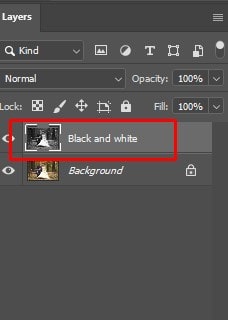
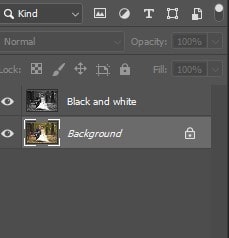
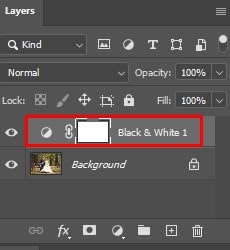
You can see the Layers panel appearing on both layers.
When you are going to convert the image to black and white, you need to double-click on Layer 1. And rename the layer. After that, tap on entering for Windows and return for Mac.
Applying a Black & White Image Adjustment
In the first tip, I removed the color from the photo by using Desaturate Command. But the right way is to convert the image to black and white with Image Adjustments.
However, here I make B&H adjustments in an image to demonstrate this method. Hence, you can apply the same method while doing other edits, like – Fixing grainy photos or making gifs in Photoshop.
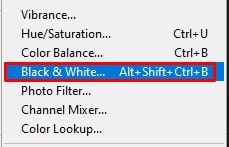
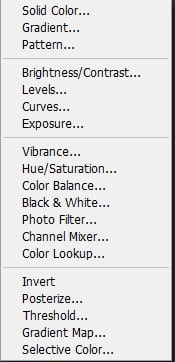
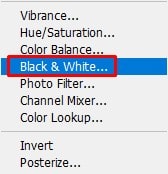
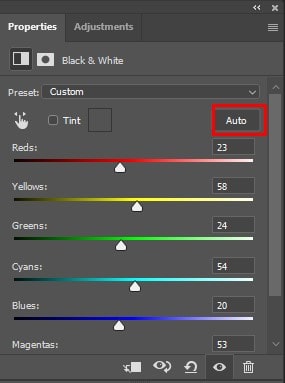
For that, you have to go to the Image menu. Select Adjustments and finally click on the Black and White Option.
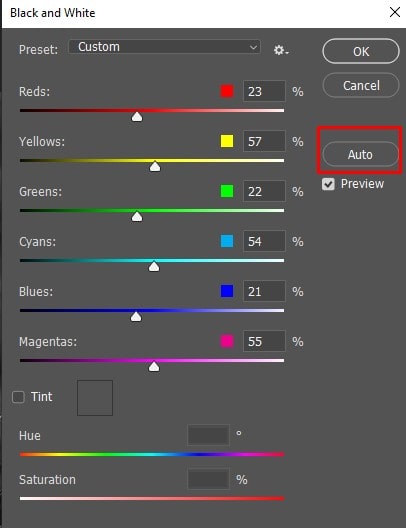
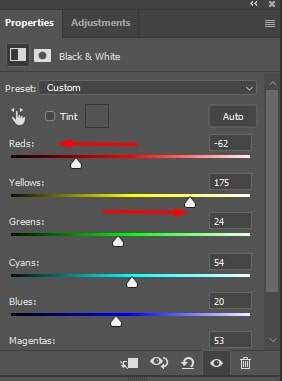
After clicking the Black and white option, you’ll get a dialog box. The dialog box includes many kinds of sliders, which you need to drag to adjust the brightness and different parts of the image that depend on the picture’s original color.
After completing all of the adjustments, click on the Auto button and then click on the OK option to close the Dialog box.
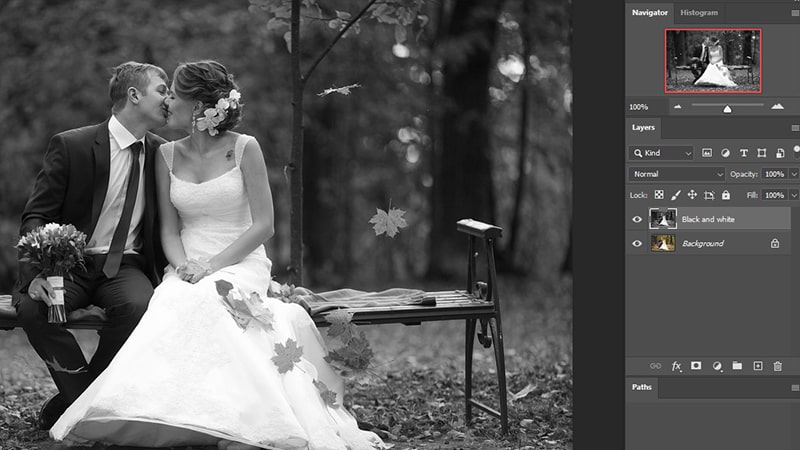
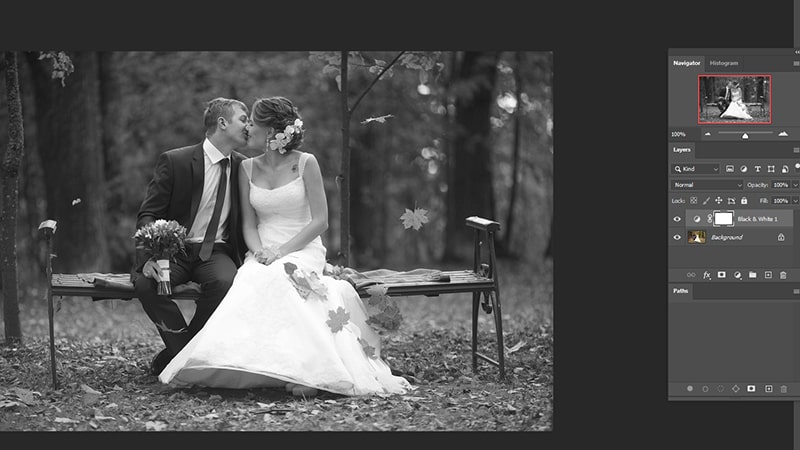
After applying all of the Adjustments, the picture will look like these:
Keeping the Edits Separate From the Original
Look at the layers panel; you can see the converted one layer to Black and white. But the original picture is still in color if you see the background layer.
If you want the Black and white layer off, then press on the Visibility Icon.
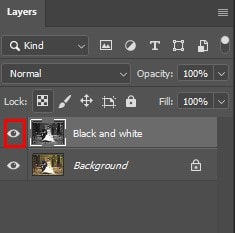
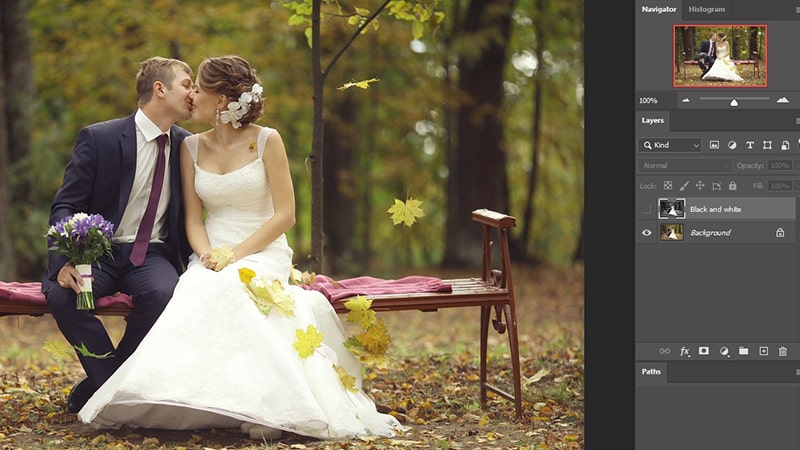
Now look at the original image color:
Next, you want the Black and White layer back. Then again, press on the visibility icon.
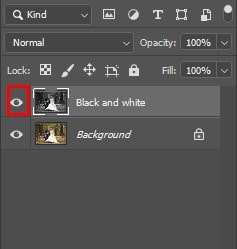
Then, get back to the Black and white photo.
The best idea about the PSD format is that the layers are saved with them. For that, you can reopen the document. And turn the different versions of the image at a time.
You may read:
- Ultimate Guide To White Background Product Photography
- 11 Ways to Avoid Image Copyright
- A Complete Guide to Mask an Image
Closing the Document Immediately You Finished Editing in Photoshop
For saving the document you can go to the File menu and select the Save option.

When Photoshop asks you about Maximizing Compatibility, then click just ok.
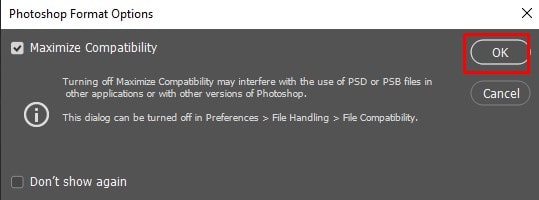
Now, you can close the document. For that, Return to the File menu and click on the Close Option.
Get back to the home screen, and you can see the Original JPEG format, which is in the middle of the picture. The updated PSD format image is on the left side of the picture. Notice that the PSD.
Format thumbnail: its color is Black and White. Because you turned on the layer in Black and white, By pressing on the thumbnail, you can reopen the PSD. Format.
When you reopen the PSD format, both layers are still intact. Now you can create changes apart from losing access to the original image:
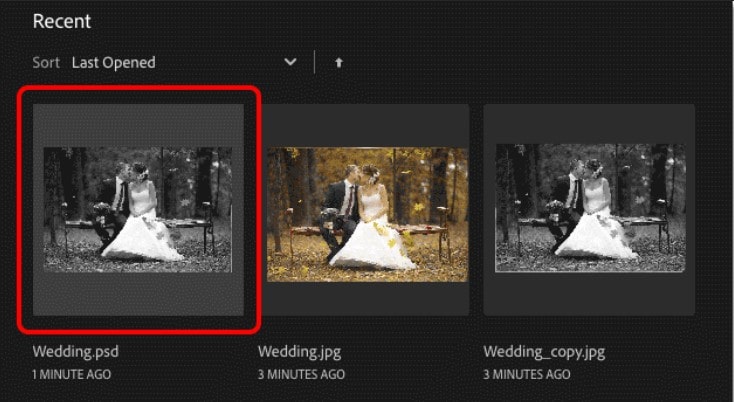
Intact both layers.
Edit Image Without Losing Quality Using Adjustment Layers
This method is useful to save the original image with the modifications. Also, I use this method when I create a Clipping Path or Retouch a Photo.
Here, you can use the adjustment layers. This is a special type of layer. The adjustment layer makes the photo editable.
Go to the Layers panel and delete the “Black and white” layer. So, drag it down to the trash bin:
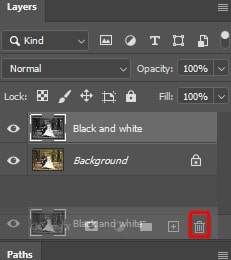
Now, return to the original image, which is on the background layer.
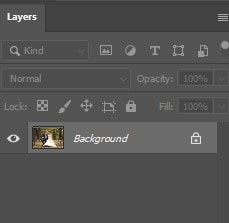
Image Adjustments vs Adjustment Layers
For image adjustments in Photoshop, you need to go to the Image Menu first. Then select the Adjustments. But the Adjustments are static.
However, Image adjustments are available as adjustment layers. The Adjustment layer can’t make permanent changes.
Photoshop’s Adjustment Layers
To add the adjustments layer, you need to go to the layers panel. After that, press on the Adjustment Layer and New Fill Icon, which is at the bottom of the Layers panel.
Most of the image adjustments are available as adjustment layers.
How to Use an Adjustment Layer
For Instance, you are choosing the Black and white Option for adjustment from the adjustment layer.
After adding the adjustment layer, it is shown as its separate layer in the layers panel.
And by using the properties panel, you can control the adjustments. Here, you can see the same auto button and the same color sliders that you saw in the previous Black and white adjustment dialog box.
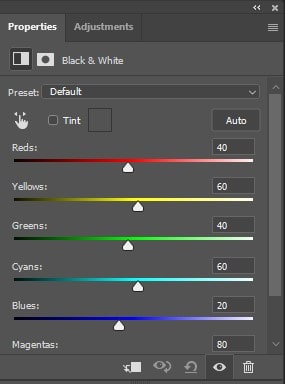
But the ok and cancel buttons, you can’t see here. Because you didn’t apply the settings of the image, now click on the Auto button.
You will get the same result that you did from the standard image adjustment.
Saving and Closing the Document
To save the document, you need to go to the File Menu and select the Save option.
Next, when you want to close the document, o the File Menu and select the Close Option.
Reopening the Photoshop Document
You need to return to the Home Screen and reopen the Photoshop document by pressing its thumbnail.

And you can see the reopened document. The adjustment layers and original layers are still intact.
Hiding and Showing the Adjustment Layer
Toggle the adjustment layer on and off by pressing on the Visibility Icon, which is in the layers panel. For showing the original image then turn the layer off.
Edit the Adjustment Layer
Adjustment layers remain editable, but the standard image adjustments are not permanent. If you don’t see the options in the properties panel, keep in mind that the adjustment layers are chosen in the layers panel.
If you want to make any changes that you need, then do that by using the properties panel. After completing all of this, restore the original image by turning off the adjustment layer. Or save the picture in the JPEG effect.
On the other hand, just save and close the Photoshop document.
How to Resize an Image in Photoshop Without Losing Quality
The process of resizing an image in Photoshop without effecting quality is multi-step. Here is a detailed guide on how to do it.
Open the Image
Start by launching Adobe Photoshop and opening the image you need to resize.
Duplicate the Original Layer
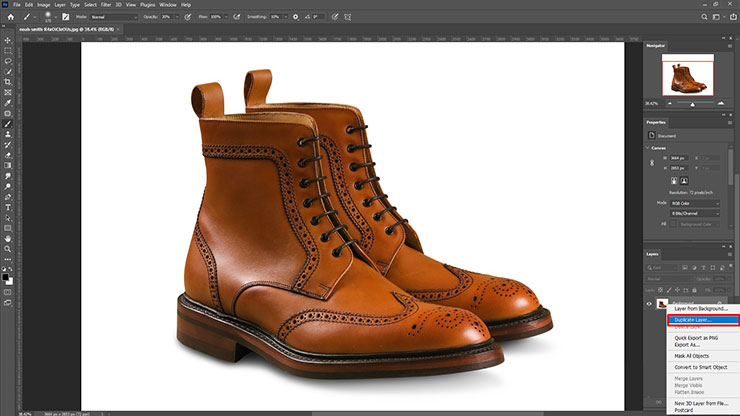
As a rule, it is better to duplicate the original layer before making changes. This means that you have an original, untouched version of the picture somewhere else. To do this, right-click on the layer in the Layers panel and click “Duplicate Layer.”
Access Image Size Settings
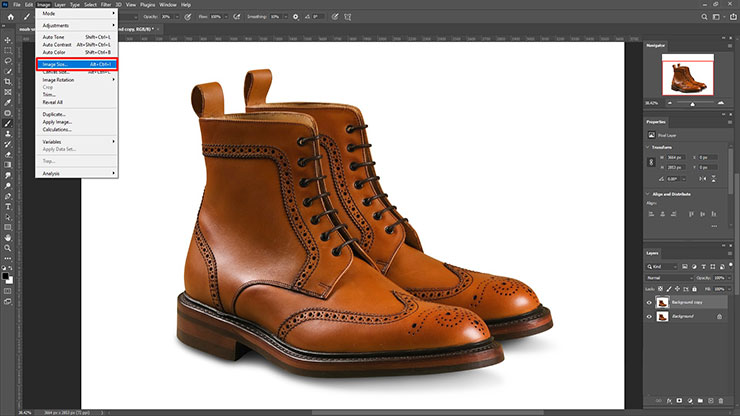
Go to the top menu, click on ‘Image,’ and then select ‘Image Size…’ from the dropdown. This will open up the Image Size dialog box.

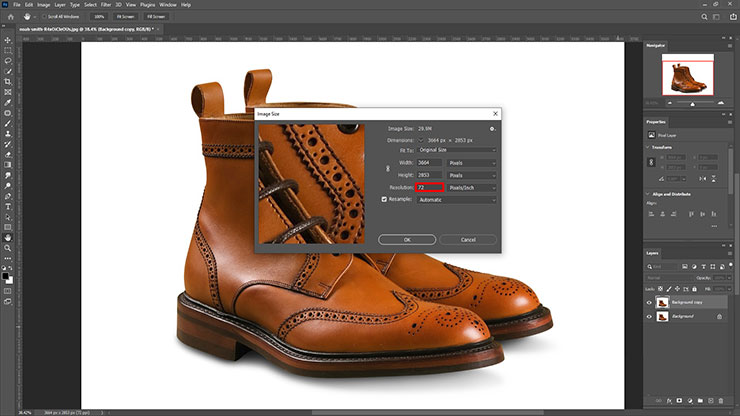
Adjust the Resolution (If Necessary)
If you are resizing for print, consider increasing the resolution. A resolution of 72 pixels per inch is standard for web images. Be careful with increasing resolution artificially because it can cause pixilation.
To Maintain Aspect Ratio
Ensure that the “Constrain Aspect Ratio” (chain icon) is checked, which keeps height and width proportional.

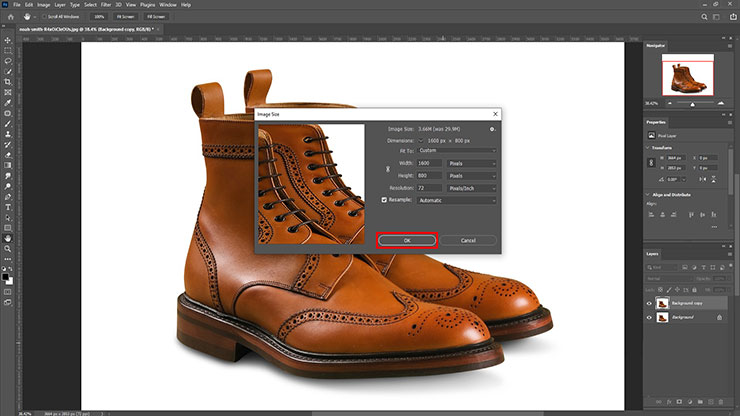
Enter New Dimensions
Please type in the desired width and height; another dimension will automatically adjust itself to maintain the ratio.
Apply the Changes
Resize your image by clicking OK.
Save or Export the Image
Save your resized image through ‘File,’ then ‘Save As.’ Choose where and in what format to save it.
Instead of using ‘Save As,’ use ‘Export As’ if saving for the web, as there are more options such as file format or quality settings.
FAQs
Photoshop provides a few methods to resize an image without altering its quality. One uses Photoshop basics such as the ‘Image Size’ option to keep the image quality as high as possible.
Another is the Preserve Details option under Resampling in the Image Size menu. Lastly, choose plugins like On One’s Perfect Resize for serious resizing, which are designed specifically for this task.
Yes, resizing an image can result in loss of quality depending on how much you adjust the size of that image. However, Photoshop has some tools to minimize this, such as using the ‘Preserve Details’ in your resizing process. Besides, use a high-resolution image with 300 dpi.
Select Image Size from the Image menu in Photoshop. Ensure that both ‘Constrain Proportions’ and ‘Resample Image’ are selected. In the example image, use the Preserve Details option. It reduces image size while maintaining its picture quality.
Both PNG and JPG can maintain attractive images. PNGs are better for images with text or sharp lines, while JPGs are typically better for photos. This means PNG pictures do not suffer from compression-related distortion, unlike JPG ones; thus, if you want a bigger picture, you should consider using PNG files instead.
Conclusion
By using these methods, you can avoid losing your original image in Photoshop! But, it depends on your awareness while working.
So, make a habit of performing one of those methods even if you do not need the image later. Because mistakes can happen, and you always have the option to delete it afterward.
You may also read: