If you are willing to learn how to create an Animated GIF Image, here I have shown how you can make a GIF in Photoshop CC 2020.
Although it seems tough, if you follow this tutorial step by step you will find it fun and easy. So, let’s do it.
Create A GIF In Photoshop CC
Nowadays, We use GIFs everywhere online. We can do marketing like online ads, banners also through the GIF.
Besides, .people use GIFs on Facebook, Instagram, and many other places online. So if you want to make a GIF then you can make it in Adobe photoshop cc 2020.
In this guide, I’ll tell you about how to make a GIF in Photoshop CC 2020.
Here I’m explaining to you to create a GIF in Photoshop CC. And I’m showing you an example of an animated GIF.
How to Create A GIF In Photoshop A Step by Step Guide

Step 1: Open an Image In Adobe Photoshop CC 2020
Now you need to import the image which you want to make into a GIF. But it depends on how you proceed with the image. There are also some different ways to do that.
I think you have got a series of photos that already have a flow to animate. Maybe your clients told you what you need to do. Or they can give you some direction to make it.
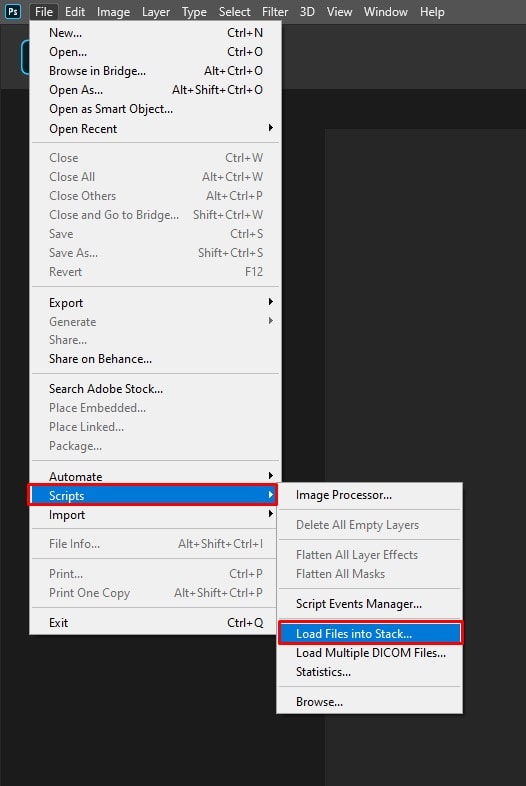
So, at first, you need to hit the File option then go to the scripts. After clicking on the Scripts option you can see the “Load files into stack”, click on it.
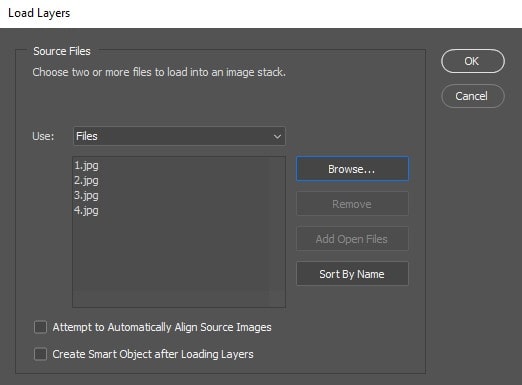
This way will help you to load the images properly. So that you don’t need to drag each one into your document part by part. For opening the files, a pop-up box opens. And you can see the Browse option. Then choose the Browse option. When you click Ok the adobe photoshop spontaneously makes a layer for every image which you chose to include.
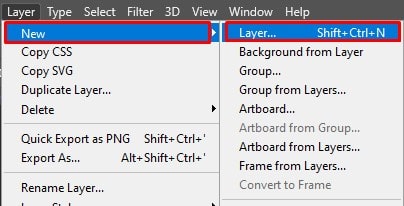
On the other hand, If you don’t have a single image or you can’t create the series of the image. So for adding a new layer go to the Layer option. Then you can see an option named “New”, click on it. After that, click on the Layer option.
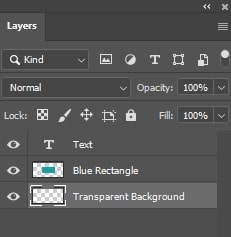
Make sure that you need to give the name of the layer. Then you can create a GIF in photoshop. Forgiving a layer name, you have to go to the layers panel. The layers panel is on the bottom right of your Pc screen. Then double click on the Default layer for giving a New name of the layer. After changing the name of the layer then press the Enter button.
Tips: If you want to get together layers then the layers reach in a single frame in your GIF. And turn the visibility to merge the layers which you want(The layers you want to merge, the eyes of those layers must be kept open). Furthermore, For Windows tab on the (Shift + Ctrl + Alt + E) / Mac (Shift + Command + Option + E) .You should also rename the layers when photoshop will make a new layer carrying the merged content.
Learn More:
Avoid Losing Original Images in Photoshop
10 Steps to Create a Ghost Mannequin Effect in Photoshop
How to Create And Use Clipping Path in Photoshop
How to Use Refine Edge in Photoshop
Step 2: Open Up The Window Timeline
When you want to start to animate anything, you need to create the keyframes. To do this you have to open the window timeline. This won’t be open by default when you are making an animated GIF in Adobe photoshop cc.
So, go to the window option which is at the top of the menu bar. On the window, you can see the timeline option, click on it.
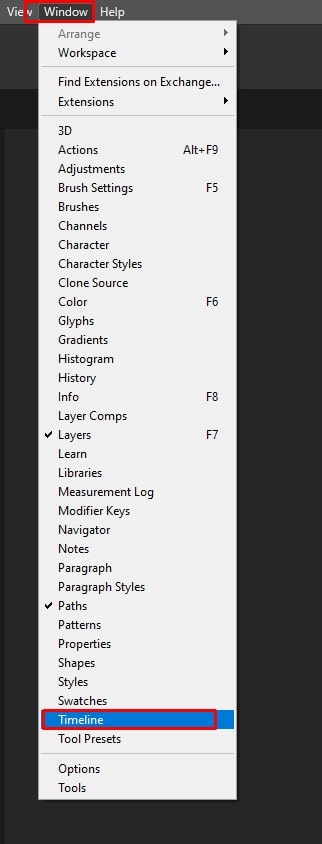
After selecting the timeline option the timeline window will be open at the bottom of your pc screen.
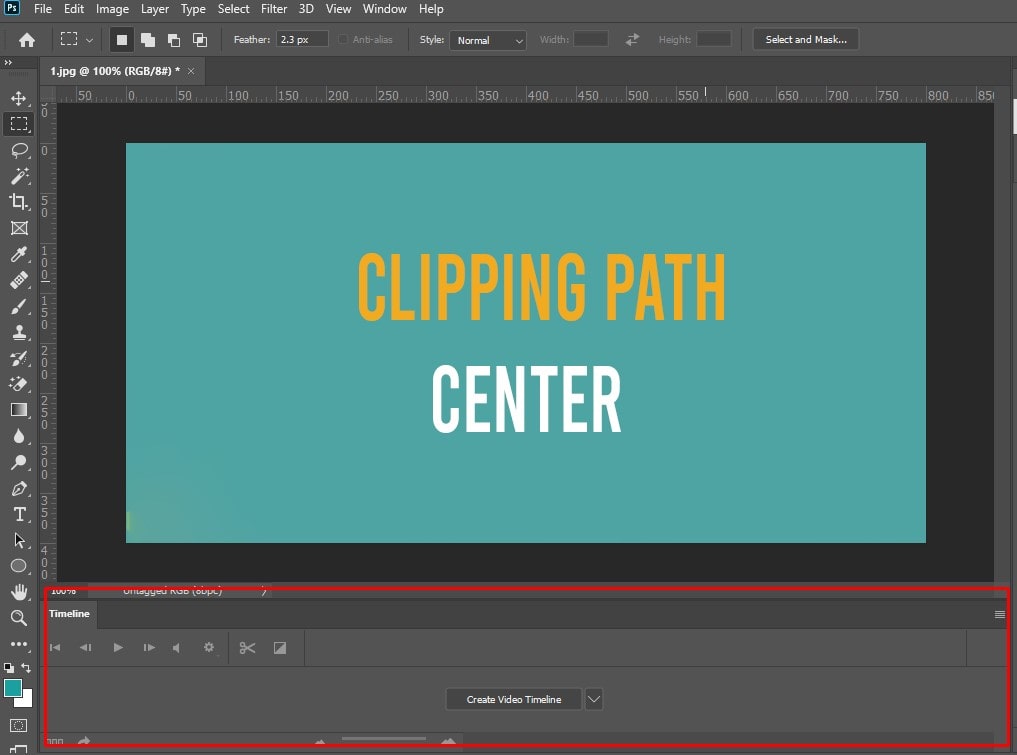
Step 3: Click “Create Frame Animation” in The Window Timeline
You can select the “Create Frame Animation” option from the dropdown menu if it isn’t selected automatically. Make sure that you click on the dropdown menu, otherwise, the “Create Frame Animation” options won’t show up.

Your Timeline will look like this which is given below in the picture. And your changing layout will fix the timeline mode as a frame-by-frame style.

Note: You need to notice in the timeline, how the picture is laid out as a frame.
Frame Animation
By applying timeline Frames, you can edit your picture and create animated effects as blinking and tweening the text through layers. The window Timeline will help you to fix the layers on and off, rotate text, fix the length of the time for certain frames, and move elements in individual frames.
Step 4: Make a new Layer For Each New Frame
When you are making a GIF in photoshop, you need to keep in mind that each frame has its own layer. For that, you will get the power to edit each frame without impacting the others in your project. It is an important part of designing a good animation.
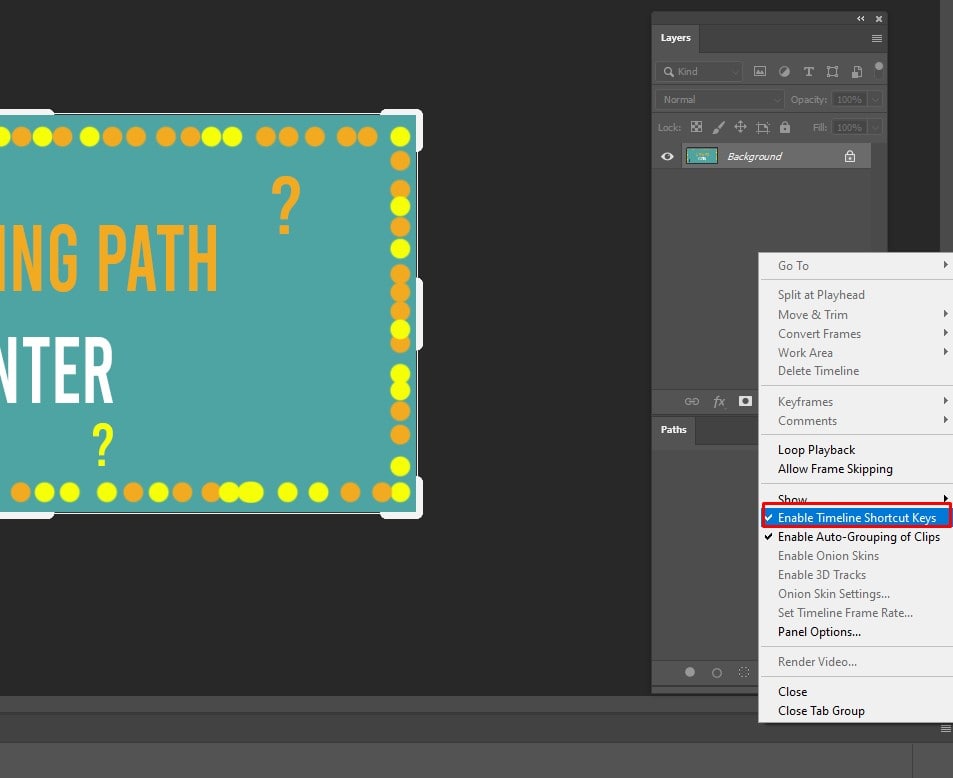
For making a new layer for each new frame, you need to go to the top menu bar and click on the Select option. In the select option, you can see the all layers option, click on it. After that, hit on the menu icon which is on the right side of the Timeline screen.
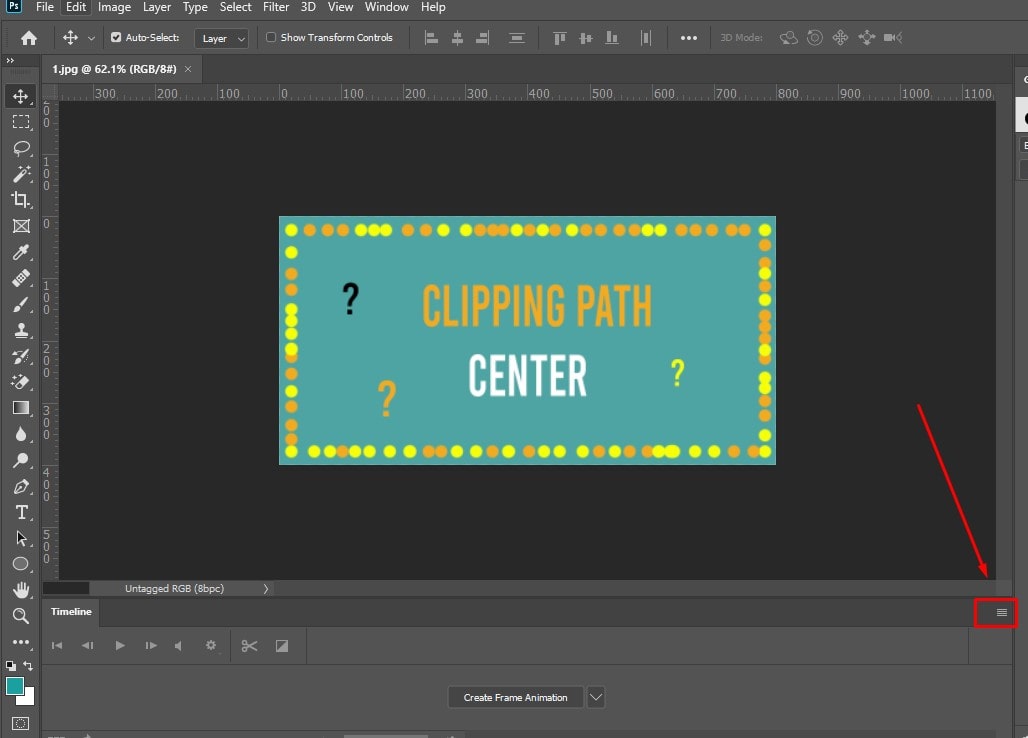
After that, go to the dropdown menu, Dropdown menu shows the “Create a new layer for each new frame”, click on it.
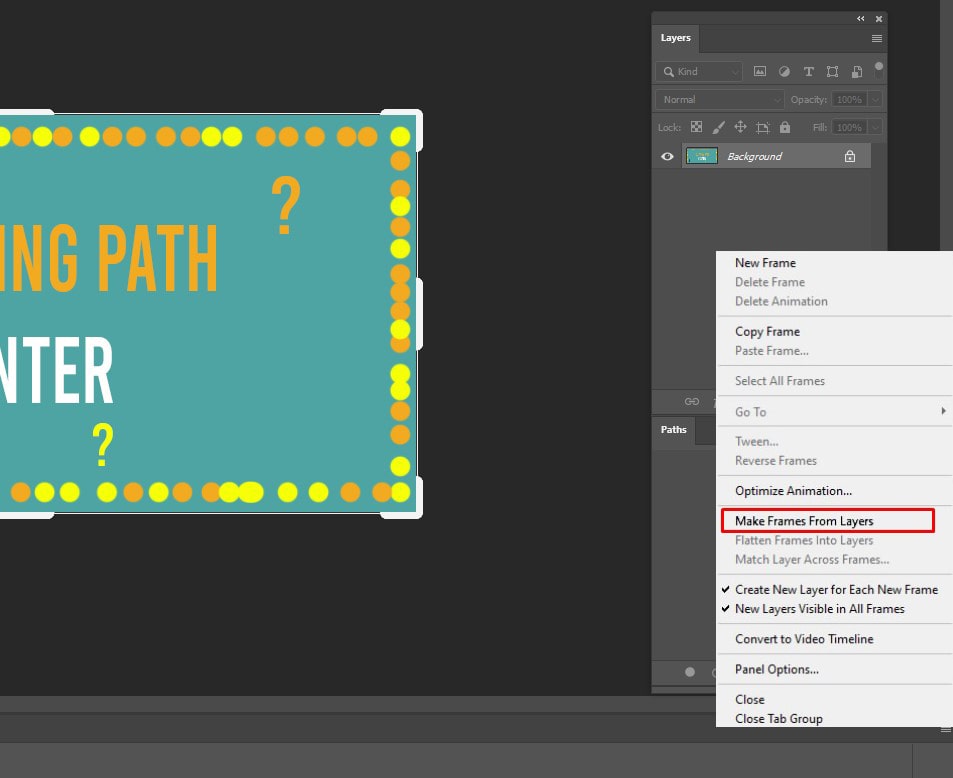
Step 5: Open the Same Menu Icon On The Right
In the same Menu Icon on the right which you opened the previous step. In the Menu Icon, you can see the “Make Frames From Layers” Option, Click on the option.
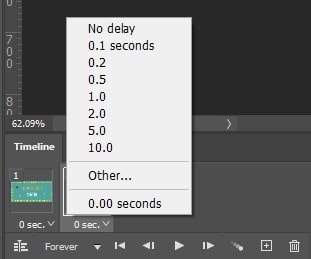
Step 6: Frame Duration.
Now you need to know how long each frame plays for. If you won’t do that, then your animation won’t work properly.
It’s an easy process: Select a frame that you want to edit. Next, click the arrow and choose the time which is in the dropdown. Choose the frame time from the time chart which is given below, which you can see in the image. And select how long you’d like it to show.
By default don’t choose 0 seconds. If you choose 0s then your animation won’t function perfectly. So, Try to choose 0.5second. Look at the image, I chose 0.50seconds.
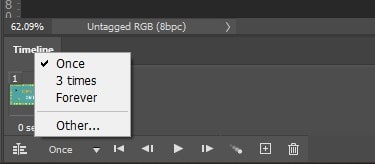
Step 7: Looping Option
Firstly, make sure that the GIF in Photoshop is working well which you have created. Now the question is, Do you want to repeat the image Once or More than Once?
Click Once Option, if you want- the animation is run for once. Which is at the bottom of the toolbar (Follow the picture).
But if you need to repeat more than Once, for that you can loop it to 3 times or forever, as you like. And if you’d like to specify a custom number of repetitions then Tab on the Other option.
Step 8: Preview
Now you have to preview the GIF by clicking on the play icon. For that, photoshop helps you to visualize the image in the program into the file format.
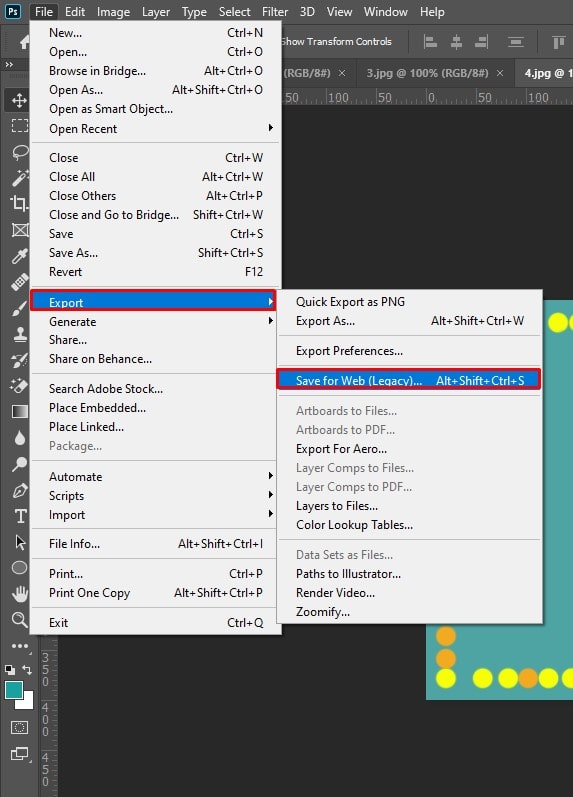
Step 9: Save and Export the GIF In Photoshop
Now you can save the GIF in photoshop. To save it, go to the File option which is in the top menu bar. In the File option, you can see the Export option, click on it. After clicking the Export Option, you can see in there Save For Web(Legacy), click on it.
Afterward, You have to select the GIF file. To save the file click on Preset Dropdown. Next, choose the GIF 128 Dithered to prevent color banding if the GIF with gradients.
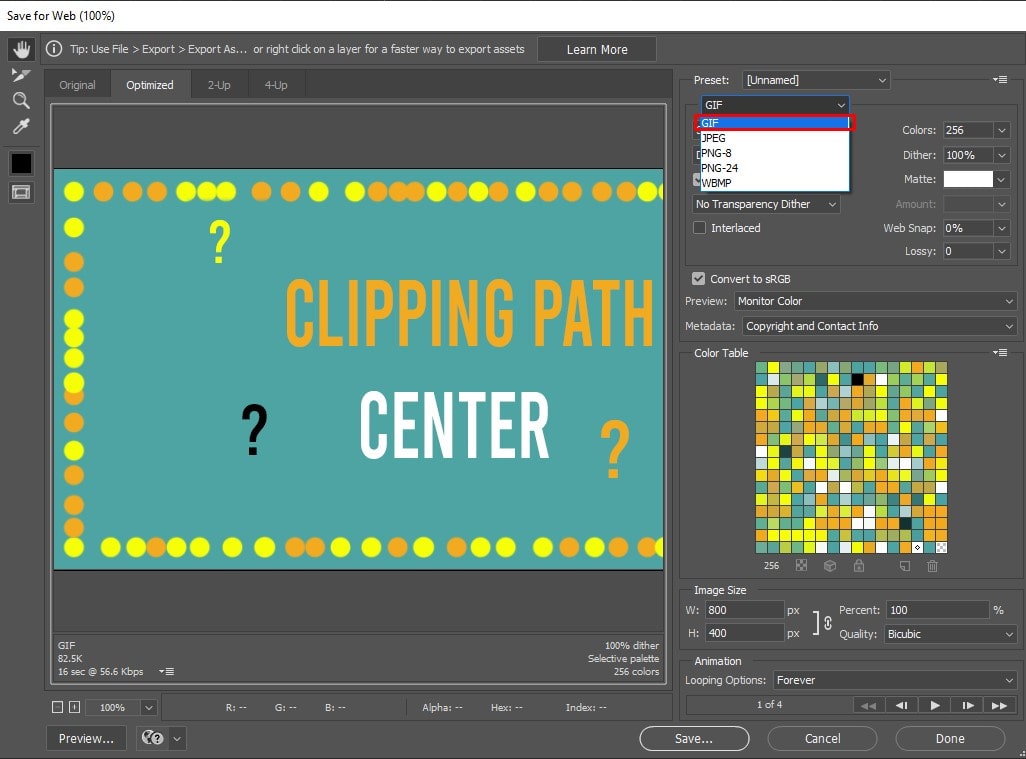
Then click on the Save button which is at the bottom of your screen. Now you can upload this GIF on any online platform. This is the final image:
Conclusion on How to Make a GIF in Photoshop
Now then, I hope you can make your own GIF animation.
This is a very simple process, but if you are a complete beginner then you may face some difficulties. On that note, this can be performed to avoid unwanted situation:-
- Must use the latest software (I.E. Adobe Photoshop cc 2020), because this is the most featured version. And it has many new tools to edit. If you follow this guide properly then you can create a large number of GIFs for your online marketing. Or any kind of online platform.
Keep in mind that, before going deeper into the process, don’t be afraid of asking what your clients want. As a good photo editor, you want your clients to be happy.
Hence, stay in touch with them confidently. When you make a good relationship with your clients then they can trust you and your work. As a result, they feel happy to work with you. So, making a good relationship is very important.
You may also read:
How To Choose The Best Clipping Path Service Provider