Learn photo editing for magazine from this brief guide to make an eye-catching magazine cover or inner pages.
Every photographer has a dream to take fashion shots & be a master of retouching to convert their shots into classic shots. If you want to edit your magazine’s shots, follow these articles to make portraits look like master shots.
A vivid celebrity photo is enough to make your magazine popular & talk of the town. So it’s important to edit your shots with the best editing software to make the photo-worthy. An eye-catchy image is worth more than a thousand visual stories.
.In this article, I will try to cover everything you need to know to edit a photo for both online and printable magazines.
Let’s begin.
Benefits of Photo Editing for Magazine
Magazines are one of the best ways to get your photos seen by more people. They can be printed or published online. If you want to make sure your images look their best, there are many things you should consider before publishing them.
There may have many unexpected problems. Magazine Photo Editing help you in this regards
There are many ways to edit magazine photos. Some people like to use Photoshop or other photo editing software, while others prefer to use free online services such as Pixlr-o-Matic.
Either way, there are plenty of options out there. You can create professional-looking magazine pages and photos using Adobe Photoshop. It saves money, energy, and time.
A Brief Guide on Photo Editing for Magazine
Magazines are always looking for new ways to attract readers. They need photos that will make them stand out from their competitors. A good photo editor knows how to edit images so they look professional and interesting.
Basic editing is the key to generating eye-catchy magazine photos that look standard. No matter what your photography skill is! You can still make your bad click into high-quality images with a few clicks of mouses.
Dive into the article to know how to edit editorial photos.
Photo Retouching for Magazine
To publish your photo in various fashion magazines, the precondition is the perfection of your shots.
You can’t publish bad dull-looking images in your magazine because that is enough to bring a bad reputation for your magazines though you attach lots of informative, latest news. So, the heart of your magazine is a good quality picture.
People won’t read those magazines that contain poor-quality pictures. Besides, most of the magazine’s photos are fashion shots, celebrity photos, or portraits. To derive perfection there is no alternative to photoshop image editing.
Even a pro photographer can get some bad snaps due to insufficient lighting. It’s impossible to repeat the shots because the models are so busy. So, you can only edit your photos to transform the outlook.
However, there are many chances to produce a photo containing glare, reflection, blemishes, etc. This is not always the photographer’s mistake. Often the models are not prepared enough. But your motive is to make an attractive magazine photo to hold the reader’s attention.
So, you need to polish the shoots to make them marvelous & glamorous.
You need to know how to edit editorial photos to get glamorous pictures. So here I am going to share the easy tips & steps on how to edit editorial photos to produce a perfect glamourous photoshoot.
Must know: Why Cheap Retouching Services are Bad?
Image Cropping
The crop tool is one of the basic tools you must know for editing magazine photos. You must need to maintain an accurate size to publish in magazines. At a time, it is important to ensure that the image is not distracting.
If your image contains unnecessary pixels that can distract the images. So, you need to cut the unnecessary pixel from your images & convert it to focus-grabbing with the help of a crop tool (A guide to the latest photoshop cc tools).
Photoshop is the giant & leading photo editing software that helps you to edit the photo perfectly & allow depth control in your editing.
So, I suggest you use photoshop. From the toolbar, you will get the crop tool. To edit images, follow the below steps-
- First, erase the unnecessary objects from the picture.
- Be careful don’t cut any points that join the model.
- Try to set the subject to fit in the frame.
- When it’s a portrait shot, crop it at eye level.
Most professionals use Photoshop to crop and resize images easily and effectively.
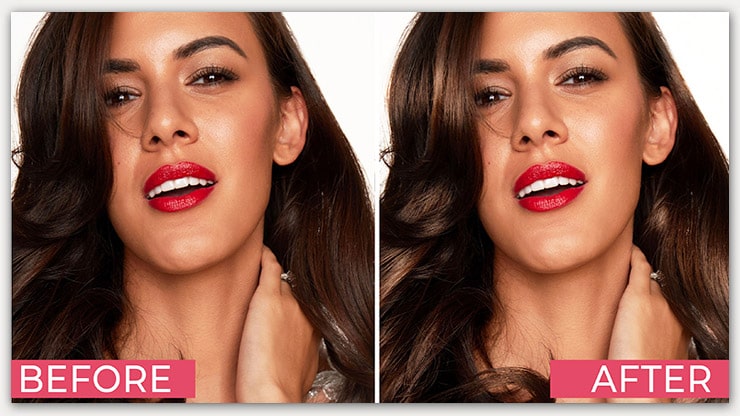
Skin Correction for Magazine
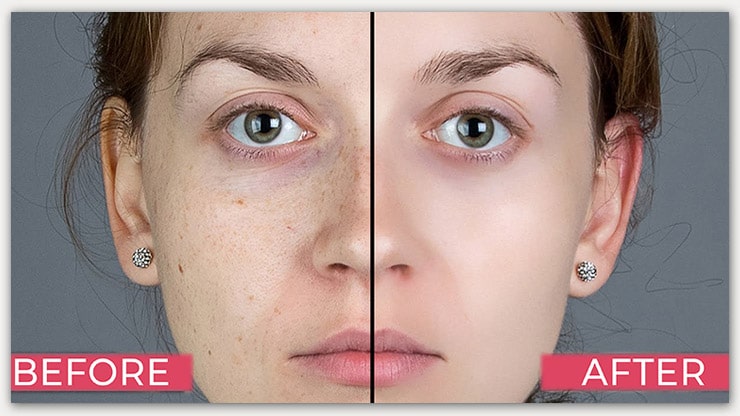
You need to derive a natural skin glow. So, following some natural skin retouching is important to derive glamorous skin.
This step is quite challenging as you retouch the skin but you need to keep it natural. If you aren’t good at skin retouching & make it look artificial it’s better to outsource photo retouching services.
However, it’s possible to derive the natural look if you follow my tips & practice it regularly.
You should first remember that keeping the sharpness level accurate is mandatory. So please don’t make it too high, which results in the skin being too clear that seems edited when you set an exact sharpness level that will represent each skin detail.
Smoothing skin is the most demanding effect that most magazine photographers try to show.
It looks great. You need to use the Clone & healing tools to derive smoothing skin. Healing tools help you to get rid of unwanted blemishes, spots, rashes, etc. & clones help you to retrieve any damaged portions or correct any uneven skin parts.
This tool will generate magical results that must impress the audience.
Skin Tone Adjustment
As a beginner, it’s not tough to adjust the skin tone if you have a sharp eye. Just look at your model’s skin tone & derive high-end photos, and choose amazing colors & shades to make adjustments.
It helps you to hide an uneven tone. Create a new layer & select an essential color to make the adjustments. An expert hand must adjust the skin tone evenly to look glowing.
Apply the Frequency Separation Method
Frequency separation is an essential tool of photoshop for editing images. The benefit of this tool is it allows us to play with colors individually on various layers. You can apply frequency & low frequency according to your needs.
So, you are capable of editing images without the influence of shadows & color. Always try to improve the skin with a natural tone.
Color Balancing for Magazine
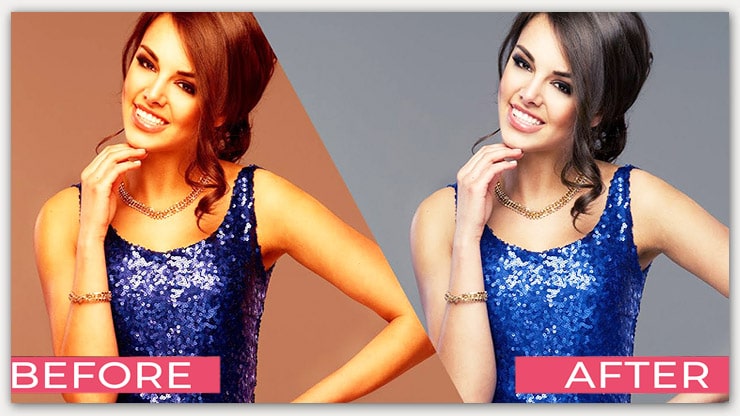
Color is another vital factor to derive vivid images. You can balance the color using different methods in photoshop.
The easiest & simple way to do color correction is by using the histogram. The histogram will balance the color uniformly.
It will be unique for each image. Your software generates the histogram of your images & the level adjustments help you to adjust your phone’s brightness or saturate the colors perfectly. From photoshop, select Window- Histogram & now make your required adjustments.
Correction White
If you don’t do white balancing, your model image will look too yellow. This method is similar to color balancing. You can use the built-in white balancing feature to adjust the white balance. It can give you amazing results.
Select window -> Adjustment. Now choose selective color & do the automatic white balancing. See the difference it makes in your photo. That will be cool.
Noise Reduction
To generate stand & high-quality images it’s important to use some tricks. For example, you can make noise reduction if you follow some secret tricks to remove grains from a photo.
It is the insufficient light that generates poor shots. Follow the below steps to reduce noise-
- Keep the ISO low, which generates low noise.
- You can select Filter-> Noise -> Reduce Noise to get rid of the noise.
- Try the Surface Blur tool.
Photo Editing for Magazine: Teeth Whiten
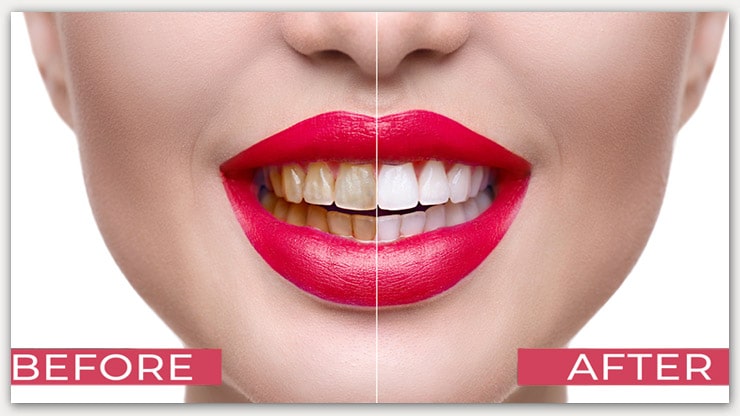
A smile is a way to attract the audience at first glance. But if your model’s teeth are not white it will fail to create a positive first impression. Therefore, in a magazine, it’s important to display a model photo that contains white teeth.
Most of the editors make an effort on natural teeth whitening in Photoshop. This will help you to get rid of yellow teeth & help you to generate a beautiful smile. Follow the below steps-
- From the toolbar, select the lasso tool.
- Make a selection area of your teeth.
- Create a Hue/Saturation Layer
- Modify the edit options to yellow.
- Reduce the saturation slider
- Modify the edit mode again to Master
- Now use the Lightness slider to increase the brightness. It will give you natural whitening teeth.
Lips Enhancing for Magazine
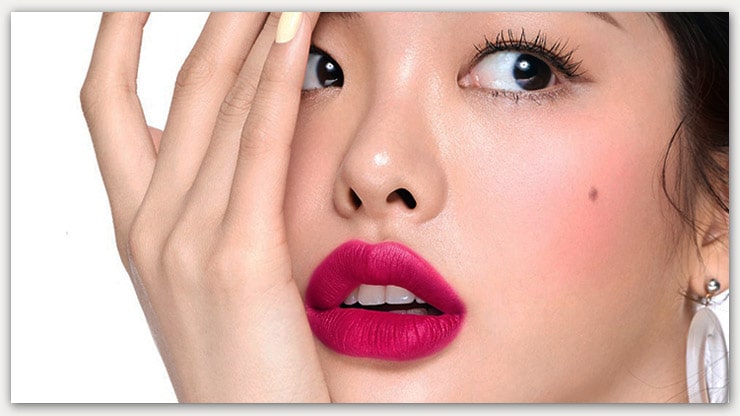
Lips are the key to grabbing attention. So, if your snaps contain a model photo that’s lips is not look glamorous, it is essential to do some editing.
Though your photo has an excellent skin tone, it is important to reshape the lips to make your photo perfect. Follow the below steps to do lips enhancing like a master editor-
- Make a new layer
- Now you need to remove unnecessary sketches & distractions from the lips inside.
- Select the Regular Healing Brush tool & check the sample is selected as Current & Below options.
- Zoom in on the photo & take a sample by hold+ Alt options & click on a nearby area & blend it smoothly.
- Now select the pen tool from the toolbar to draw the outline using the pen tool & create an enlarged path. You can enlarge the lips as much as you need. Make the necessary adjustments to create a perfect lips outline.
- Now hold ctrl & click on the path. It will make a harsh selection of lips.
- Now you need to smooth the selection. Press Q to go to quick mask mode. Go to Filter-> Blur-> Gaussian Blur-> 3.2 the value depends on your image. Click Ok. You can see a soft selection.
- Bow creates a new layer & names it an outline layer. Enter ctrl shift+I to select the outside of the selection layer. Take a sample & blend the outline with a soft healing brush.
- Now, ctrl shift+I to select the inside & take a sample & blend the inside portion of the outline.
- Now to make a final selection, press Ctrl+ D. Your lips look soft & Beautiful. To make it more natural & vivid select the outline layer & decrease the opacity by 60-70%.
It’s enough to enlarge the lips. Then, you can use the dodging & burning tool to adjust the lip’s color. Dodging helps you to brighten the lip’s color & burning helps you to darken the color.
Eye Color
Sometimes the photo does not reflect the original eye color. So, needs to modify the eye color to make the photo vibrant & natural. Follow the below steps to change the eye color easily.
- Click on the Adjustments icon & then choose Hue/Saturation
- If you move the hue slider, it will change the color of the whole image.
- To invert the mask, click on Image. Select image-> Adjustments->Invert
- Now choose the Brush tool. Now crucially, paint with a brush over the Irish without going outside the edges.
- Repeat this step for another eye.
- Now you can apply contrast & make lower color saturation to make the eyes natural & glamorous.
You have successfully transformed the eyes’ color. See the below images to find the differences.
Photo Editing for Magazine: Eyes Pop-up

The main attraction of a portrait is the eye. Therefore, if your model’s eye is not attractive, it is essential to enhance its appearance to make it eye-grabbing.
This type of editing needs an expert hand & hard labor to do the editing efficiently. Some people prefer to outsource photo editing services to get a stock model photo with an attractive appearance. So, here are some tips to make the eyes pop.
- Create a new layer. Then click on adjustments & choose exposure.
- Select the mask invert.
- Now modify your Irish & pupils. Start painting with black & white repeatedly
- Select Luminosity in a blending mode of the layer.
- Apply contrast to the irises to enhance the exposure.
- And now, try to modify the offset slider to derive the perfect eyes pop.
Photo Editing for Magazine: Digital makeup
Magazine’s photo without makeup is incomplete. So even though your model won’t get time to take proper makeup, it is a must to attach digital makeup that saves your time & makes the shoot convenient.
Sometimes choosing perfect clothing & matching jewelry is also difficult. Digital makeover allows you to change your model clothing & accessories as per requirement & make the photo lucrative.
Often the makeup does not enlighten the model’s beauty properly & the lighting spoils the makeover or dress color. So, the only option is the digital makeover to overcome these kinds of problems.
Makeup fixing and adding digital makeovers are important steps in editing editorial photos. You must follow this step to get a perfect magazine photo. Follow the below steps-
- While sharpening the image’s highlights on the red channel.
- Choose the Radial Filter to eyes pop.
- Use a patch & clone stamp and a healing brush tool to remove skin spots and wrinkles.
- A healing brush helps you to adjust the skin color that matches your body color.
Using these above tools you can apply a digital makeover. If you need to change the model dress color, you can use the pen or quick selection tool.
Photo Editing for Magazine: Remove Flyaway Hair
Flyaway hair is a common problem every photographer faces. It can happen due to the wind. Removing flyaways are crucial & challenging photo editing step because each hair has a unique style & pattern.
You need to apply various methods to fix the flyaway hair perfectly. Unfortunately, there is no one-click solution for gaining perfection.
If you follow some steps, you can remove the distracting flyways from your images. If you find it difficult or time-consuming take help from a reputed photo editing service provider like Clipping Path Center.
Here I am going to share an easy technique to fix grainy hair that won’t give excellent output in a complicated case. But if you are lucky, it will give good results in the case of your images. Follow the below steps:
- Open Your images & create a new layer.
- From the toolbar choose the spot healing brush & set the foreground color as black. Now paint the flyaway hair with the spot-healing brush. If you are lucky, this is enough to remove the curly hair.
- Now for further modifications, create another layer & reduce the opacity to 50% & paint the flyways with the same spot healing brush & keep the brush size 20pixel.
It will make your image hair look more natural. But there is also some extreme frizzy hair that exists in some images. In those cases, you need further advanced editing.
So, It’s better if you have extreme grain problems you will take help from an expert Photo Retoucher. Because this painting is not too easy, You will need to do it crucially; otherwise, it will harm your good hair & make it look artificial.
Add Shine & Modification To Hair
Adding shine to dull images is quite challenging & advance editing steps that need dedication & time.
These methods need to change the original hair shape & enhance the volume. Photoshop experts give effort & time to derive efficiency & excellent silky hair that can surprise you.
So, it’s better to take professional photo editors’ help to modify the hair look & add shine to models’ photos that are lucrative (See our Pricing Plan) because this complex editing won’t come overnight.
Remove Background
The background is the foundation of an image. If you attach a distracting background that can grab the attention of your subject, which is harmful.
Besides, if you add a light background, it can spoil the beauty of the subjects. Thus, it is ideal to use a prominent & cool background that enhances the beauty of your subjects.
Background Removal is another crucial photo-editing step that you must apply. The pen tool can draw an efficient path to isolate the subject from the background. This process is known as the clipping path method.
For example, you should go for the clipping path method to remove an object with a solid outline.
But the objects that do not have plain edges contain a complex structure that needs masking to remove the background. For image masking, you need a Background Eraser tool, a Magic eraser tool & a color separation method.
These two methods need a keen eye & expert hand to cut the subject perfectly from the background. If you mistakenly cut any essential pixel from the images, that can make your images of poor quality.
So, it’s better to take help from a professional photo editing service provider to remove the background efficiently without a single-pixel loss.
Professional Photo Editing for Magazine
Now you realize that photo editing is a time-consuming & complex technique. Many photographers & magazine owners have no time to use photoshop for photo Retouching but want a professional outlook.
They care about their reputation & quality of work. So, the best option for busy photographers or magazine owners is to outsource photo editing companies like the Clipping Path Center to get standard editing at a reasonable price.
You can order a Photo Retouching package, Background removal, Color correction, etc. The expert hand can transform your images into a glamorous one that will bring fame to your magazine’s business.
FAQs
You can edit magazine photos with Adobe Photoshop Elements, which has a variety of tools for editing images.
Magazine covers are usually shot with an aperture between f/2.8 and f/4, ISO of 100-400, a shutter speed of 1/125 – 1/500, and a focal length from 50mm to 200mm.
If you want professional-quality images, then it may be worth hiring an image editor. However, if you just want to make minor edits such as cropping, adjusting brightness/contrast, etc., then editing them yourself will save money.
Last Words
Here I try to cover everything you need to know about photo editing for the magazine. If you follow my tips & guideline it will help you to edit your magazine’s photo like a pro.
But keeping some patients is important because perfection comes with expert hands. So give yourself some time to do practicing on how to edit editorial photos to achieve perfection. Your practices are the main weapon to bring excellence to your editing.