The clipping path is a well-known photo editing process for many people, especially those in the E-commerce business. The clipping path keeps its focus on creating life-like images.
Many Photoshop services companies provide clipping path services and are highly professional in making an accurate and unique clipping path.
However, while working with the clipping path, you might have faced a problem known as the clipping path inverted. Unfortunately, this problem is quite common in the Photoshop industry.
Clipping Path Inverted in Photoshop and Solution
A clipping path is an invisible line that tells Photoshop which part of an image to keep and which part to discard. When a clipping path is inverted, it tells Photoshop to keep everything outside of the path and discard everything inside the path. This can be useful for isolating a subject from its background.
Now, while working on the clipping path, many people experience a problem and look for a solution to the problem of “why is my clipping path inverted.”
If you’re a Photoshop user, you may have come across the problem of an inverted clipping path. Unfortunately, this issue is actually quite common in the Photoshop world.
An inverted clipping path can occur for a variety of reasons. The most common cause is simply because the clipping path was created incorrectly. In other cases, it can be caused by an image being saved in the wrong file format.
Fortunately, there are a few simple solutions to this problem. First, you can try to recreate the clipping path simply.
You can try saving the image in a different file format if that doesn’t work. In most cases, either of these solutions will fix the problem of an inverted clipping path.
What does Clipping Path Inverted Mean?
Let’s say; you are making a clipping path around an object. Using the pen tool, you create the path, and if you give the final command, the path will turn into a selection. But unfortunately, the path gets reversed.
This means you didn’t get a selection of the object; instead, the background gets the selection.

Now the question is, How Can You Solve this Problem?
As you already understand, while working with the vector mast, you can create a path using the pen tool. And if you close the path, the vector mask will be customizable. However, inverting the path is inevitable if your mask is white, where it should not be selected.
First, select the tool named path selection to accomplish this task, and your target has to be on the vector mask. After then, don’t miss to give click on your path.
If you go to the tool options bar, you will find an icon named Subtract from Shape Area – once you click on this icon, the path will automatically invert without creating any problems.
Let me explain the solution too.
Explaining The Problem:
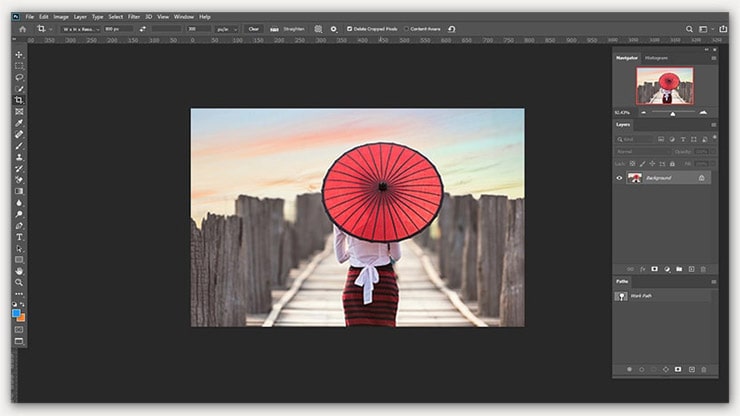
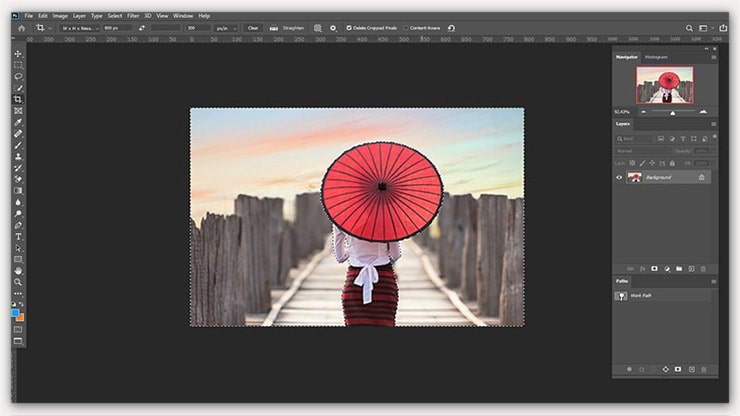
I open a photo in Photoshop and create a clipping path around the subject.
But when I make a selection by pressing Shift+Ctrl+D, always my selection is inverted/reversed.
Solving Clipping Path Inverted Problem Easily:
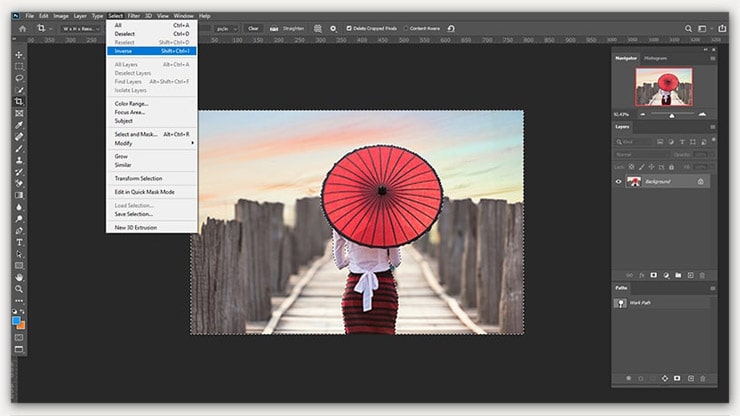
To eliminate this problem, click on the Select option and choose Inverse from the dropdown menu.
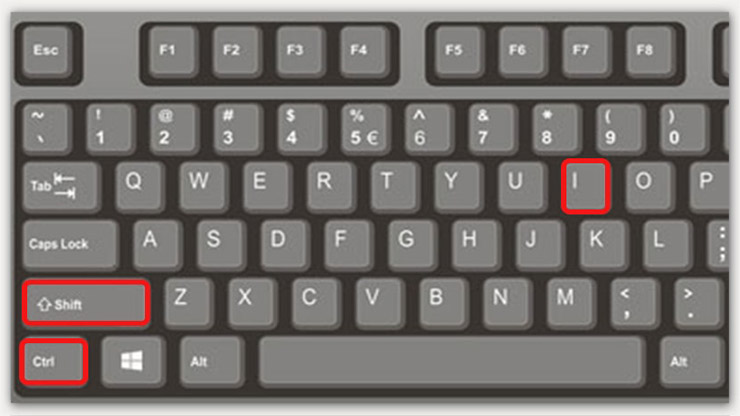
You also can solve this problem by using shortcuts. To do this, Press the Shift+Ctrl+I button from the keyboard.
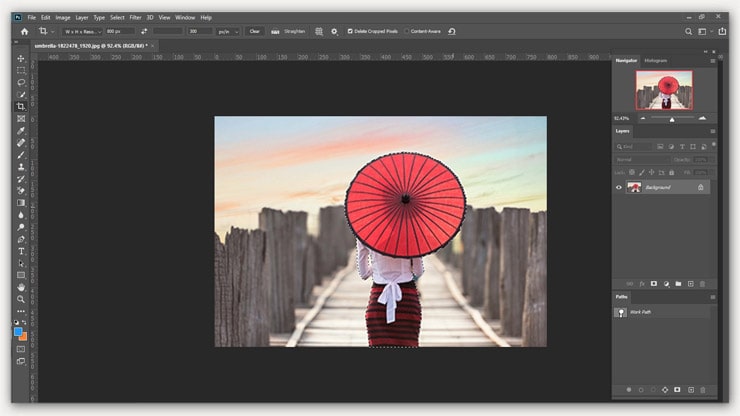
Look at the picture. Now the selection perfectly covers only the subject.
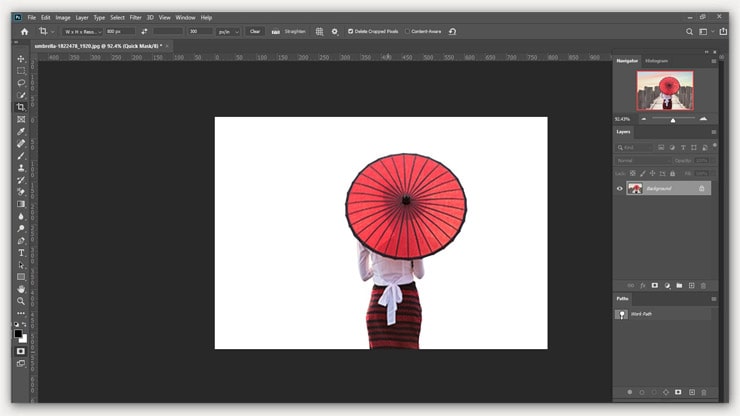
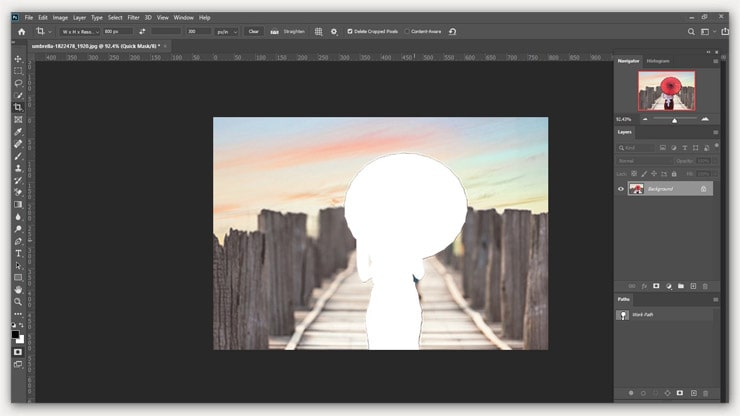
Now press the Q button from the keyboard to see the result.
Done! I hope it solves the problem. If you are new to photoshop clipping paths, you can read:-
- Clipping Path vs. Masking: What is the Difference? With Example
- What Is A Clipping Path? Everything You Need to Know
- What Photo Editing Software Should a Beginner Use in 2020?
When do You Require a Clipping Path?
If you have an image with a complex background that you want to remove so that only the photo’s subject is visible, then you need a clipping path. A clipping path is an image editing technique that allows you to isolate one area of an image from the rest of the picture.
This is done by creating a “path” around the area you want to isolate and then using that path to “clip” the image so that only the isolated area is visible.
A clipping path is the best way to remove the background from an image. Clipping path service providers always use this technique for removing the background and changing it with a new one.
You can also use the clipping path in other ways like cropping, drop shadow, enhancing or retouching images, applying color correction, etc.
- Background removal of an image.
- If you want to design catalogs in InDesign or QuarkXPress, this option works great if you are looking for a way to hide the background of your image without removing it.
- Do you want to change the shape or choose and customize any specific region of an image? Undoubtedly, select the clipping path.
- You also can do color correction using the multi-layer clipping path.
When is the Clipping Path Unnecessary?
For example, when the image is being used for web purposes, you can save the picture as a JPG with a lower-quality setting. This will result in a smaller file size and will allow you to avoid the hassle of creating a clipping path.
Moreover, You can’t use the clipping path service when your subject contains messy edges, such as a teddy bear or if the subject is translucent. At this point, you need to apply an advanced photo masking option.
Final words on Clipping Path Inverted.
“Why is my clipping path inverted?” is a common question asked by Photoshop users. There are a few reasons why your clipping path may be inverted. One reason is that you may have accidentally inverted your selection.
By the way, you can now solve the Inverted Clipping Path problem on your own. However, the popularity of the clipping path is increasing trend.
To fulfill the requirement of E-commerce sites, you can’t deny the importance of the clipping path, which is the main reason for increasing its popularity of clipping path.
You may read: