Outlining a picture can change its overall appearance and make it look better. Unfortunately, not knowing that adding borders to images is pretty easy, many don’t try to learn the processes of how to outline a picture in Photoshop.
It requires two different tools only and a few steps to achieve your goals. So if you are a person who is eager to learn to outline pictures in Photoshop, we have got you covered.
We will share with you five ways of adding borders to photos with the help of the Stroke option and Layer style. So, without further ado, let’s get started.
Outline a Picture in Photoshop: 5 Easy Step-by-Step Methods
learn “How to Outline a Picture in Photoshop” from the following 5 Easy step-by-step Methods. With these 5 systems, you can add borders differently to your pictures and enhance their appearance.
But, first, let’s learn all the methods one by one.
(Method 01)
How to Outline the Edges of the Picture
The primary way of outlining a photo in Photoshop is by outlining the whole picture. You can’t focus on one or more particular sections to outline edges.
This way, you can make borders around the entire image. In addition, it’s the simplest method of adding an outline since you are not required to make selections.
All you have to do is click a little while and get the effect on your picture. Let’s learn the process below to outline your image edges.
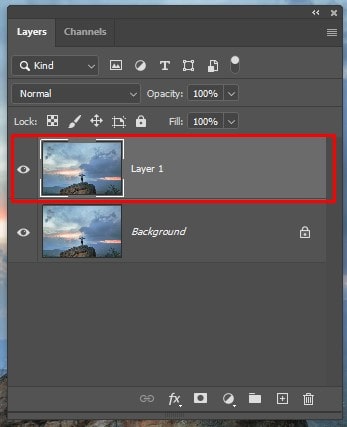
Step 1. Duplicating Layer
First, select the photo you want to work on. Now, duplicate the layer of the particular part you want to add the border around. This layer will help you in times when you will make mistakes. In addition, you can get a backup if you are messed up.
You can duplicate a layer using these shortcuts (Control + J for Windows and Command + J for Mac). If many layers are already selected you can merge them by pressing Control + Alt + Shift + E (on PC) or Command + Option + Shift + E (on Mac. It will merge the layers so that you can add them to your outline.

Step 2. Opening Layer Style Panel
Next, you must open the Layer Style Panel by clicking twice over the duplicate layer.
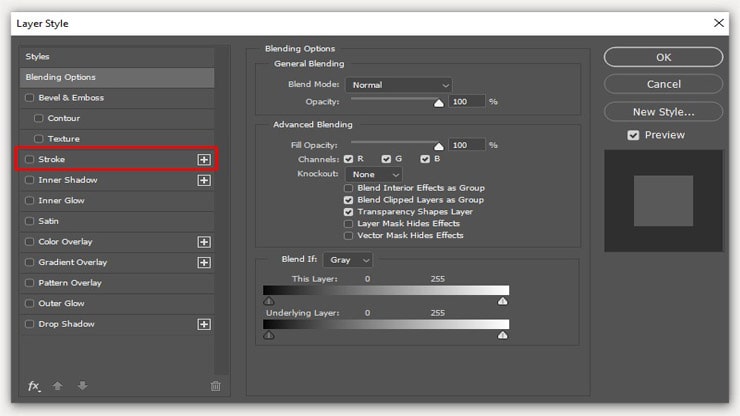
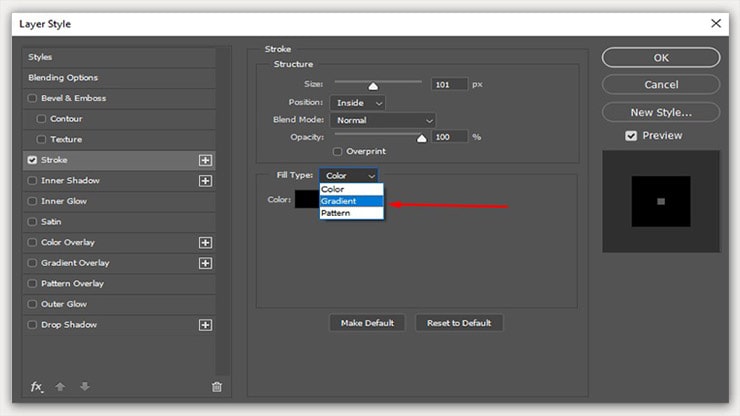
Step 3. Selecting Stroke
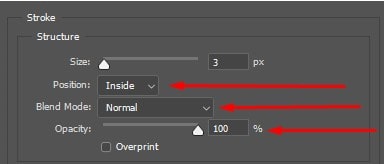
Choose the ” Stroke ” option and set its position to ‘Inside.” Set its opacity at 100%.
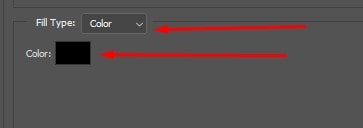
It’s time to pick a color for your border, which you can do by setting the Fill Type to “Color.”
Step 4. Adjusting the Stroke Size
Keep everything else unchanged but adjust the stroke size only by utilizing the size slider. You can pick any size you like. Successfully an outline will be created around the edges of your image.

(Method 02)
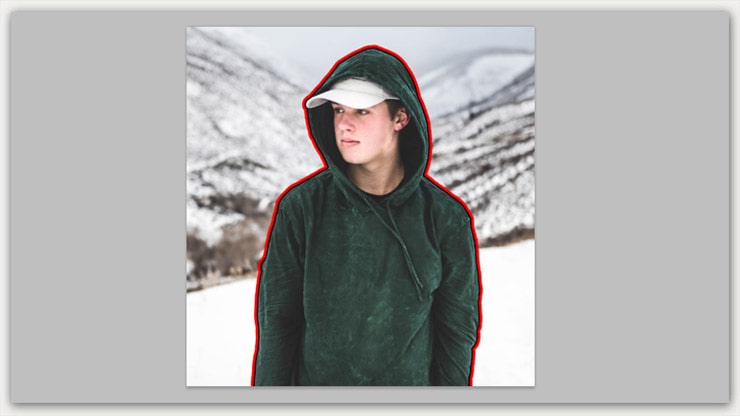
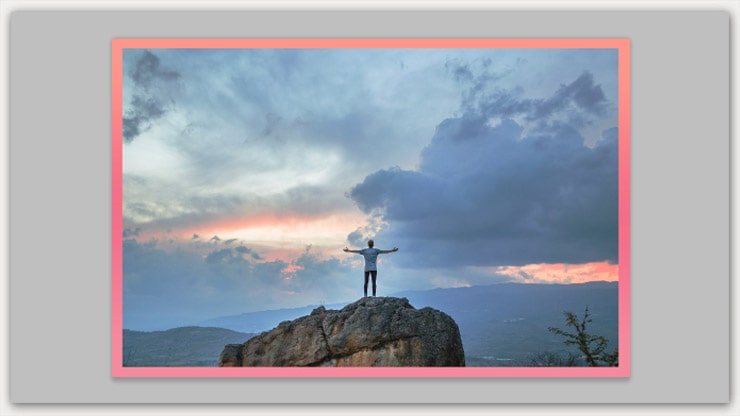
How to Outline a Cutout Image
Sometimes creating outlines around your pictures can ruin the image’s appearance, mainly when the picture contains a human being.
In such a case, the standard way to outline the picture is by creating borders around a particular selection. This method is neither too easy nor too challenging. If you practice this a couple of times, you can master it.
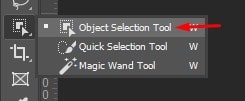
Step 1. Opening Object Selection Tool
Find the Object Selection tool in the toolbar, or press W on the keyboard for a shortcut. Remember, you can get this tool in Photoshop CC 2020 and newer versions.
If you have the previous version of Photoshop installed, you can use the Quick Selection tool instead. To keep the tool active, set its mode to “Rectangle” and select the “Enhance Edge and Object Subtract” options.

Step 2. Making a Selection
You must make a rectangular selection by clicking and dragging it around the subject. Then, ensure to properly fit the image subject into the box and let go. There is also a straightforward way that can speed up the process.
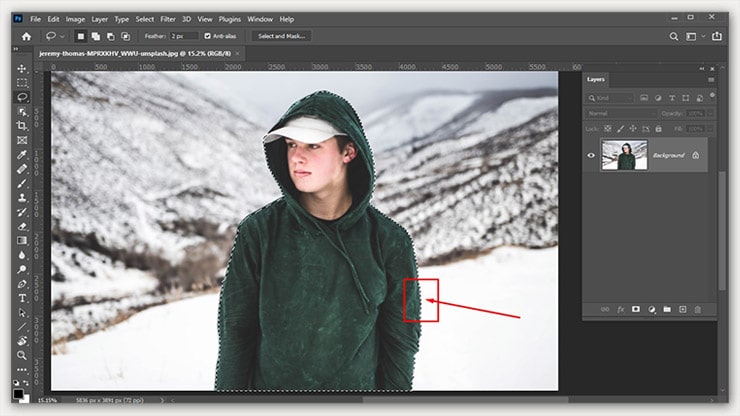
Use “Select Subject,” but only when your picture contains a background with a solid color. Afterward, press Control + J for PC or Command + J for Mac to duplicate the selection into a new one.
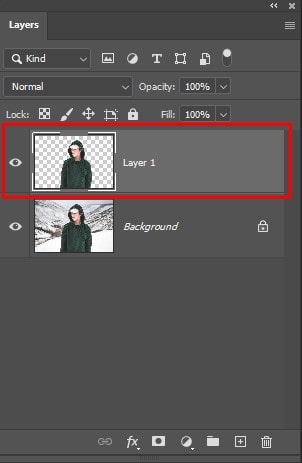
Step 3. Selecting Stroke
Click twice on the layer and open the Layer Style Panel.
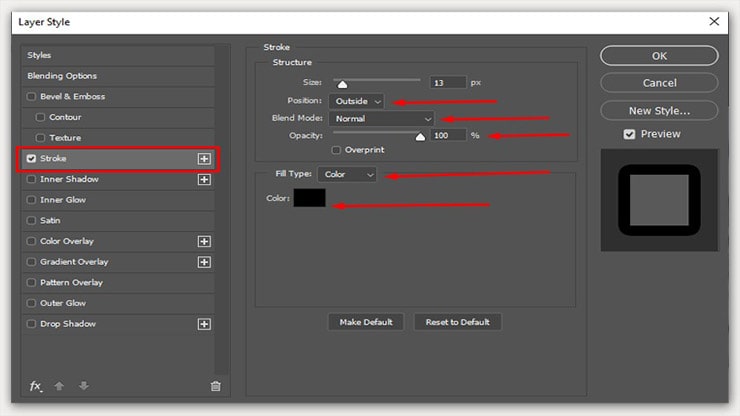
Then choose Stroke, set its mode to “Outside,” and keep the opacity at 100. Finally, select the mode “Fill type to Colour” for a color for your border and pick a color you want to use.

Step 4. Changing the Stroke Size
If the stroke size is too small or big, you can adjust it and set a size using the stroke slider. It will either increase or decrease the size of the outline.
(Method 03)
How to Outline Edges With Several Colors
We know it’s boring to add one color border to your picture. It will look better when spiced up a little. You can do it by adding additional colors. Improving your pictures by making them look unique will take a few seconds.
Step 1. Adding the Second Color
You must follow the entire process of method 02 first, and after making the first Stroke, you will have to add another color. To do so, look at the option “Stroke,” where you will find a plus sign. Click on that.
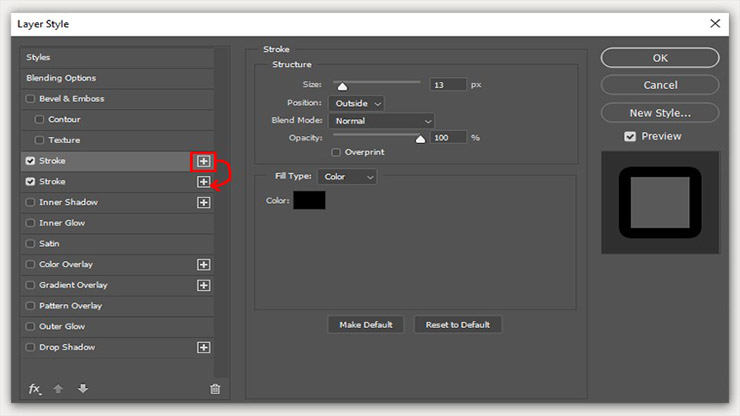
Step 2. Adding the Second Stroke
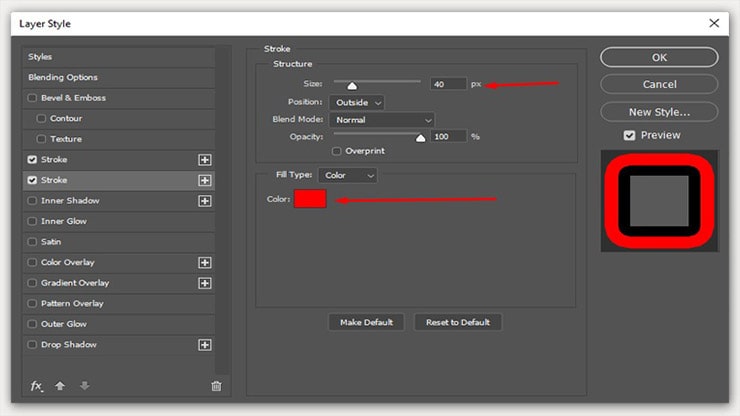
Clicking on that option will open another option for a second stroke. For further editing, keep all the other things unchanged but change the size and color values.
(Method 04)
How to Add a Gradient outline to The Photo
Adding a gradient to the photos can take things to another level. It takes a few clicks, and voila! Your image has a gradient outline.
Step 1. changing “Fill Type”
After creating the initial outline, you must switch to Gradient in the Fill Type Color.
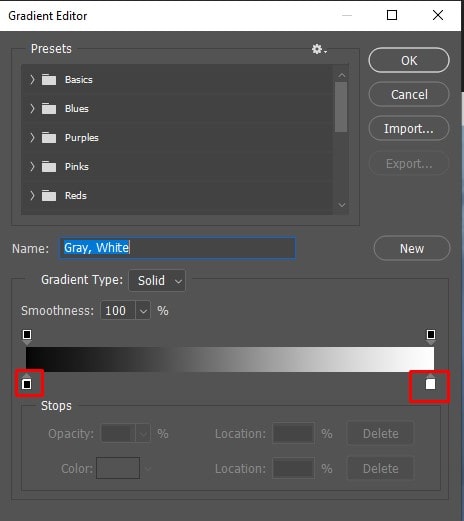
Step 2. Creating Gradient
After switching to Gradient, the Gradient Editor will appear from where you can either create one or pick from the given preset options. Just click over the color swatches to make a gradient. Next, you will see a color picker to choose the color you want.
Or use a gradient from the preset by browsing through the folders and picking any of them as you prefer. In this case, we have selected a gradient from the Oranges folder.
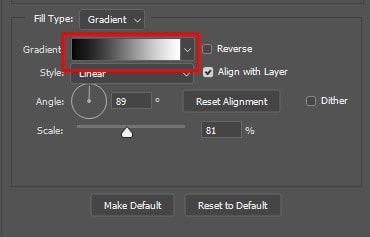
Step 3. Selecting Gradient Angle
After setting a gradient color, select the Angle to start and end the Gradient from wherever you like by rotating its angle alignment.

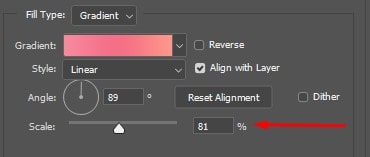
Step 4. Setting Gradient Scale
The preference for transition varies; some want to make it more complex, while others like it softer. You can control this by setting the gradient scale. The larger the scale, the smoother the transition, and on the other hand, the smaller the scale, the harsher the lines.
Finally, set the gradient type as you prefer. If you can’t make up your mind, keep it to “Linear.”
(Method 05)
How to Outline a Photo With a Texture
It’s the last technique you can approach to add borders to pictures in Photoshop. Creating a pattern or texture is easy, but you can use it after making an initial outline around your image.
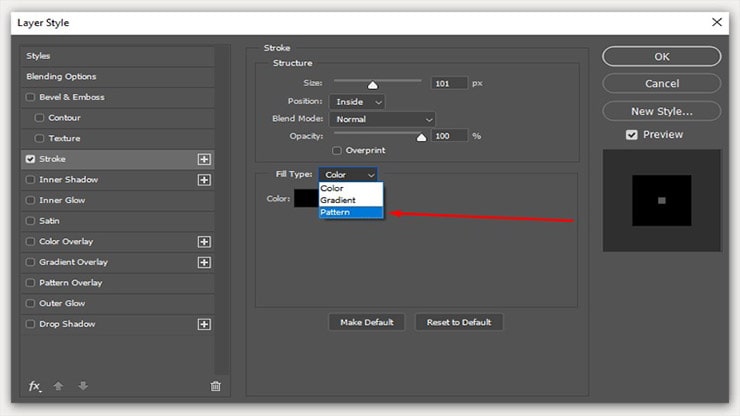
Step 1. Changing “Fill Type”
Set your Fill Type to “Pattern.”
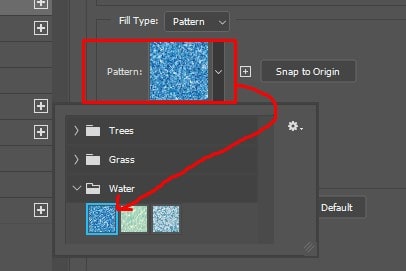
Step 2. Accessing New Patterns
Click over the Pattern Box and access various patterns. The default options are few and so if you don’t like one of those, try downloading online.
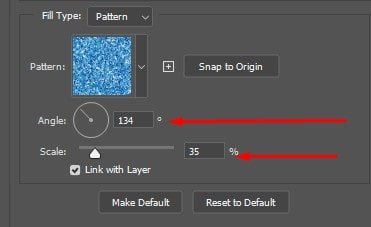
Step 3. Adjusting Angle
Under the option “Pattern,” you will find Angle, and using it, you can pattern orientation for lining up better. Finally, set a scale you think will go best with the image, and you are good to go.
FAQs
You can outline a picture variously using Photoshop software. There are, in total, 5 techniques. You will find all five methods of outlining a picture in this article.
Follow these steps to turn a picture into an outline in Photoshop
1. Adjust the image contrast
2. Set up layers
3. Use the adjustment layer and convert the picture to grayscale
4. Convert a picture to a line drawing
5. Set the colors for the background and foreground
6. Add on pencil shading
7. Use the effect of cross-hatching
8. Make the last tweaks
With the help of the move, the tool selects the layer of the photo. Afterward, you need to place the logo wherever you like by moving it around different areas. Now, click on the checkmark from the top bar, and you have successfully outlined a logo on a picture.
Closing Remarks
We hope you have adequately learned how to outline a Picture in Photoshop. These techniques are effortless and take a little time. Now, say goodbye to boring pictures. Instead, outline edges or outline specifically selected pictures with 3 to 4 clicks only.
You may read: