The cast shadow is a Photoshop effect that gives any picture a realistic vibe. The motivation behind the innovation of this technique was derived from nature.
Naturally, when lights fall on any object, the object leaves a shadow behind it. Photoshop used this idea to innovate an effect like the cast shadow to make any given picture look more realistic.
Realistic Cast Shadow Effect In Photoshop Tutorial Overview
Adding the cast shadow to any picture can be challenging, but it needs sheer dedication, concentration, and hours of hard work.
If you want to cast a realistic shadow on your photo using Photoshop, stay tuned with us. Today, we’ll share how you can add realistic and practical cast shadows using Photoshop.
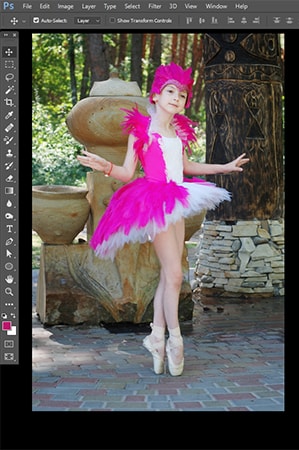
The picture we will work on:-
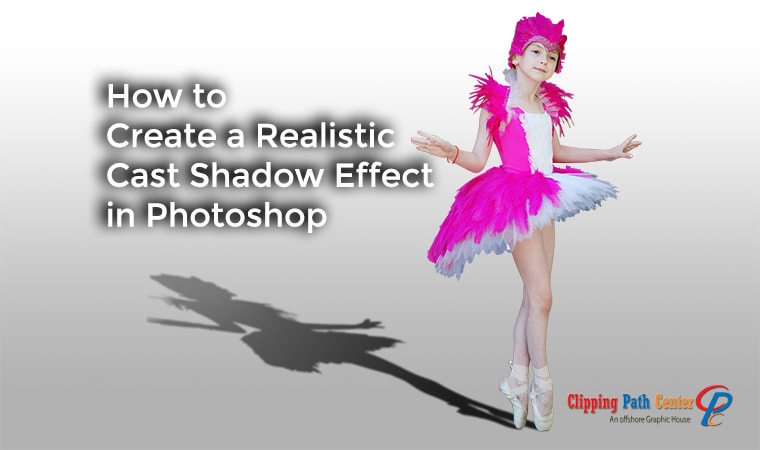
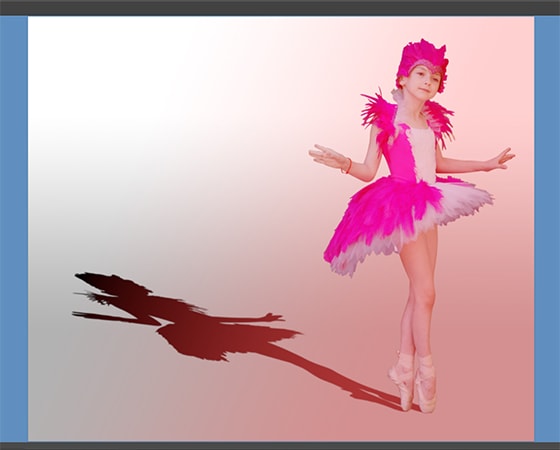
The final result we are going to achieve:-

A cast shadow effect is a sensitive material. While proper use of it can make your picture look realistic, improper use can represent your picture as false. So, be careful about its uses. Do not add cast shadow where its use is not required.
So, without further ado, let’s dig in.
What is the Cast Shadow?
When an object or person stands on any surface due to light, they leave a shadow behind them. The shadow falls diagonally backward from the person or object. Besides, the shadow remains dark at the joint point and cast at the end.
When Photoshop transforms this very idea into a graphical presentation, it turns into a Photoshop effect, and the effect takes the name after cast shadow.
Cast shadow adds a realistic vibe to any picture, specifically if you perform background removal.
Plus, the cast shadow differs from other graphical effects used in Photoshop. According to its origin, we can only add cast a shadow on an object when it is touched with any surface.
Consequently, we can not add the cast shadow effect under any object if the surface does not touch the object.
Benefits of the Realistic Cast Shadow
Cast shadow adds depth to an image. It helps the photo to look more realistic.
For instance, we can talk about e-commerce pictures. Unlike a traditional shop, e-commerce hardly has any physical shop. So, e-commerce can only showcase their products to customers and prospects via their digital platform.
They share their product pictures and relevant details on their websites and social media platforms. Here, image is vital in generating traffic, hence customers and prospects.
If the picture doesn’t look enticing enough, no one will be interested in visiting the website. If there is no traffic on your website, it means you will lose thousands of sales.
So, now we can realize the importance of an image for an e-commerce site. Do you know a cast shadow can count you in thousand sales? Doesn’t sound convincing?
Let me explain…
Suppose you run an e-commerce business of furniture. You need to showcase your product. You have the right quality products for your customers, and you photographed those products.
But the pictures must look more convincing due to the correct color balance and light. It doesn’t seem very easy to differentiate your product from its background.
Therefore, you need to retouch photos. You need to separate the product from its background.
How to Create a Realistic Cast Shadow in Photoshop
Today we will suggest a manual technique to cast a realistic shadow for complex photos. We’ll discuss techniques for personal images and photos of an object. To pull the cast shadow job manually, we will need specialized software and tools:
Suggested Photoshop Versions:
- Adobe Photoshop CS6 or CS5
- Adobe Photoshop CC
Though you can accomplish creating a shadow in CS3. However, we suggest using the latest versions like Adobe Photoshop CC 2020 or Adobe Photoshop CC 2021
Required Tools:
- Pen Tool
- Selection tool:
- Crop tool
- Background/ Foreground color swatch
Step-by-Step Tutorial for Casting a Realistic Shadow
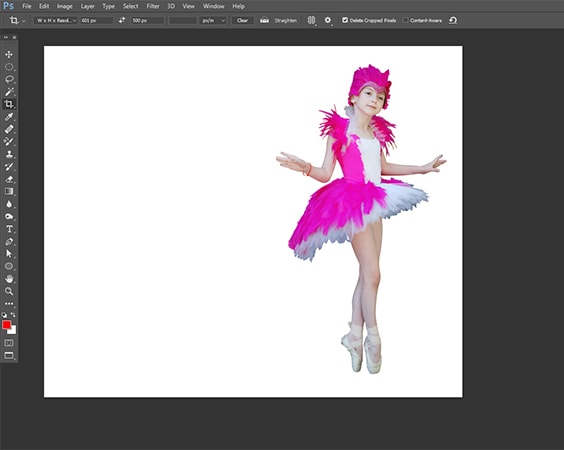
Open the image in Photoshop first and remove the background from it. You can do this by selecting the person.
Here, we use the pen tool to create a clipping path to select. However, you can select using other tools like the lasso and magic wand tools.
If you remove the background from the photo, it will be helpful to create a shadow easily. You can choose any solid color as a background.
Now let’s move on to create cast shadow in photoshop.
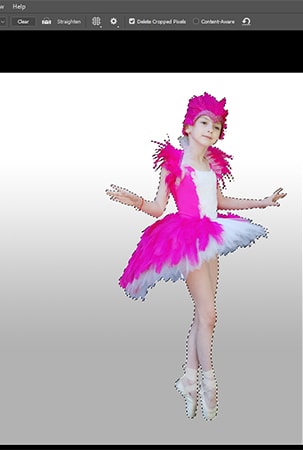
Step 1: Selecting the Person or Object Using Photoshop Selection Tools
Select the object or person on whom you want to cast a shadow. For selection, use the pen tool/lasso tool / quick selection tool, which is convenient for you. All three selection tools are super handy.
These selection tools allow the free-hand selection of edges smoothly. Once the person or object gets selected, you will see a selection mark around it.
Check the selection mark carefully for whether you have selected your desired portion. Here, I’ve selected my photo. Look at it for a better understanding.
Select the object or person on whom you want to cast a shadow. For selection, use the lasso tool/ quick selection tool/ pen tool, which is convenient for you. All three selection tools are super handy. These selection tools allow the free-hand selection of edges smoothly.
Once the person or object gets selected, you will see a selection mark around it. Check the selection mark carefully for whether you have selected your desired portion. Here, I’ve selected my photo. Look at it for a better understanding.
Learn More: How to Create And Use Clipping Path in Photoshop [ A Complete Guide ]
Step 2: Creating a Layer for The Selection
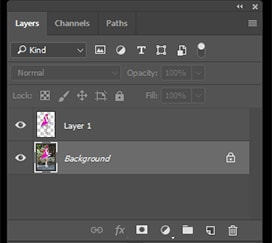
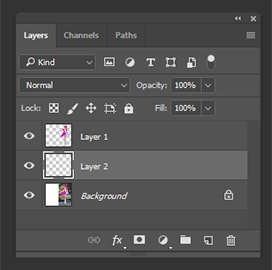
Now copy the selected portion into a new layer. Then, Use keyboard shortcuts to complete the action for windows, and press Ctrl+J. Furthermore, for mac, press Command +J.
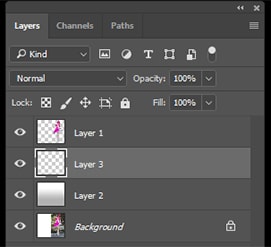
Photoshop will copy the selection to a new layer without changing the present window. To see whether the action has been completed, check the layer panels. Nevertheless, that will create a new layer.
Naturally, named “layer 1” above the background (imported image) layer.
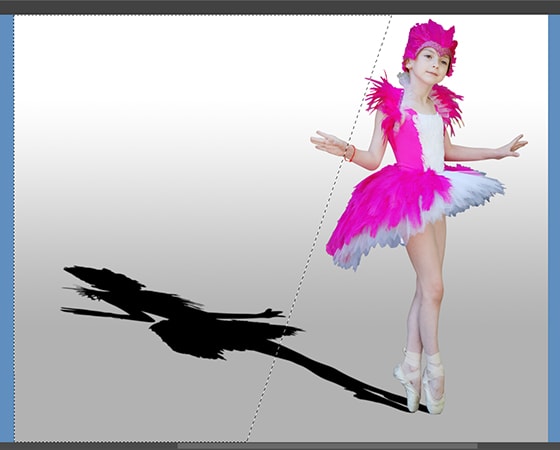
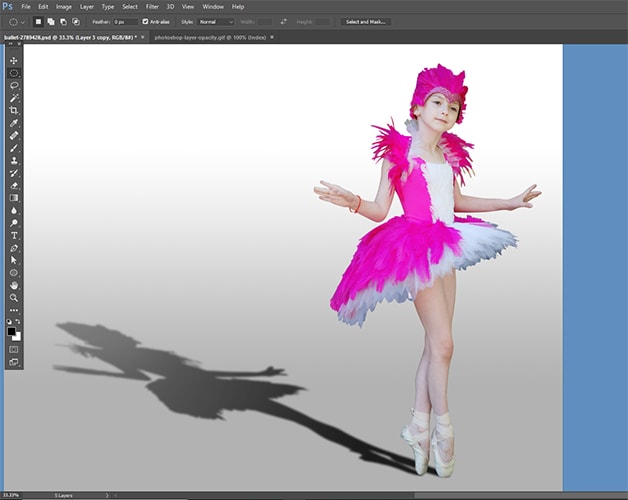
Step 3: Add Extra Canvas to Accommodate the Shadow

If your photo has little canvas space, it will be challenging to accommodate shadow. Expand the canvas if you need space to accommodate the shadow.
Click on the crop tool from the left sidebar to expand the canvas. Now, enter fullscreen mode with the crop tool active.
Place and tap the mouse cursor at the upper gray top corner of the screen and drag the cursor to the bottom of the screen. Drag the cursor diagonally.
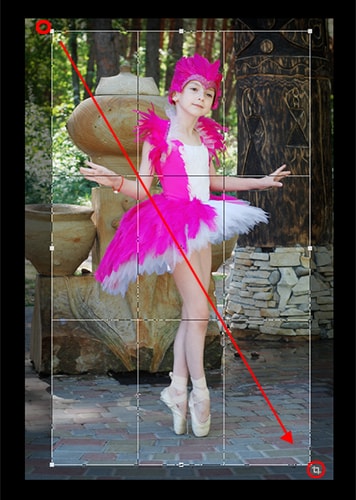
However, you will see some little squares in the photo after releasing the mouse tap. Click on the square placed right beside where you need extra canvas space.

Now, drag the square till you get your convenient canvas space. ( In my photo, I needed space at the back of my photo, so I made extra space at the back) Press enter to complete the action.
Step 4: Take a New Blank Layer
Suppose you are using a mac. Press and hold the Command key. Keeping a hold on the key, go to the bottom of the layer panels and click on the NEW LAYER Icon.
It will add a new layer between layer 1 and the background layer. If you are using windows, complete the action by pressing the Ctrl key.
Step 5: Create a New Gradient Background
Now we need to create another Background Layer for using the gradient effect. And it will give a realistic Depth to the shadow.
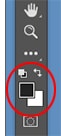
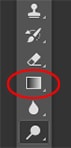
Select the Foreground color swatch from the left tools panel. You can select any or change color from here. But by default, it’s black.
You will see a Color Picker, where you can select any foreground color. But I will suggest you choose a light gray. You can use the color settings that I use in this tutorial. Make the B value 70%( B means Brightness). Now click OK,
Next, Look at the tools panel and select the Gradient tool. We will use these gradient tools several times to make this effect.
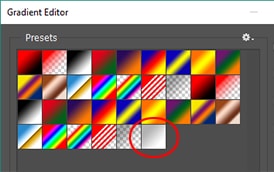
The gradient tools right-click ( Windows) and Control-click ( MacBook) to activate. To open the Gradient Picker, click at any place inside the document window. Be sure you have the last gradient, foreground to background.
And you are selected by clicking on the thumbnail. Press Enter on your Keyboard (for Win) or Return (For Mac) when you are done to shut out of Gradient Picker.
Then, Click on the picture’s down, hold the shift key, and drag it straight up until you are in the middle of the image.
It will be easy to drag and constrain your movements if you hold the shift key.
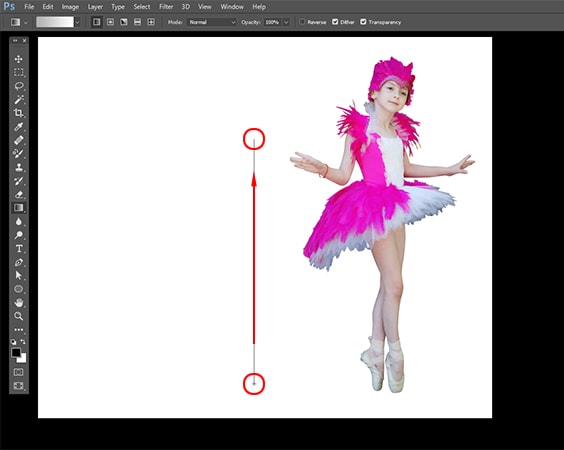
Escape your mouse button, and Photoshop will draw the gradient effect, our new background for the image.
Step 6: Create Another Layer on Top of the Gradient
Now click on the New Layer icon from the layer panel. You will find it at the bottom.
You will see a new layer above the gradient layer we created.
Step 7: Make a Selection Around the Object
Keep upholding your Ctrl key ( Windows) or Command (Macbook), and Click on the Top layer’s thumbnail from the layers panel. No need to select the layer. You need to click on the thumbnail.
Now you will see a selection around the Object of this layer.

Step 8: Fill The Entire Selection With Black Colors
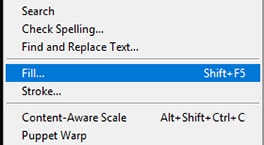
To fill the selection with black colors, go to the Edit menu from the top of the screen and choose “Fill” from the Dropdown menu.
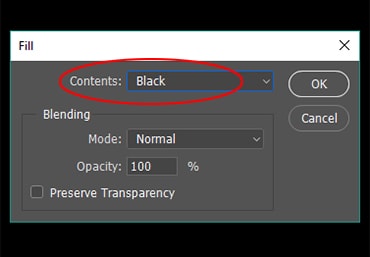
A dialogue box will appear. Now change the Use option to black and click OK to close this box.
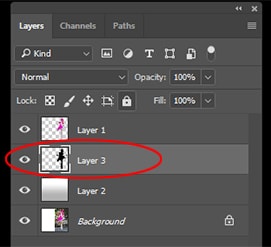
It fills up the entire selection with Black colors. Then it will not appear on the image window because this layer is blocked. But you can see the preview on the layer panel.
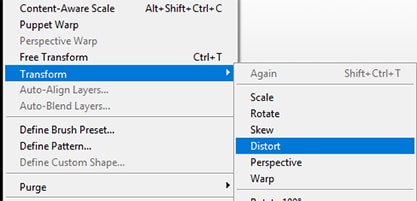
Step 9: Distort the Shadow into Right Position
This Filled area will be our shadow, which we made some time ago. At first, I need to revamp it and move it to the right place. We can do this by using the Distort option.
You need to click on the Edit menu, select Transform from the dropdown menu, and choose Distort.
We need to reshape the black-filled area. We can do this by clicking on the transform box and pulling it to make it perfect for shadow. It will depend on your image position.
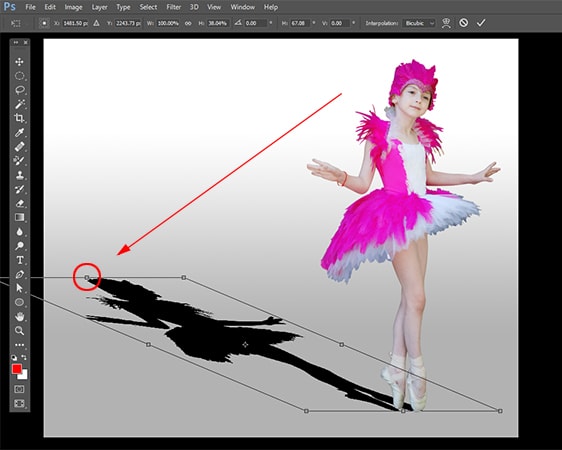
You may also need to fix the base part of this shadow the same way until everything looks good.
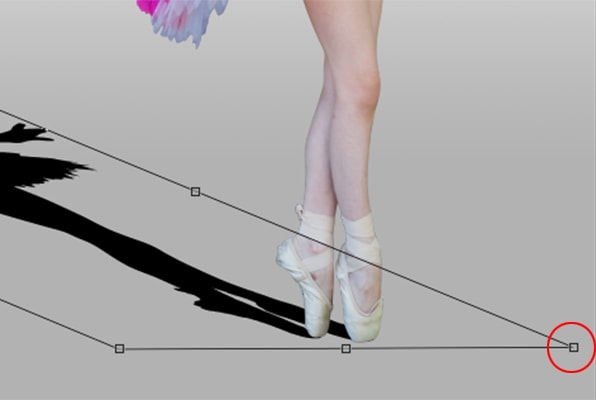
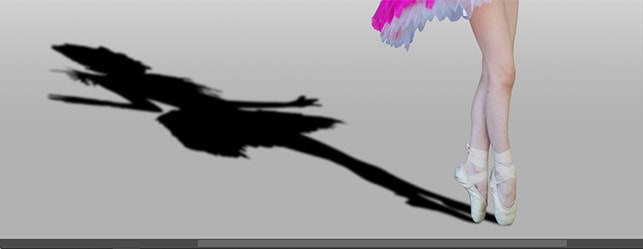
Press Enter (Windows) or Return ( MackBook) when it is perfect for exiting the Distort command. Now you will see something like a shadow, but this could be better.
Step 10: Apply a Slight Blur Effect on the Shadow
Now we will apply the Blur effect because the edge of the shadow looks too sharp. To apply the blur, click Filter menu > Blur > Gaussian Blur. Now, adjust the blur effect to your preference.
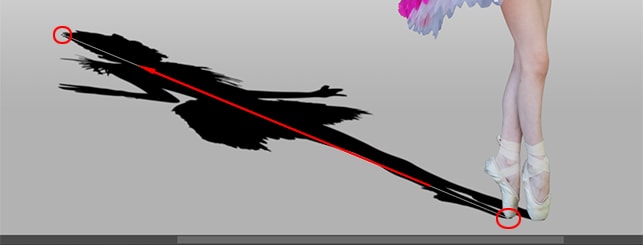
Step 11: Apply Quick Mask Mode to Select the Shadow Gradually
To make the shadow realistic, the edge of the shadow needs to be softer. We will use the Gaussian blur filter to create a continual blurring effect. But before we create this filter, we will use a quick mask option to create a selection.
Again we need to select the gradient tool like before. Now press the D button from the keyboard to reset the color of the Foreground and Background options.
Then press the Q from the keyboard to make a quick mask. Click on the bottom of the shadow and drag it step by step.

Escape the mouse at the top of the shadow, and a red transparent will show on the image. This transparent part represents the selected area.
After that, press Q on the keyboard to quit the Quick Mask, and it will return to normal mode. Now, look at the image. It looks better than before.
Step 12. Use the Gaussian Blur Effect Again
Now it’s time to apply the Gaussian Blur effect again. We can bring it back by pressing CTRL+ALT=+F (Windows) or COMMAND+OPTION+F (MacBook). Now increase the value of the Radius to around 8.0 pixels to make it perfect. Then click OK to quit it.
To remove the Outline selection, press CTRL+D ( Windows) or COMMAND+D ( MackBook). Now, look at the shadow. It looks softer gradually from bottom to top.
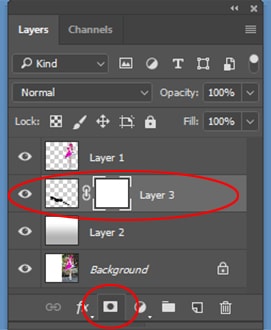
Step 13. Create a Layer Mask
Now it’s time to create a layer mask because the shadow must fade from the subject. Click on the Layer mask icon to create a new layer. You will see a white-filled layer mask thumbnail at the right side layers bar.
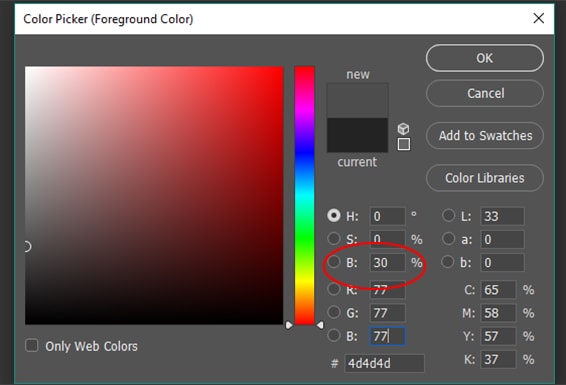
Step 14. Select the Dark Gray Color as the Foreground
Now, you need to click on the color swatch tools’ BG (Background) color. You will find it on the left side toolbar.
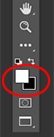
After appearing as the color picker, choose a dark gray color by changing the value of B (B for Background) to 30 %. And leave the other option as usual.
Now Escape the mouse button at the top of the shadow before we drown the gradient effect on the layer mas. And we don’t see any gradient effect in the picture.
You can see that the shadow is gradually fading from the subject.
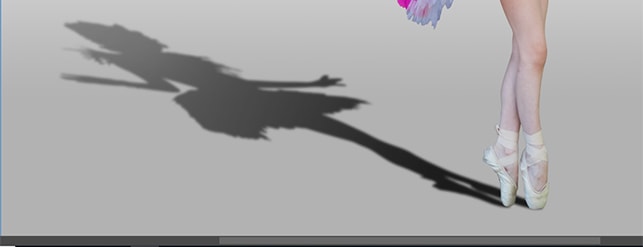
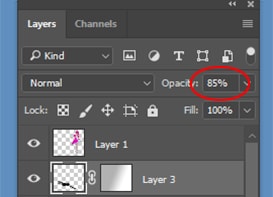
Step 15. Make Opacity Lower of The Shadow
Now it’s the final step. Lower the opacity so it doesn’t appear dark near the subject. You will get this option on the top of the layer panel. I make it 85 %.
And we are completely done. Look at the image below. This is the final result of Cast Shadow.
Now then, we have successfully created Cast Shadow in Photoshop. Let’s learn the usage of cast shadow in images.
When to Use a Cast Shadow in eCommerce:
The nature of cast shadow is creating a natural look; It helps to create the depth of a product or person. Moreover, it aids in creating an illusion of solid products, such as shoes, bottles, cans, umbrellas, etc.
Shadow creation is essential for eCommerce Image Editing and Deep Etching services.
Here, you can seek the help of a cast shadow effect. Once you remove the background from any given picture, the pictures lose their authenticity. And it starts looking like an inanimate picture because Every realistic thing has a shadow with it.
So,
- You also lose the shadow when you remove the background from a photo. The cast shadow effect helps in solving these types of problems.
- Moreover, It adds a backward shadow to your picture, giving any photo a realistic look.
- The realistic-looking picture creates trust in customers and prospects.
- That creates a good impression, which increases sales. You can only make a sale if your image looks enticing.
- Hence, add a realistic cast shadow effect to your photo and count the sales.
When to Use Cast Shadow?
- You can add a cast shadow if your image’s subject is long by height.
- When the subject of your image stands at a 120-degree angle, cast shadow will be perfect for it.
- Where the image’s subject is standing in the background, you can also add a cast shadow here.
- And the proportion of the height and width of the subject will not be the same or closer.
We can make the product more realistic by adding a shadow to it. There are some types of shadow, but Cast shadow will create realism or depth.
When your product image looks unnatural, you can add a cast shadow to make it more natural. If the subject is standing in the background, then you need to use a cast shadow. It will help you to increase your sales.
Difference Between Cast Shadow and Drop shadow:
Drop shadows are decorative and work to enhance the image. On the other hand, cast shadows are typically created for the object to give that image a real depth.
We use drop shadow when the background and foreground are collateral and cast a shadow when the subject is standing in the Background.
The Bottom Line:
The tutorial will be helpful for you. In the tutorial, we suggest ways you can get a realistic cast shadow in your photo.
But the ways will only help if you practice them devotedly. Practice and observe to do better in this field. Use a realistic cast shadow effect on your eCommerce photos.
Read More: